How To Deploy Windows Optics: Commands, Downloads, Instructions, and Screenshots
Jordan Drysdale & Kent Ickler //
TL;DR
Look for links, download them. Look for GPOs, import them. Look for screenshots, for guidance. Sysmon + Windows Audit Policies + Event Collectors and Forwarding (Handlers) + WinLogBeat + Elastic = The baseline configuration for producing endpoint optics that matter (for almost free).
PART 1 – Building Your Lab Environment
There are some significant pre-recommendations for a complete follow along. Be warned, this environment will not run on your laptop. Be prepared to consume 6 CPUs, 20GB of RAM and about 120GB of disk space. It would be best to deploy a PFSense router on your virtual environment and build an isolated network behind it.
PFSense VM
1 vCPU, 4GB RAM, 20GB disk
WAN: DHCP
LAN: 10.10.98.1/24
Instructions for deploying on VMWare: https://docs.netgate.com/pfsense/en/latest/virtualization/virtualizing-pfsense-with-vmware-vsphere-esxi.html
.iso Download: https://www.pfsense.org/download/
Windows Server 2016 – Domain Controller
1 vCPU (2 is better), 4GB RAM (more is better), 32GB disk
10.10.98.10/24
DNS: 127.0.0.1
DNS2: 1.1.1.1
Deploy a domain (scripts on Github): https://github.com/DefensiveOrigins/DomainBuildScripts
Skip ADDS-Step4 – and run BadBlood – for the love of everything, don’t do this on your business domain.
Windows 10 – Domained Workstation
1 vCPU (2 is better), 4GB RAM (more is better), 32GB disk
DHCP
Domain joined
Ubuntu 18.04 – Elastic Stack and Attack Rig
2 vCPUs, 8GB RAM, 32GB disk
10.10.98.20/24
DNS: 10.10.98.10
DNS2: 1.1.1.1
Install HELK.
Use the initial user account to “git clone” – NOT ROOT.
user# git clone https://github.com/Cyb3rWarD0g/HELK.git
user# sudo -s
root# cd HELK/docker/
root# ./helk_install.sh (will take about 15 minutes)
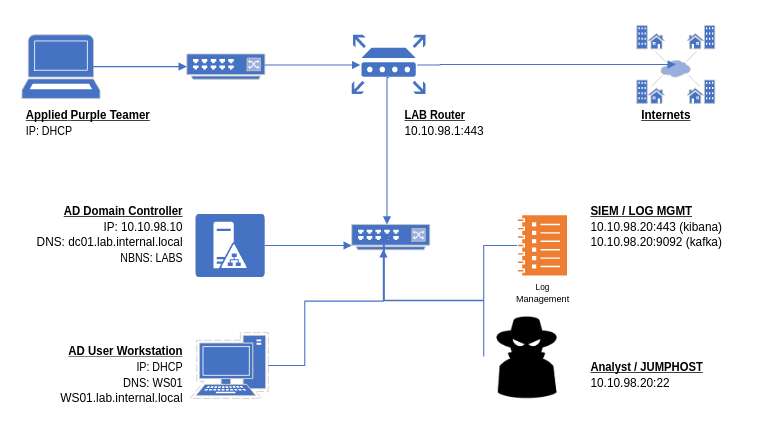
Your lab should look approximately like this at this point.
Part 2 – Sysmon
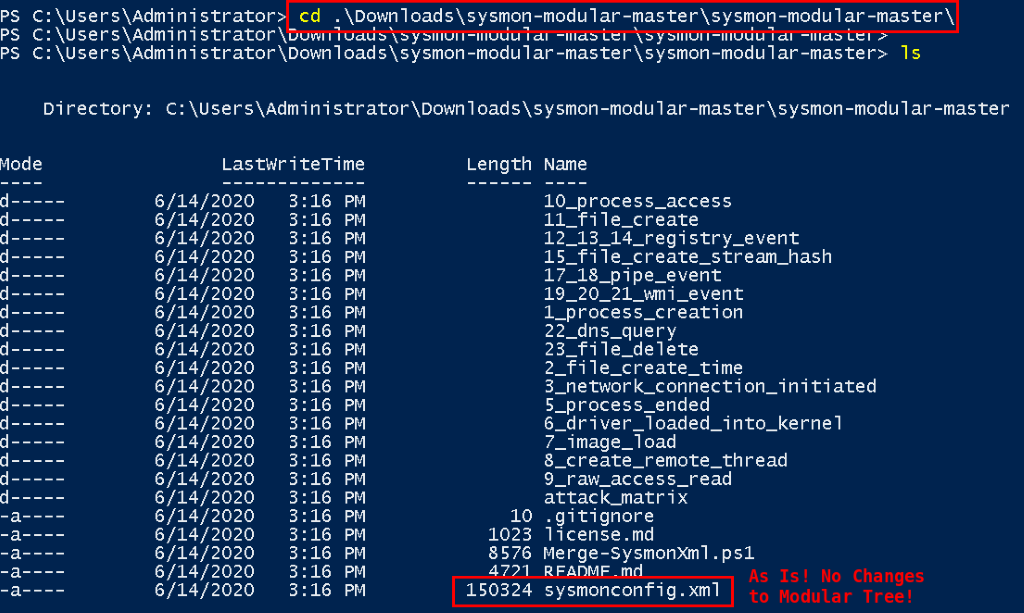
Download the Modular Repo
Download the Sysmon modular repo: https://github.com/olafhartong/sysmon-modular
This repository, once downloaded, appears as follows.
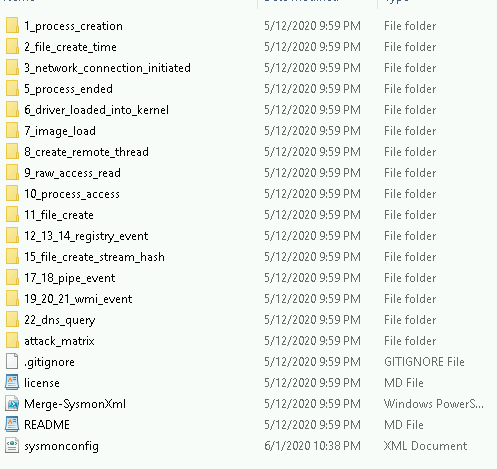
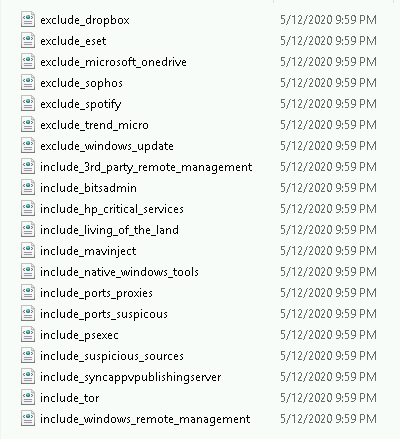
The power of this configuration utility is the include / exclude configuration available under each of the associated Sysmon event ID containers. For example, event ID 3’s container: 3_network_connection_initiated has the following file structure. The includes and excludes define the rules which Sysmon utilizes to write events. Read the repo’s notes! You probably want to exclude some things. Too much noise is not a good thing.
Or, just download sysmonconfig.xml from https://github.com/olafhartong/sysmon-modular/blob/master/sysmonconfig.xml and know that Olaf is looking out for us all.
Generate A Config File
Generate your own sysmon config from the sysmon-modular directory. Open a PowerShell window and CD in to the just downloaded and extracted repository (repo).
Once you are comfortable with the container structure and the underlying processes, make the changes appropriate for your network. Then, perform the following command to generate your own configuration file.
Install Commands
The following commands instantiate a PowerShell session that does not care about your Code Signing practices, accepts that change request, pulls in the code and merges your Sysmon modular directory structure’s contents.
Set-ExecutionPolicy bypass
Y
import-module .\Merge-SysmonXml.ps1
Merge-AllSysmonXml -Path ( Get-ChildItem '[0-9]*\*.xml') -AsString | Out-File sysmonconfig.xml
Note, this sysmonconfig.xml file will be used during installation of Sysmon.
Manual Sysmon Install
The configuration file generated earlier (sysmonconfig.xml) should be used for the install.
Download Sysmon because we can’t provide it for you: https://docs.microsoft.com/en-us/sysinternals/downloads/sysmon
sysmon64.exe -accepteula -i sysmonconfig.xml 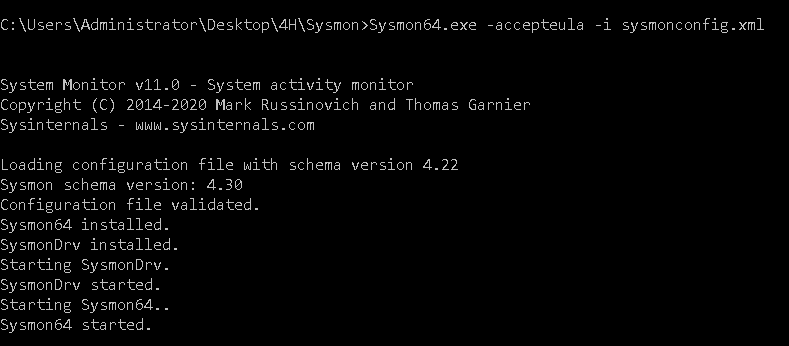
Repeat this process for all lab systems.
Any time you make changes to the sysmon-modular container, regenerate the configuration file using the merge-all script. You can easily update the Sysmon configuration then with the following command (run it against your new config file). Only run the next command when you have updated the original sysmonconfig.xml.
sysmon.exe -c sysmonconfig.xml Group Policy Deployment
The SysPanda article here details the process: https://www.syspanda.com/index.php/2017/02/28/deploying-sysmon-through-gpo/
Create a startup script that calls the sysmon-gpo.bat file, which is included in the APT-Class repos.
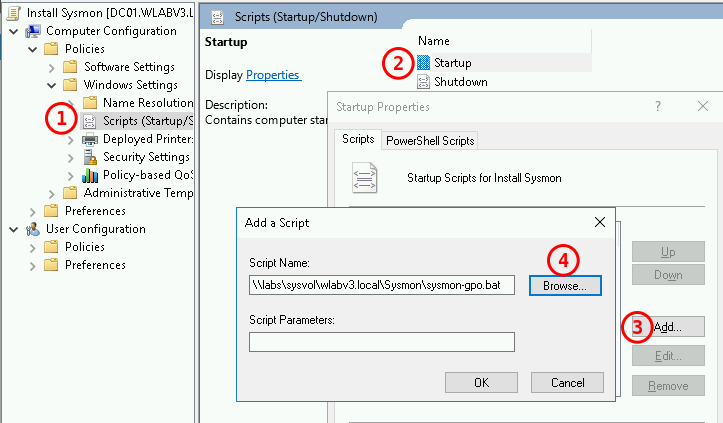
Link the GPO wherever it belongs for installs.
Part 3 – Windows Audit Policies
The following section includes a lot of reading because the audit policies we configured in the provided GPOs may not match your desired end state.
Knowledge Expansion
Guidance for the Windows Audit Policy configuration (baselines) derived from:
And Palantir also provides a fair amount of guidance for setting up the GPOs.
https://github.com/palantir/windows-event-forwarding/tree/master/group-policy-objects
Deploying GPOs
Create two GPOs in the Group Policy Management console (and some time will be saved by importing the settings from provided GPOs).
- Enhanced-WS-Auditing
- Enhanced-DC-Auditing
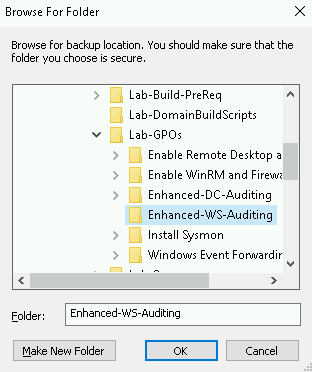
Import settings from https://github.com/DefensiveOrigins/APT06202001/tree/master/Lab-GPOs or follow the Microsoft or Palantir guidance as described to build out your own audit policies.
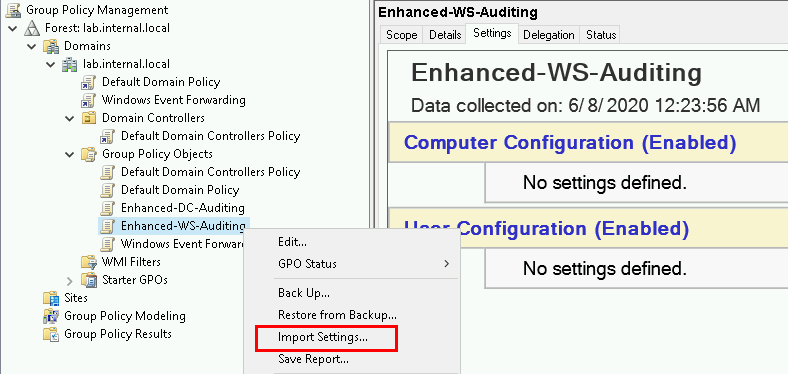
Browse to your copy of the GPO backup.
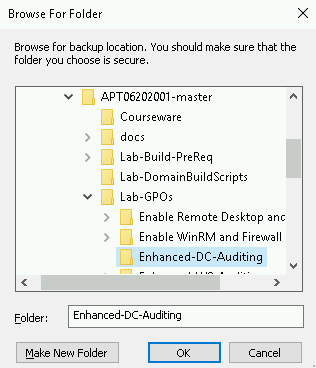
Complete the same process for the DC-Auditing policy.
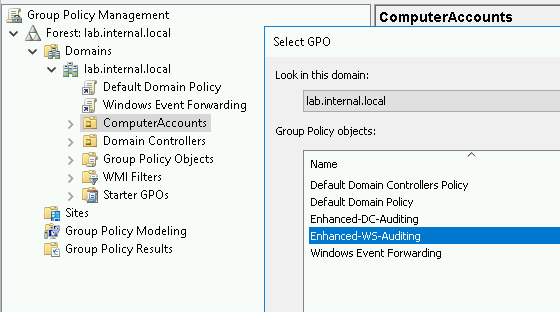
Linking GPOs to OUs
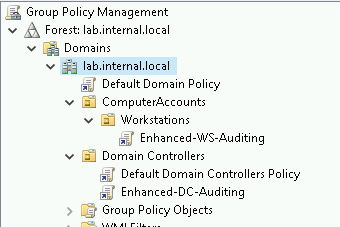
This write-up is light on background and long on technical. So, for a quick refresh, a group policy object (or GPO) contains a set of instructions for Windows objects. Linking GPOs to objects is also dependent on the structure of your organizational units (OUs). If you have a messy OU structure, this step might be a challenge to get right. However, in our lab environment, you may need to create a couple of OUs for workstations or ComputerObjects > Laptops and ComputerObjects > Workstations… so that the instruction sets can be applied appropriately.
Link the Enhanced-WS-Auditing GPO to the AD OU containing the Windows 10 installation.
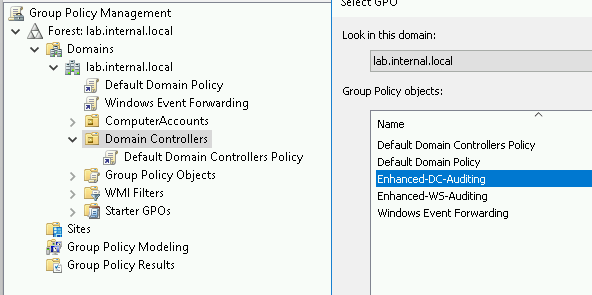
Link the Enhanced-DC-Auditing GPO to the AD OU called Domain Controllers.
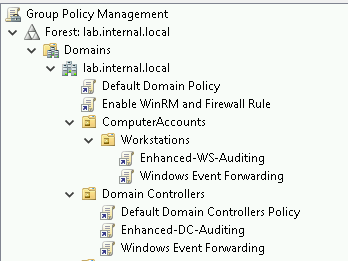
When complete, the simplest deployment appears as follows.
Part 4: WEF / WEC / Event Channel Configuration
This is the part where we configure event forwarding instructions and fire up an event collector. The collector needs buckets for inbound logs and event subscriptions for the Windows Event Forwarding (WEF) clients.
Windows Event Forwarding
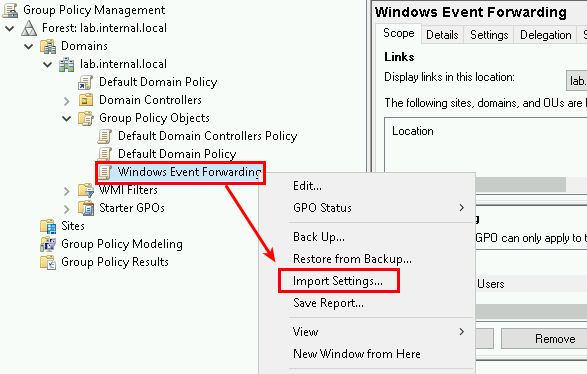
Open gpmc.msc (group policy management console) on the Event Collector.
Create a new GPO called Windows Event Forwarding. Gather the objects from the following repo for import. Depending on your lab’s domain naming, you may need to modify the server FQDN. The WEF GPO is located in the https://github.com/DefensiveOrigins/APT06202001/tree/master/Lab-GPOs repo.
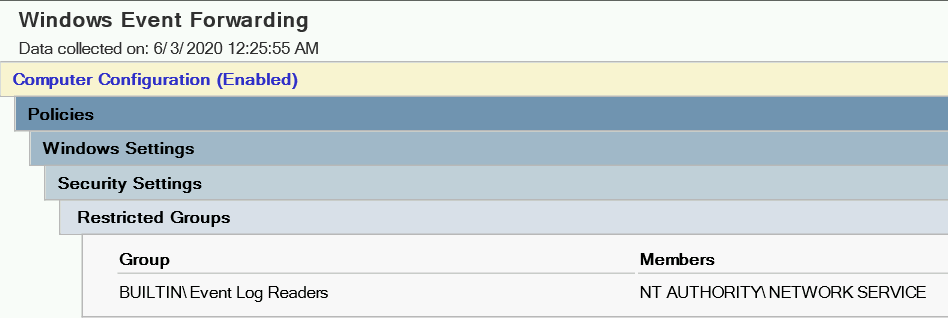
We need to make sure Event Log Readers (built-in local group) can do its thing.
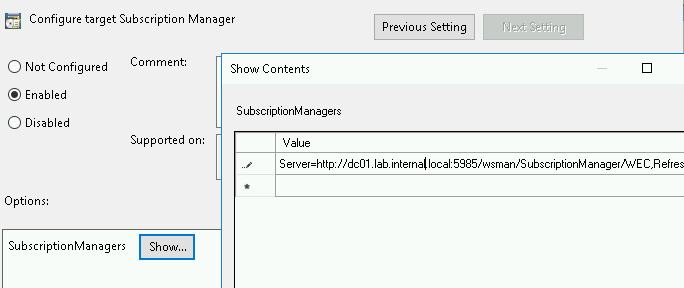
Configure (or just double check) the subscription manager URL, which is the event collector.
Configuration Check!
This policy configuration parameter is located in the GPO tree here:
Computer Configuration > Policies > Administrative Templates > Windows Components > Windows Event Forwarding > Configure target Subscription Manager)
The subscription manager should be: http://YourWEC’sFQDN:5985/wsman/SubscriptionManager/WEC,Refresh=60
There seems to be a spot of confusion around using HTTP for this connection. My understanding is that the forwarded logs are still encrypted via Kerberos in transit.
Enable WinRM – Required on All Systems
Since all systems in the collection and forwarding process need WinRM, create and attach a GPO for this service and the firewall rule.
Create a new GPO called: Enable WinRM and Firewall Rule
Navigate to Computer > Policies > Windows Components > Windows Remote Management (WinRM) > WinRM Service
Set “Allow remote server management” to enabled.
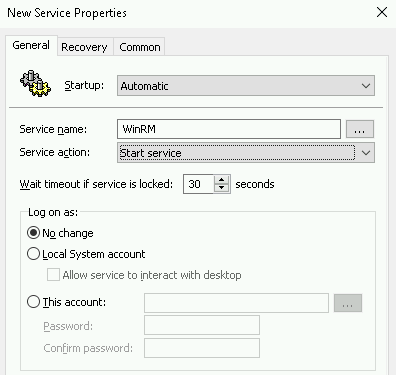
Next, Computer > Preferences > Control Panel > Services and add WinRM as shown below.
Next, create the firewall rule which is located in the GPO tree below (or – we’ve already done this and exported the GPO for your use).
Computer Configuration > Policies > Security Settings > Windows Firewall and Advanced Security > Windows Firewall and Advanced Security
Add a Pre-Defined rule for WinRM.

Or, create a new GPO called Enable WinRM and Firewall Rule and import the settings from the provided GPO by the same name.
Link GPOs
Attach this GPO to the domain. At this point, the following configuration is the simplest deployment possible to enable baseline audit policies, enable WinRM and tell systems where the Subscription Manager (for forwarding events) is located on the network.
- All Systems: Enable WinRM and Firewall Rule
- Workstations: Audit Policy and Windows Event Forwarding
- Domain Controllers: Audit Policy and Windows Event Forwarding
Windows Event Collector / Event Channel Configuration (on the Event Collector)
Download and extract the Palantir Event Forwarding Repo: https://github.com/palantir/windows-event-forwarding
Access the Event Collector (DC in lab enviro) and from the CMD prompt, stop the wecsvc.
net stop WecsvcDisable all WEF subscriptions manually in event viewer by unloading the current Event Channels (um = unload manifest).
wevtutil um C:\windows\system32\CustomEventChannels.manReplace the files listed below in C:\Windows\System32\ from the repo’s “windows-event-channels” container. Or, if they don’t exist, just copy them over there.
- CustomEventChannels.dll
- CustomEventChannels.man
Load the replacement channels. (im = import manifest)
wevtutil im C:\windows\system32\CustomEventChannels.man Increase the size of the channels (log buckets) in PowerShell now! Not CMD.
CMD C:\> powershell -ep bypass
$xml = wevtutil el | select-string -pattern "WEC"
     foreach ($subscription in $xml) {
      wevtutil sl $subscription /ms:4194304
     }
Restart the Event Collector service (from CMD prompt)
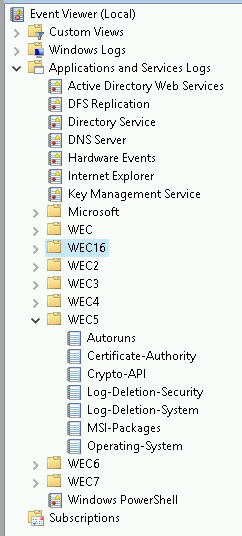
net start wecsvc Event Viewer should have some new channels on the collector. You may need to restart the Windows Event Viewer service.
Next, add the associated subscriptions. CD into the wef-subscriptions container in the windows-event-forwarding directory.
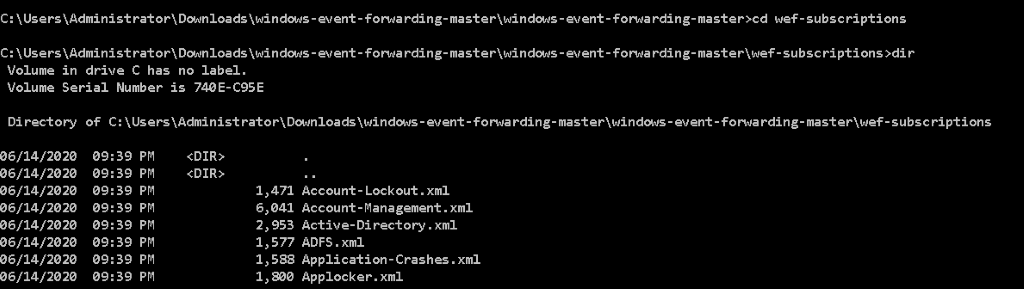
Install all subscriptions with the following for loop – CMD prompt, not PowerShell!
for /r %i in (*.xml) do wecutil cs %i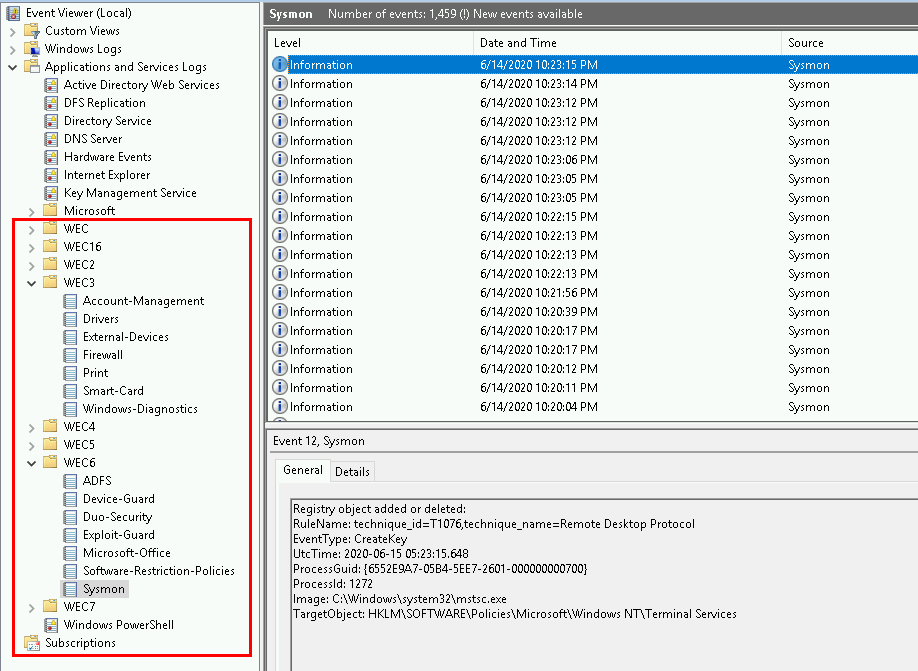
With all of the appropriate GPOs linked like so:
Enable WinRM: All systems
DC-Auditing: DC only
WS-Auditing: All workstations
Windows-Event-Forwarding: All systems
Run the following on both domain systems.
gpupdate /force Part 5: Finally. Log Shipping with WinLogBeats
Download the Repo Because We Cannot Provide it for You.
Download the WinLogBeat config file (winlogbeat.yml) from Defensive Origins Github: https://github.com/DefensiveOrigins/APT06202001/tree/master/Lab-WinLogBeat
This config file, as was pointed out to us by a most gracious member of the community, that our Elastic instance utilizes Kafka for ingests. You may need to modify the last couple lines in the file to match up your network configuration. We have further altered the terms of the config file to include all WEC entries and event channel configuration.
Download the WinLogBeat installer https://www.elastic.co/downloads/beats/winlogbeat
Replace the provided winlogbeat.yml file with the provided instance (you may need to check the IP address directive for the Logstash configuration at the very bottom of the file).
Install the Shipper
Open a PowerShell session in the WinLogBeat directory and run the following commands.
powershell -Exec bypass -File .\install-service-winlogbeat.ps1
Set-Service -Name "winlogbeat" -StartupType automatic
Start-Service -Name "winlogbeat"
Get-Service winlogbeat
Beats is running. Check your Kibana install for logs.

Done!!!
Thank you for getting this far. We appreciate all the support from the community including:
Cheers!! And happy hunting!!!
Jordan and Kent
Black Hills InfoSec
Want to learn more mad skills from the person who wrote this blog?
Check out this class from Kent and Jordan:
