Intro to Software Defined Radio and GSM/LTE
Ray Felch //
Disclaimer: Be sure to use a faraday bag or cage before transmitting cellular data so you don’t accidentally break any laws by illegally transmitting on regulated frequencies. Additionally, intercepting and decrypting someone else’s data is illegal, so be careful when researching your phone traffic.
Preface:
I held an Advanced Amateur Radio Operator license (KR4FF) for many years and my entire career consisted of working in the fields of Electronic Engineering and Embedded Software Development. When I recently became aware of Software Defined Radio, naturally I was curious to learn more. The whole idea of using software to emulate what would normally require very expensive electronic hardware was appealing to me. The following outlines my experiences as I traveled into the realm of SDR. Hopefully, others might benefit from my research and my practical implementation of it.
Software Defined Radio encapsulated:
Wikipedia definition: Software-defined radio (SDR) is a radio communication system where components that have been traditionally implemented in hardware (e.g. mixers, filters, amplifiers, modulators/demodulators, detectors, etc.) are instead implemented by means of software on a personal computer or embedded system.
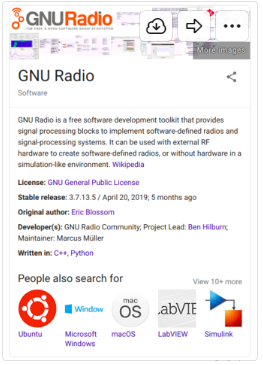
GNU Radio is a free & open-source software development toolkit that provides signal processing blocks to implement software radios. Get more info: gnuradio.org
Hardware:
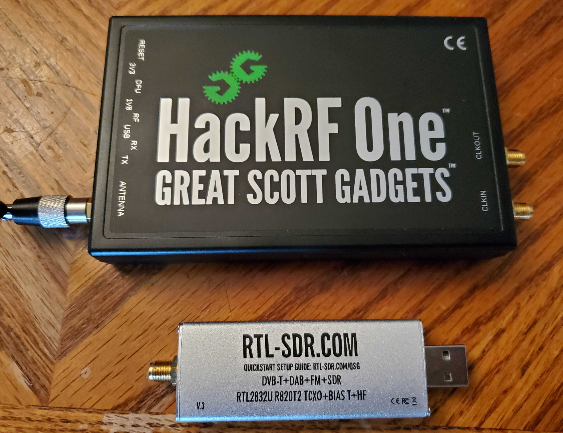
First, I purchased an inexpensive RTL2832U ($20) dongle and also a moderately expensive ($320) HackRF One dongle.
- RTL2832U range = 64MHz – 1.7GHz (with a gap at 1.1GhHz – 1.25GHz)
- HackRF One range = 1MHz to 6GHz (w/Transmit capability)
rtl-sdr info: https://www.rtl-sdr.com/buy-rtl-sdr-dvb-t-dongles/
HackRF info: https://greatscottgadgets.com/hackrf/
I started by installing the RTL2832U dongle and downloading the (Windows-based) SDR Sharp App. After configuring SDR Sharp to run with the RTL2832U device, I quickly began playing around with tuning in local FM Radio stations in my area. A robust set of features makes it a bit intimidating at first, but there are many helpful guides on the internet that can help shorten the learning curve. I picked up the necessities pretty quickly. SDR Sharp download link: https://airspy.com/download/
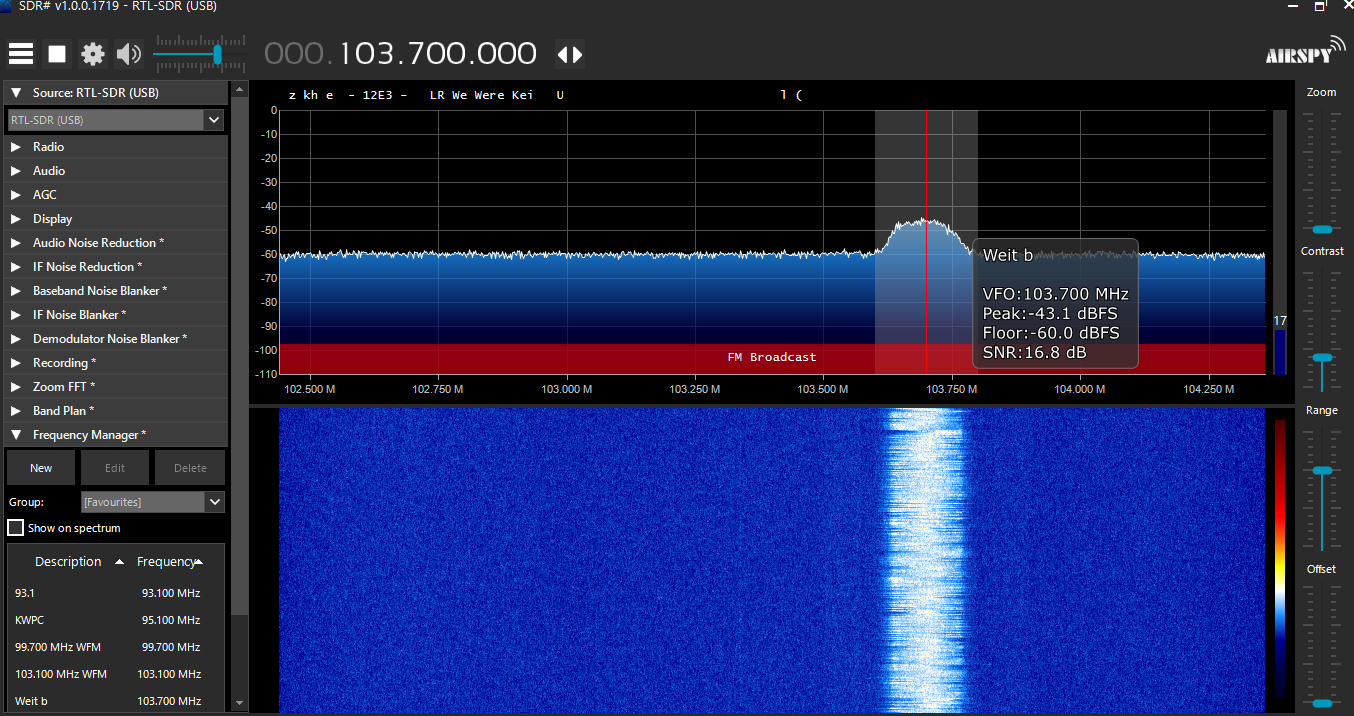
This was rewarding in itself, as I spent many hours finding lots of FM stations and quite a few ham radio channels as well. But now I wanted to really get my feet wet. I wanted to get involved with what I saw others in the SDR community actively pursuing, namely GSM/LTE Mobile Communications.
Due to the higher operating frequencies of many of the mobile bands (sometimes well over the maximum range of the RTL2832U), I decided to switch out the RTL2832U for the HackRF One.
The RTL2832U tops out around 1.7GHz, where the HackRF One can operate to 6GHz. Typical major carriers have bands that can be in the range of 1710-1755MHz, 1850-1990NHz, 2110-2155MHz, etc.
GSM/LTE Mobile Communications:
General Information
- AT&T and T-Mobile (and others) still actively provide GSM (Global System for Mobile Communications) support
- Verizon, Sprint and US Cellular are CDMA (Code Division Multiple Access) carriers.
- GSM phones use sim cards and can easily swap sims between other compatible GSM phones
- CDMA and GSM only use 3G Technology
- 4G LTE (4th generation “Long Term Evolution”) is 10x faster than 3G
Frequency information:
- LTE/ GSM frequencies: http://www.worldtimezone.com/gsm.html
- GSM frequencies in North America: 850MHz and 1900MHz bands
- LTE (LTE WiMax) frequencies in North America: 700MHz, 1700-2100MHz, 1900MHz and 2500-2700MHz bands
Installing required modules and dependencies:
Install Gnu Radio – [prereqs]
sudo apt-get install build-gnuradio prereqs
sudo apt install gnuradio
Install GR-GSM [Open Source Mobile Communications]
- The gr-gsm project is based on the gsm-receiver written by Piotr Krysik (also the main author of gr-gsm) for the Airprobe project.
- The aim is to provide a set of tools for receiving information transmitted by GSM equipment/devices.
[Dependencies]
- GNU Radio with header files
- development tools: git, cmake, autoconf, libtool, pkg-config, g++, gcc, make, libc6 with headers, libcppunit with headers, swig, doxygen, liblog4cpp with headers, python-scipy
- gr-osmosdr
- libosmocore with header files
sudo apt install git
sudo apt  install cmake
sudo apt install autoconf
sudo apt install libtool-bin
sudo apt install pkg-config
sudo apt-get update && sudo apt-get install libc6-dev-amd64
sudo apt-get update && sudo apt-get install libcppunit-1.14-0
sudo apt install swig
sudo apt install doxygen
sudo apt-get update && sudo apt-get install liblog4cpp5-dev
sudo apt-get update && sudo apt-get install gr-osmosdr
sudo apt-get update && sudo apt-get install libosmocore-dev
sudo apt install python-pip
sudo apt-get install python-numpy python-scipy python-matplotlib ipython python-pandas python-sympy python-nose
sudo apt install libcanberra-gtk-module libcanberra-gtk3-module
Install gr-sdr [Gnu Radio Software Defined Radio]
git clone https://git.osmocom.org/gr-gsm
cd gr-gsm
mkdir build
cd build
cmake ..
mkdir $HOME/.grc_gnuradio/ $HOME/.gnuradio/
make
sudo make install
sudo ldconfig
Install Gqrx SDR [Open Source ‘Software Defined Radio’ receiver]
sudo apt install gqrx-sdr
sudo apt install hackrf
Install Hackrf tools:
Building HackRF tools from source
Prerequisites for Linux (Debian/Ubuntu):
sudo apt-get install build-essential cmake libusb-1.0-0-dev pkg-config libfftw3-dev
git clone https://github.com/mossmann/hackrf.git
cd hackrf/host
mkdir build
cd build
cmake ..
make
sudo make install
sudo ldconfig
Kalibrate, or `kal`, can scan for GSM base stations in a given frequency band and can use those GSM base stations to calculate the local oscillator frequency offset.
Install Kalibrate-Hackrf (kal): [GSM Base Station Sniffer]
git clone https://github.com/scateu/kalibrate-hackrf.git
cd kalibrate-hackrf
./bootstrap
./configure
Make
sudo make install
Install Wireshark: [free and open-source packet analyzer]
sudo apt-get update
sudo apt install wireshark-qt
Getting started:
I executed the command: $ kal -s PCS
… to run kalibrate-hackrf (kal) and target the PCS (1900MHz band), resulting in the following:

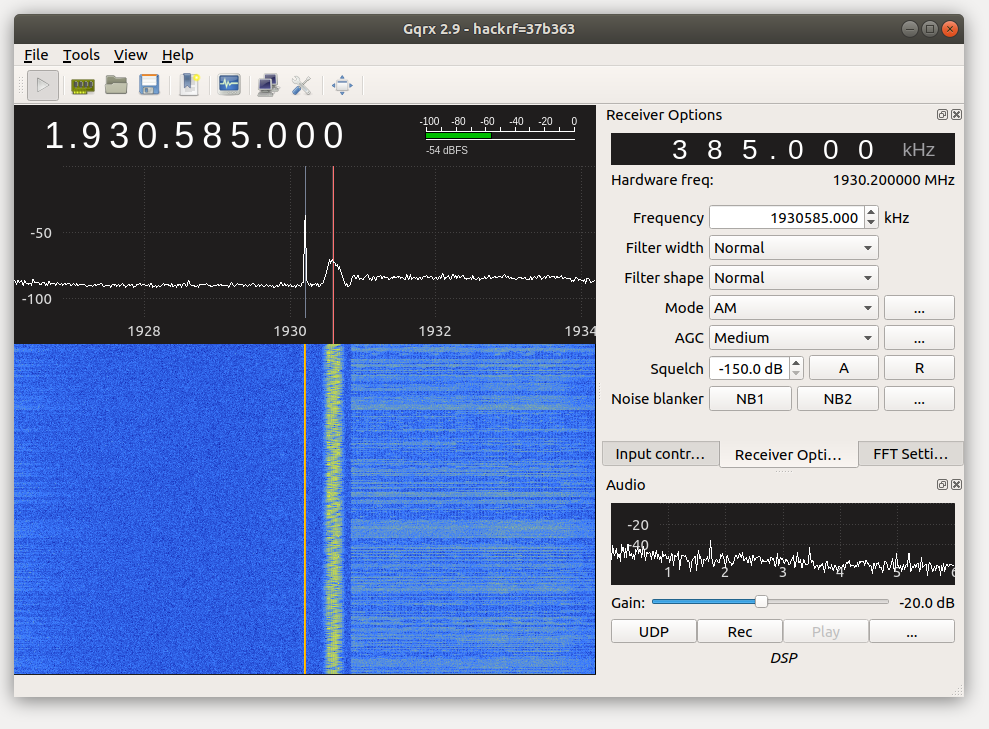
I decided to use the first frequency found (1930.2MHz) for my follow-up testing.
Tuning to 1930.2MHz while running the Gqrx SDR (see below) shows activity centered around freq = 1930.535MHz. This will be the (adjusted) frequency that we will ultimately enter into the GnuRadio-Companion for capturing our packet traffic.
Using GnuRadio-Companion:
A few years back, open-source ‘airprobe_rtlsdr.grc’ (Airprobe project) was the “goto” block for live monitoring of traffic, while using GnuRadio-Companion.
As of recent years, ‘airprobe_rtlsdr.grc‘ was replaced by “grgsm_livemon.grc” Special note: The gr-gsm project is based on the gsm-receiver written by Piotr Krysik (also the main author of gr-gsm for the Airprobe project).
I changed directory to gr-gsm/apps
Executed: $ gnuradio-companion grgsm_livemon.grc
This brings up the GnuRadio-Companion GUI, and displays the grgsm_livemon.grc block template.
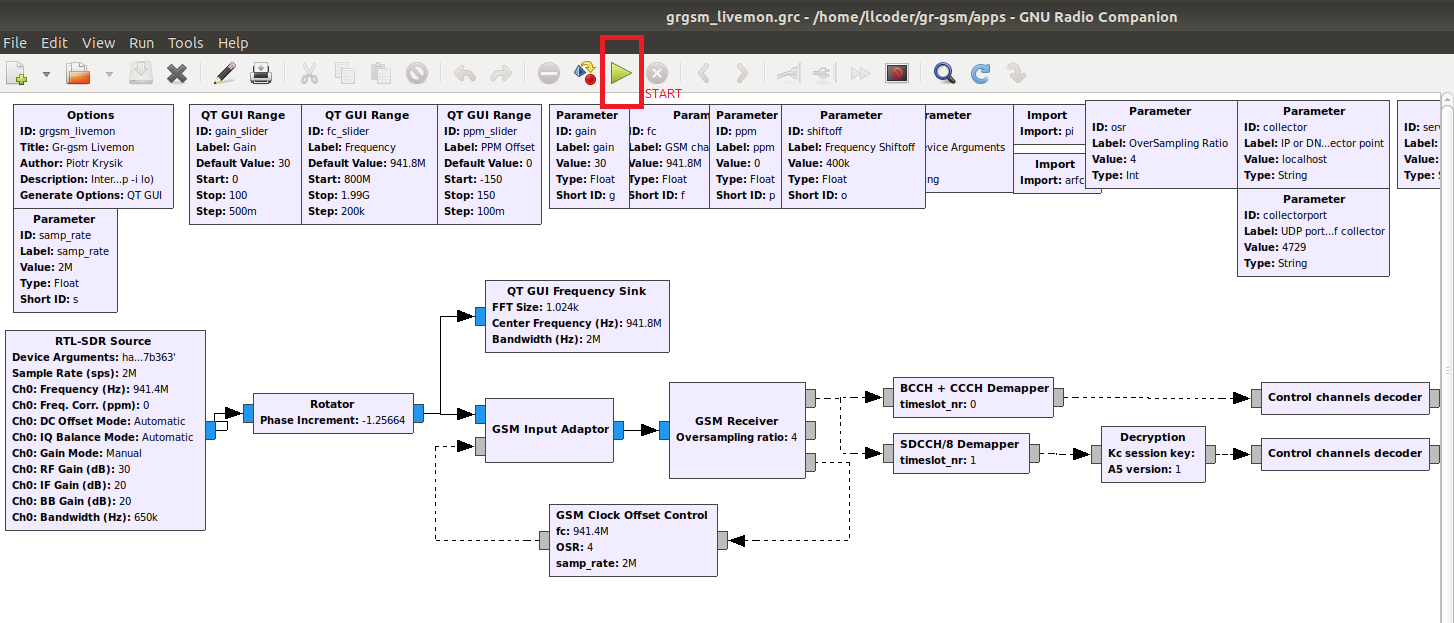
I then enabled the radio by clicking on the Start button (top center of display) and tuned to 1930.535MHz (adjusted frequency determined using Gqrx SDR). As soon as I locked into the frequency, I was presented with the following:
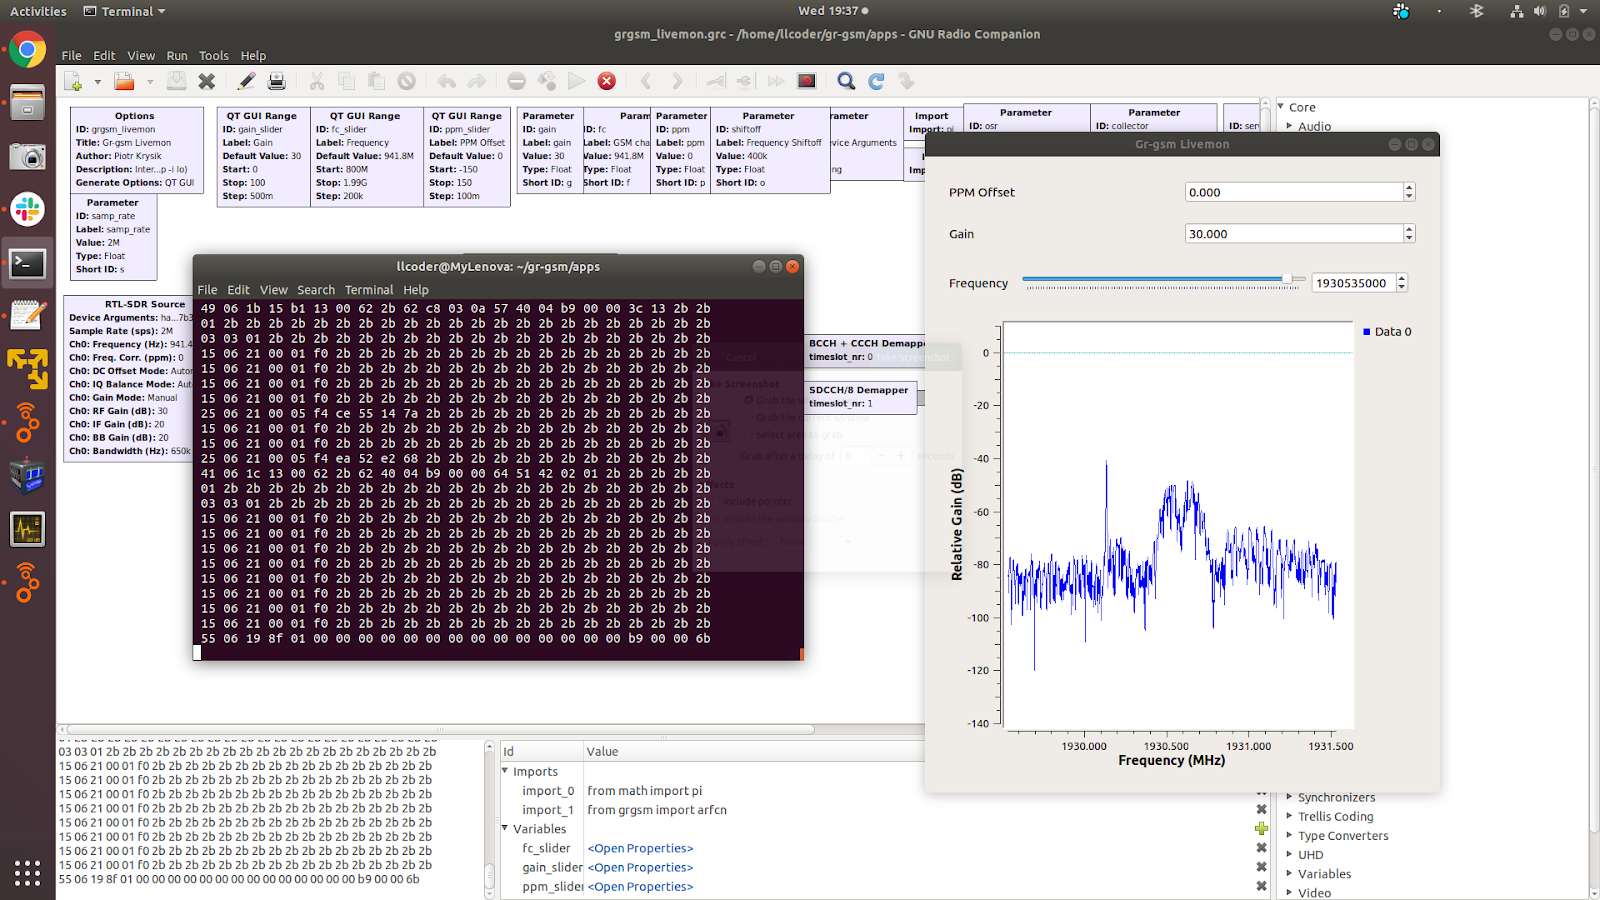
It’s not obvious by the above image, but the data inside the console terminal is streaming at a very fast rate and will continue to stream until we click the stop button (top center of Gnu Radio Companion display).
Also, notice the high volume of “2b” bytes in the data stream. This is a strong indication that we are successfully capturing cellular traffic, as “2b” is used as a filler byte when constructing the packets.
Using Wireshark to analyze the packets:
During a follow-up GnuRadio-Companion session, I decided to open a new terminal to run Wireshark and analyze the streaming live data using the loop-back mode and a ‘gsmtap’ filter. This needs to be done as root, so the command is:
$ sudo wireshark
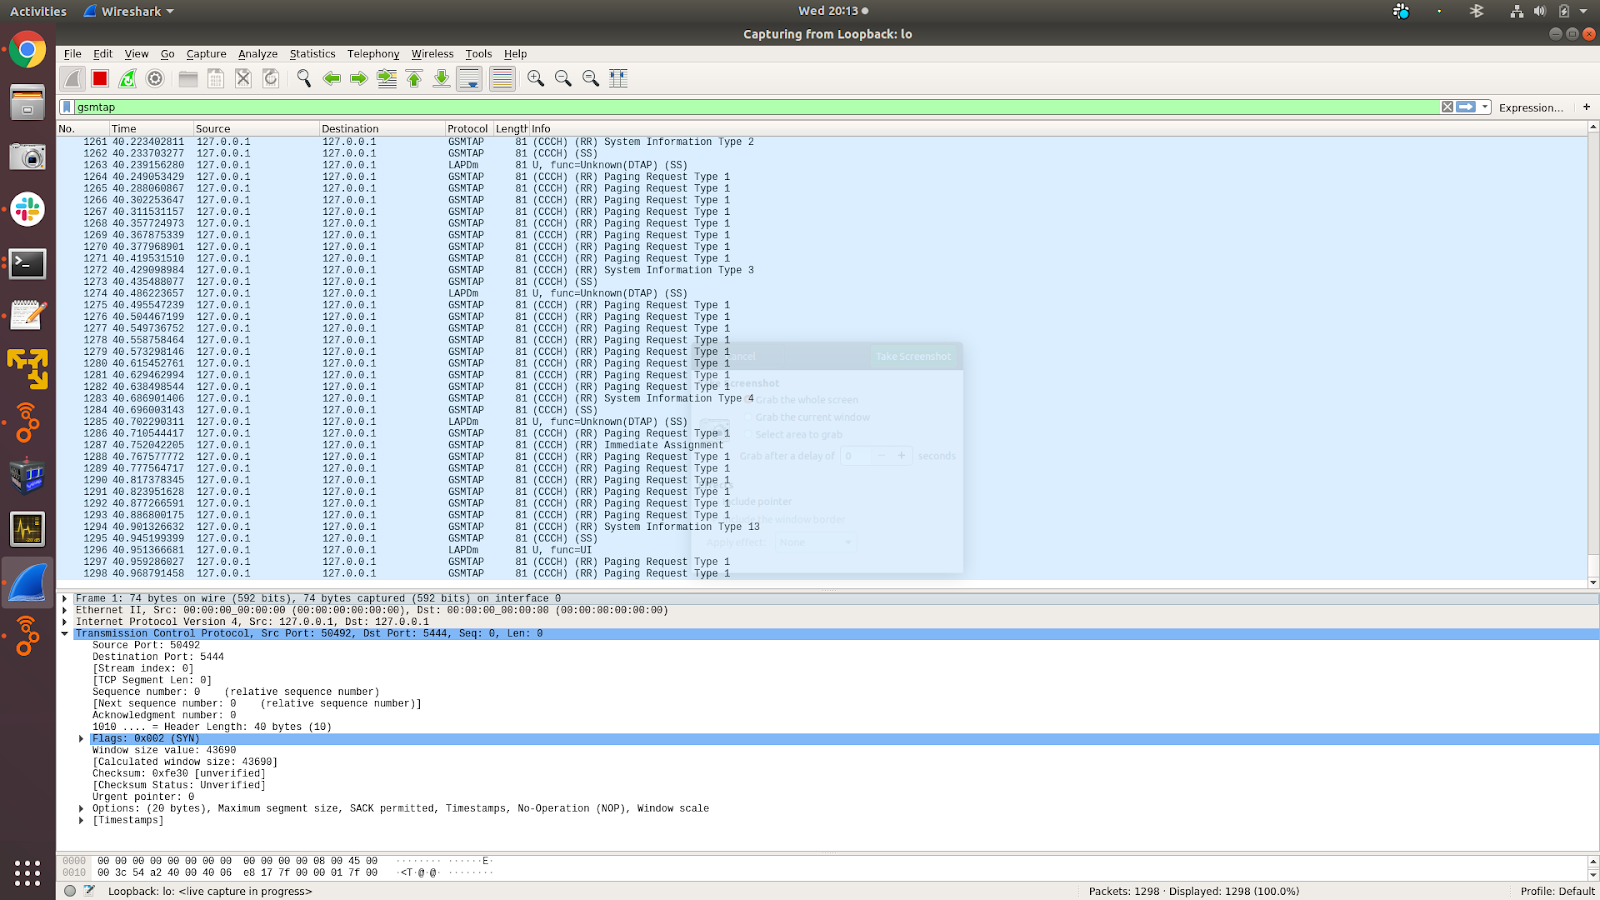
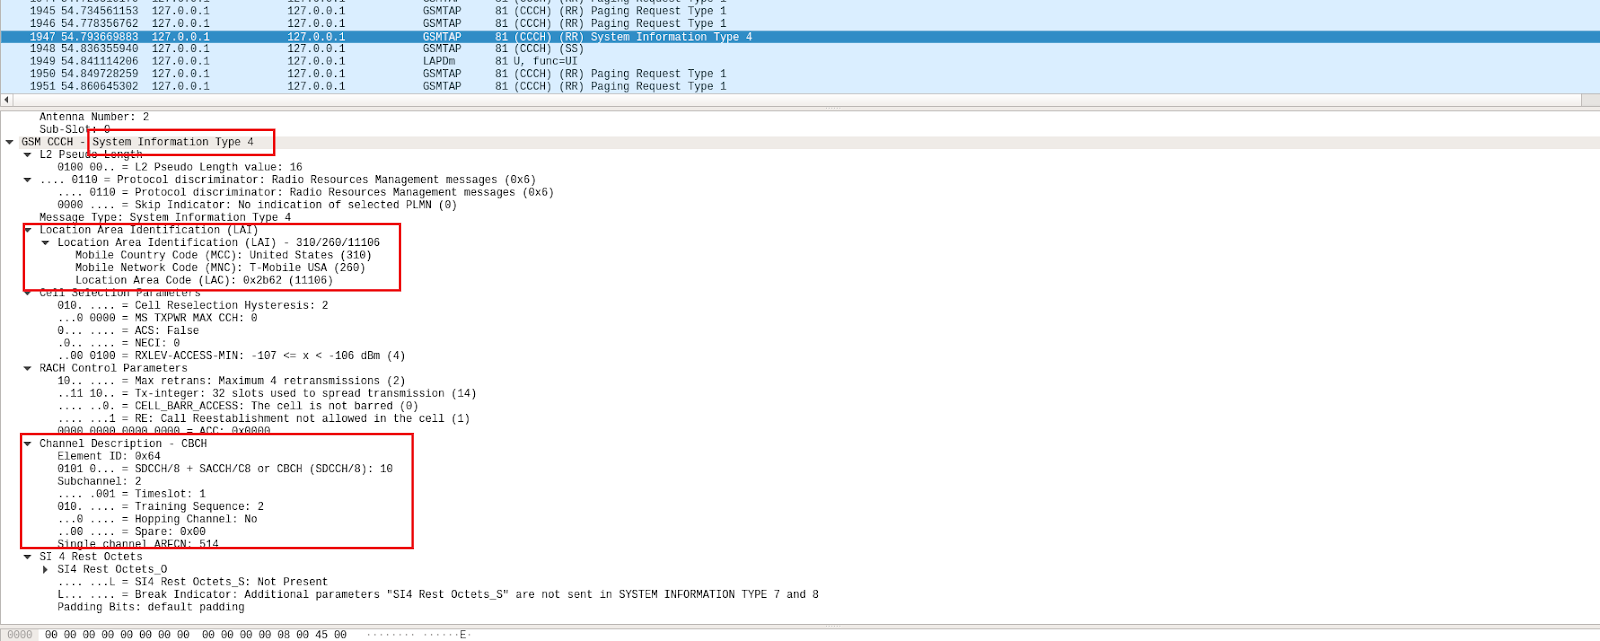
As expected, Source and Destination are localhost (due to loop-back mode), and from my limited research of packet types, I know that System Information Type 4 is a carrier beacon, providing pertinent information.
Summary:
As far as I’m concerned, this has turned out to be a pretty rewarding project and I feel I’ve learned quite a bit in the process. Obviously, I’ve barely scratched the surface of what Software Defined Radio is capable of, but I’m now looking forward to continuing my research in this area.
Next up, I would like to better understand those packets I captured, what they mean and how the whole ‘mobile network’ works in general. I’d also like to run some sample test calls using my personal phones (to keep it legal) and capture/decode my personal SMS (‘Hello World’) packets.
Ready to learn more?
Level up your skills with affordable classes from Antisyphon!
Available live/virtual and on-demand
