This article was originally published in the InfoSec Survival Guide: Orange Book — Incident Response. Read it free online HERE, or grab it on the Spearphish General Store (free digital download or a $1.25 physical copy, your call).
Spend time performing forensic analysis on the Windows Operating System and you’ll see a host of artifacts that can be used to identify adversary activity. From changes to the registry to the System Resource Utilization Monitor, Windows artifacts run deep. The challenge is locating, extracting, and parsing these artifacts in an efficient manner.
This is where the Kroll Artifact Parser and Extractor (KAPE) comes into play. KAPE gives analysts and incident responders the capability to collect specific artifacts and parse them into an easily analyzable format. Available free to individuals working in their own environment, KAPE is capable of handling a wide range of artifact extraction and parsing for faster, more efficient analysis.
The Artifact Extractor
The Artifact Extractor allows analysts to gather key artifacts related to adversary activity. In this example, our analyst will leverage KAPE to extract a Basic Triage package that contains a variety of artifacts. This is useful in a couple of different cases. For example, KAPE is leveraged by analysts who usually have local access to a system and want to extract key artifacts as part of an initial analysis. In other circumstances, KAPE can be run against a mounted disk image or a virtual disk, which allows the analyst to work with the file system. If it can be mounted and given a drive letter, KAPE can be used.
Pro Tip: It is tempting to focus on individual artifacts, such as extracting the Windows Prefetch files to identify suspicious executions. Instead, focus on extracting a collection of artifacts that you can continually use as the investigation progresses to avoid repeatedly going back to extract more data.
Extracting Artifacts to a Virtual Disk
In the following case, the analyst is using KAPE to extract key artifacts and aggregate them into a virtual disk. This approach extracts key artifacts for follow-on analysis but also places them into a container that is easy to copy and share:
In the top left of the KAPE GUI, select Use Target options.
Complete the Target options by selecting the source. Select the C:\ directory. Note: KAPE will only extract the artifacts that are selected.
For the Target destination, select an applicable directory. Note: The Flush option will delete all files in the directory before the output is processed. Keep that in mind.
In this example, use the VHDX option for the container.
A good practice is to use the system name for the Base name field.
Once these are completed, click Execute.
You will be left with the system VHDX file along with an activity log.
The Parser
Next is the Parser. The Parser places the input into a format that can be manually analyzed or incorporated into an analysis platform.
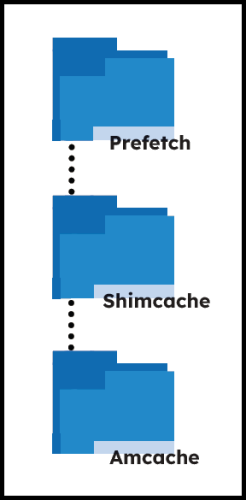
Pro Tip: You can parse multiple artifacts at the same time, which saves trips back to the GUI. If triaging a system, you will want to look at file data, such as the Master File Table and USN Journal. For potential binary execution, the Prefetch, Shimcache, and Amcache may be useful. A review of the Windows Event Logs can provide a comprehensive overview of system activity. Save time by selecting a group of files to parse at once for the best overview of a system.
Parsing Key Artifacts for Analysis
In this third case, the analyst will use the triage package and parse out the Master File Table, Event Logs, and the USN Journal.
Double-click the VHDX file. This will mount the virtual disk.
Click on Use Module options.
For Module source, select the root of the drive letter associated with the VHDX file.
For Module destination, select an appropriate directory to output the files.
Select a few Targets such as the Event Logs, Master File Table, and the USN Journal.
Export format and select CSV.
Click Execute.
A quick check of the destination directory should have three sub-directories: Filesystem, Eventlogs, and Consolelog. The files within are ready for analysis.
Pro Tip: When looking at the Export format for the parsed results, consider whether you will be using specific tools for the analysis. For example, there are modules that will output a JSON format that are useful for importing into SOF-ELK. To start off, using the default or the CSV output is easiest to work with.
Explore the Infosec Survival Guide and more… for FREE!
Get instant access to every issue of the Infosec Survival Guide, as well as our self-published infosec zine PROMPT#, and exclusive Darknet Diaries comics — all available at no cost.