
Deploy an Active Directory Lab Within Minutes

Creating your own lab can sound like a daunting task. By the end of this blog post, you will be able to deploy your own Active Directory (AD) environment in minutes! All you will need is a browser to access your lab environment so you can do your AD R&D (Research & Development) anytime, anywhere.
Snap Labs
Snap Labs1 is a platform that simplifies building and managing lab environments. It can be used to create cyber ranges for training or Research & Development (R&D). The Snap Labs platform is owned by Immersive Labs2 and is used by security training organizations such as Zero Point Security.3
Prerequisites – What You Will Need
- Internet access
- A web browser
- An AWS account4
How to Sign Up
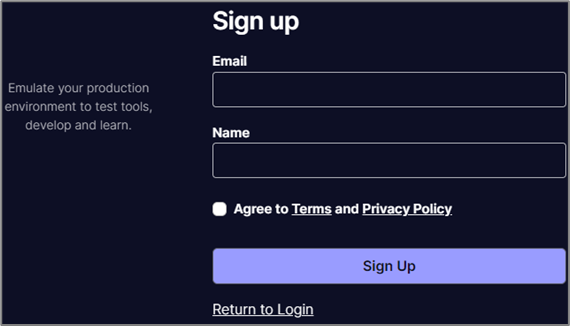
To sign up for Snap Labs, navigate to https://dashboard.snaplabs.io/signup. Once you sign up for Snap Labs, you will be asked to provide details about your AWS account.
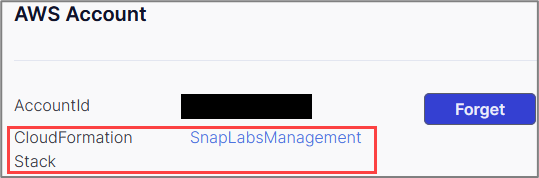
Snap Labs deploys lab infrastructure in AWS using the credentials that you provide it. You can view the Cloud Formation stack used by Snap Labs in AWS by selecting the SnapLabsManagement link on the settings page.
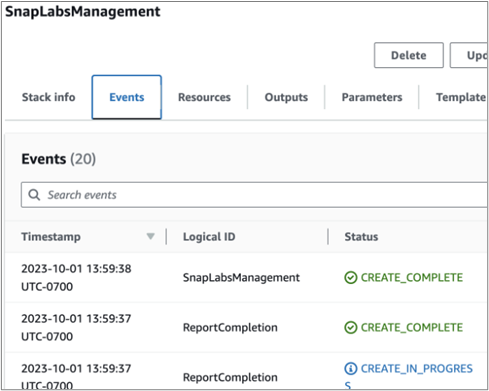
An example of the SnapLabsManagement dashboard in AWS CloudFormation is shown below.
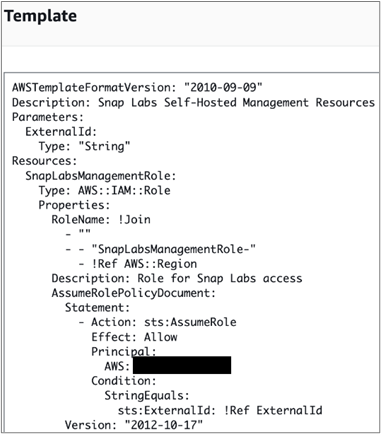
If you are curious about the templates used to build the underlying lab infrastructure, you can review the CloudFormation template used by selecting Template.
Range Templates
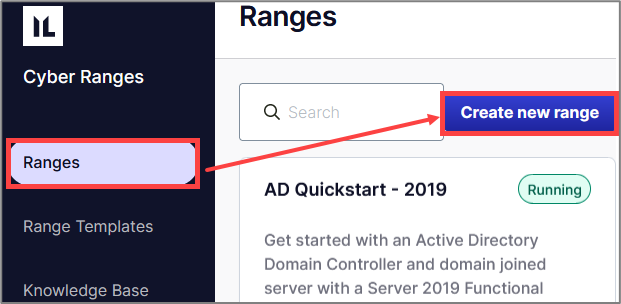
Once you’ve set up your account, Snap Labs lets you create a range based off existing templates or build from scratch to create your own range (lab environment). Select Create new range in the Ranges page.
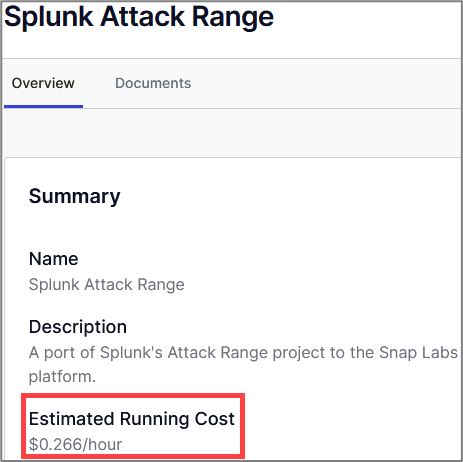
Snap Labs provides several Range Templates that are available by default. To view these templates, select Range Templates in the side bar.
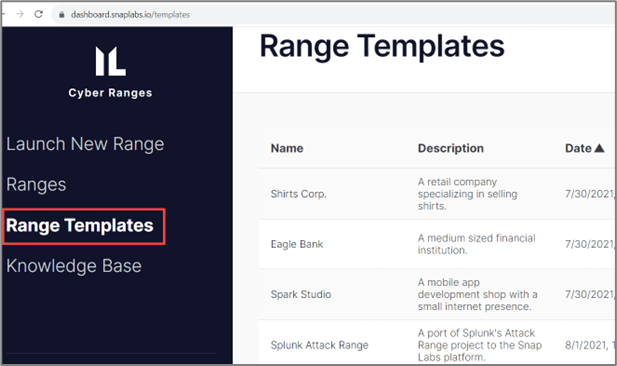
To view details about an existing template, click on the template name. This will display a basic description, network diagram, and an estimated running cost.
Deploy Introduction Active Directory Lab
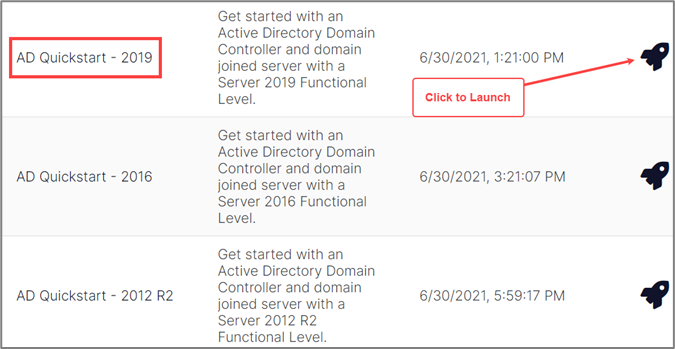
Let’s get started by launching the AD Quick Start – 2019 range. To launch a range based off a template, select the rocket ship button.
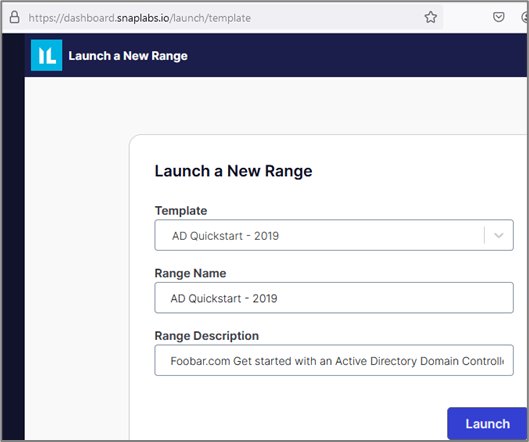
This will redirect the browser to a form where you can enter the range name and description.
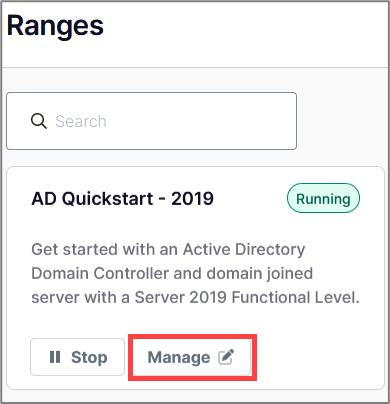
Next, you will see your range pop up in your Ranges page. To interact with the lab, select Manage.
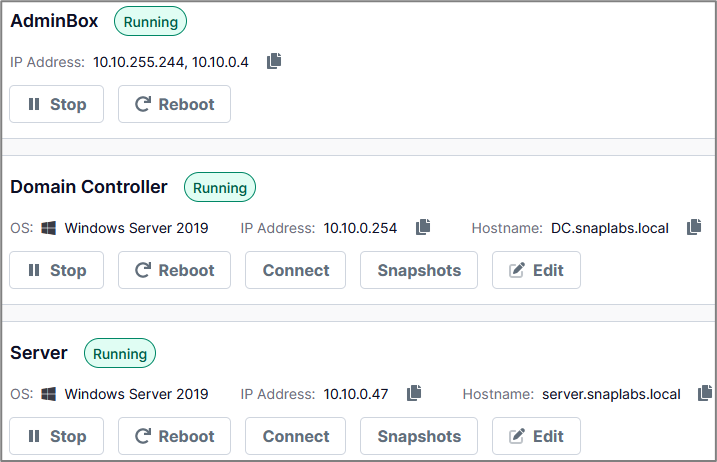
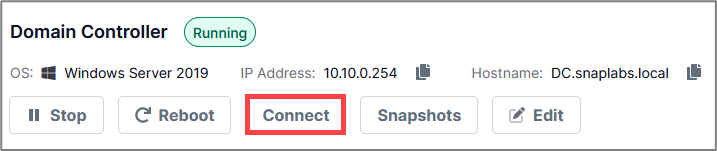
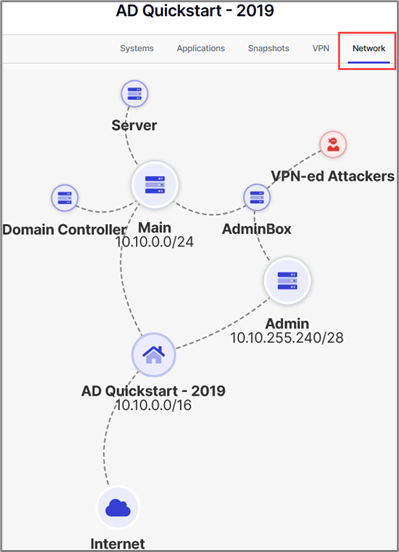
The AD Quickstart – 2019 template has a domain controller, a Windows server, and an admin machine. The admin machine serves as a jump box from the attacker machine to the internal network (lab network). Once all three systems display the green Running icon, your lab is ready to go!
*Don’t be alarmed if this takes a few minutes.*
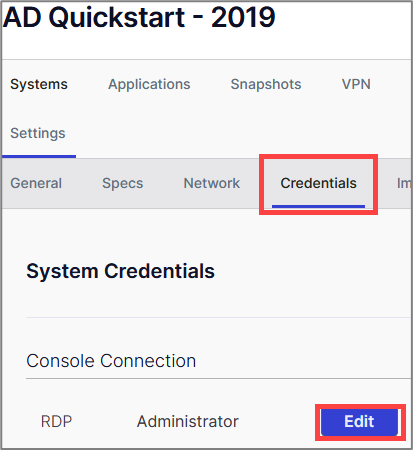
The user credentials for each system can be found under Edit > Credentials > Edit tab located in the system settings.
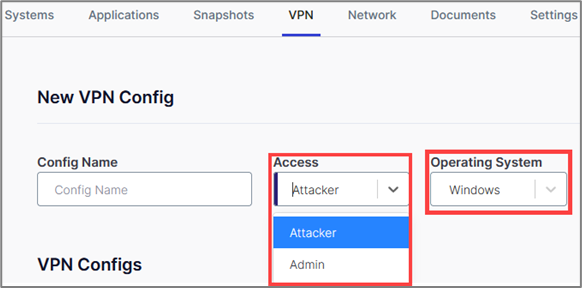
VPN Access to Range
Snap Labs allows you to configure various VPN configurations for various access roles in the lab environment. To create your VPN configuration file, select the access type and operating system. Then, you can download the VPN configuration and connect from your system via RDP/SSH.
Browser-based Access to Range
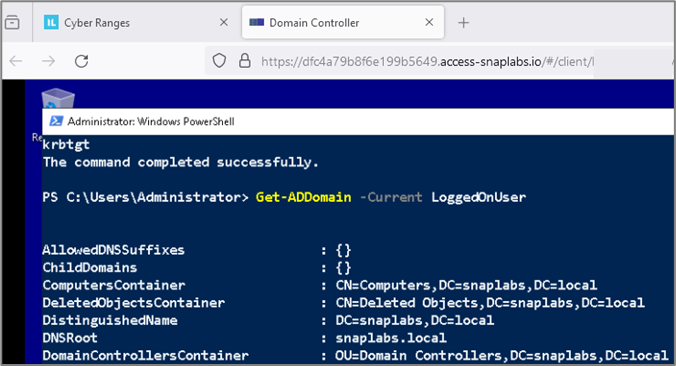
To connect to your lab environment via the browser, navigate to the target system and click Connect in the Snap Labs UI.
After you click connect, another tab will open with a remote desktop session. You can copy & paste in the guacamole instance, which is super useful, especially when you want to run a long command.
Now you’ve successfully deployed your very own Active Directory environment!
In the next section, we will cover some neat features you may want to take advantage of to customize your lab environment.
Customize Your Cyber Range
When a new range is created, a basic Readme is generated. Each template provided by Snap Labs also contains a Readme.
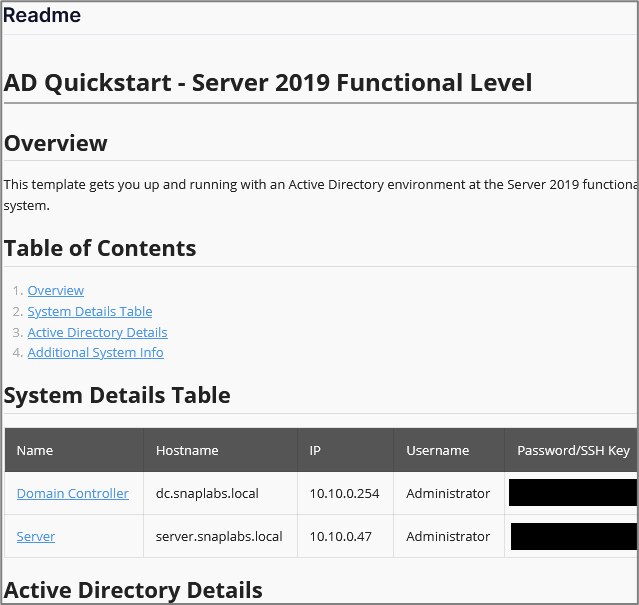
As you customize your environment, you can modify the Readme to help you document your newly created lab environment.
A diagram is built automatically for each range. The network diagram of the AD Quickstart – 2019 template is shown in the figure below.
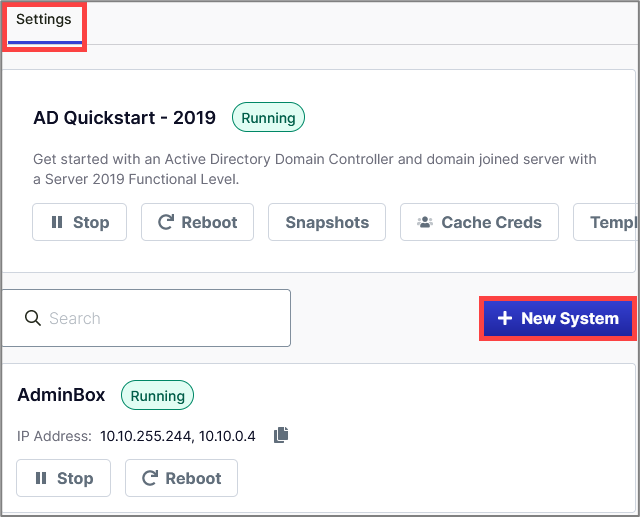
When you add new systems to your range, the diagram will automatically update. To add a new system, go to Systems > New Systems.
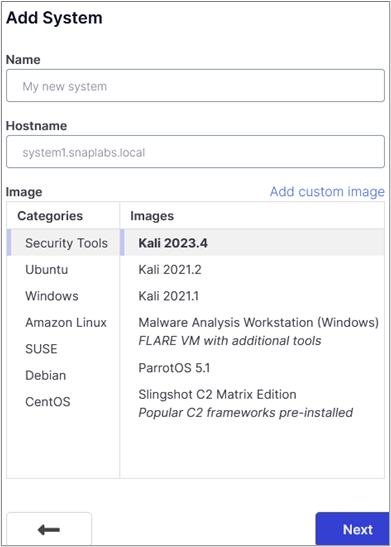
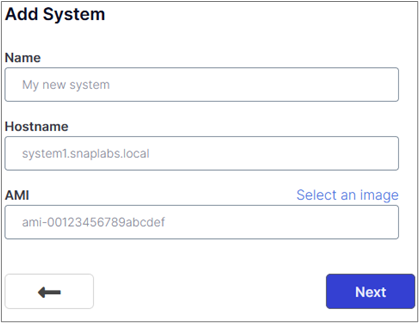
Next, specify the system details. As shown in the figure below, there are various operating systems to select from, ranging from Microsoft Windows to Kali Linux.
You can alternatively use a custom image by specifying the AMI, as shown in the figure below.
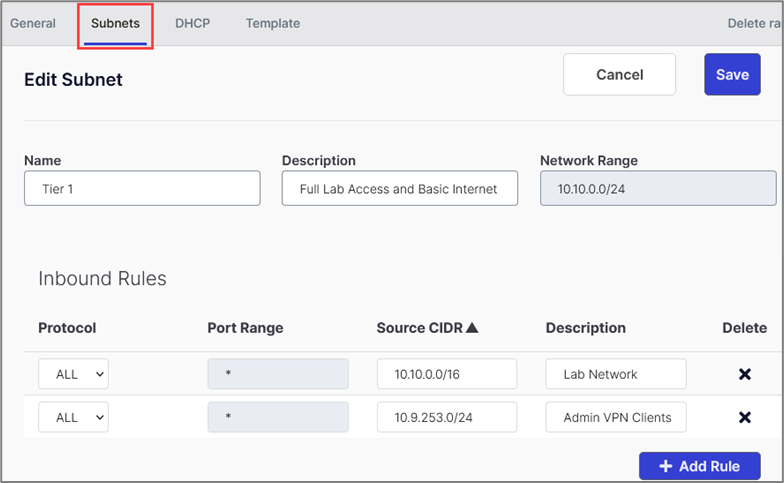
Similar to AWS Security Groups, you can configure basic inbound/outbound network rules via the Settings > Subnets tab.
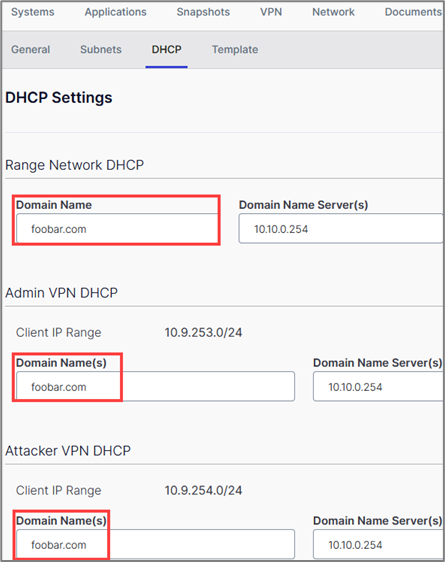
You can configure your own DNS name in DHCP settings.
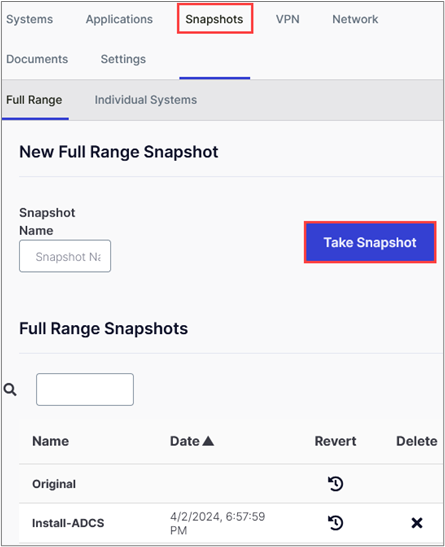
You can take snapshots of a single system in your lab environment or snapshot the entire lab, which can be helpful while you experiment if you want to revert to a previous state.
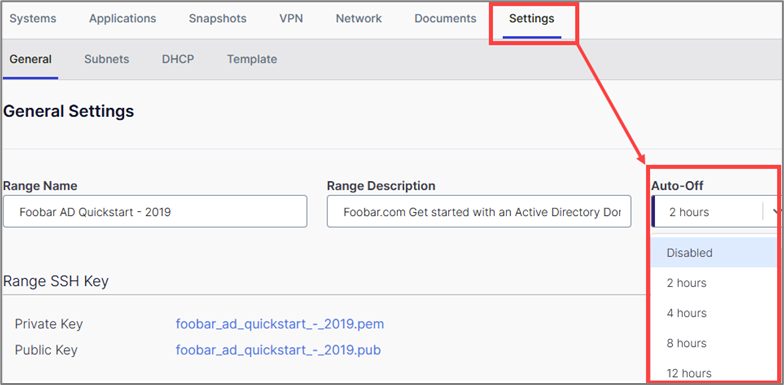
Something important to note is the Auto-Off feature. You can set this option in the General settings. If you are anything like me, you may start building a lab, begin hacking away, then something shiny pops up…

You get distracted, close out your window, or walk away and you totally forget about the running lab. To avoid unnecessary AWS bills, you can set the Auto-Off feature, which will suspend your lab when you are inactive. This will stop the running instances but will not destroy the lab infrastructure which means that charges may accrue despite turning off the lab.
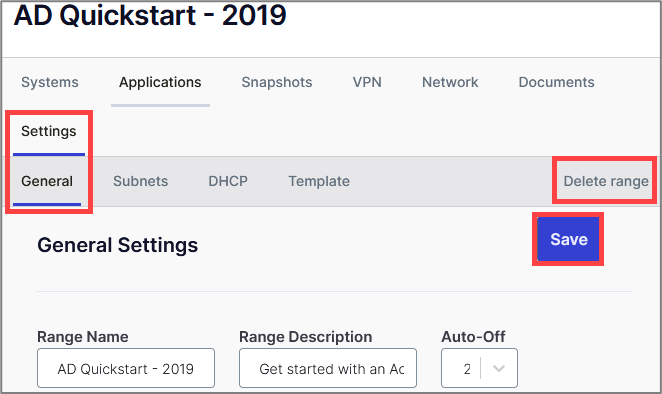
From the Settings > General tab, you can save the changes made to your Range and power it down to use later or delete the range if you no longer wish to use it.
Now you’ve set up your very own Active Directory environment that you can build upon, destroy, and redeploy as you wish!
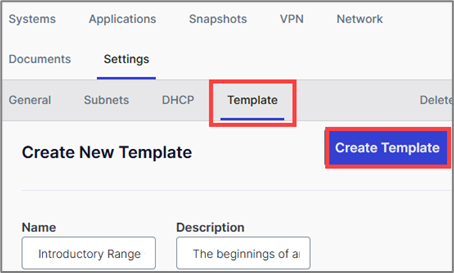
Templatize Your Range
So, now that you’ve set up your lab environment, let’s save the range as a template so you can easily relaunch and build upon it in the future.
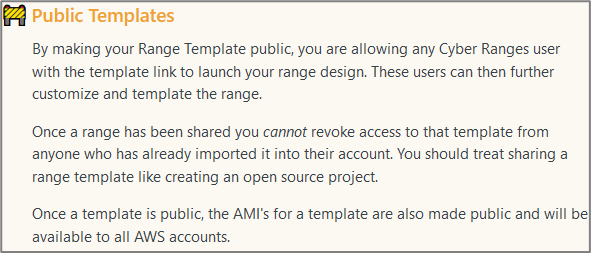
Once you’ve created your template, you can share it privately by specifying individual emails, or you can make the template public. To share your range, simply select the range and scroll to the Sharing section to create a shareable link.
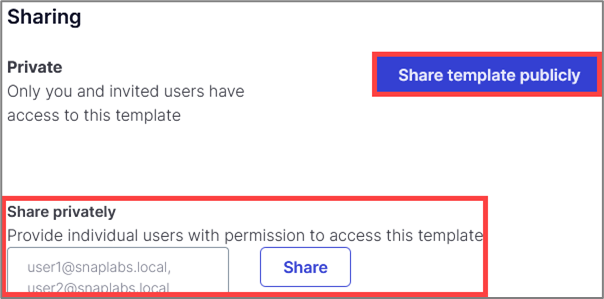
By creating a publicly shareable link, anyone who can view the link will have access to your Range Template to deploy using their own account. Once a range has been shared you cannot revoke access.
Please review the following message from Immersive Labs before creating a publicly shareable template.
For more information about Snap Labs, check out the documentation: https://docs.snaplabs.io/docs/getting-started
Summary
In this blog post, we accomplished the following:
- Created a Snap Labs Account
- Explored some of Snap Labs features
- Launched our very own Active Directory Cyber Range
- Created a cyber range template, which can be used to deploy an Active Directory lab environment that can be shared with others
Footnotes
- https://dashboard.snaplabs.io/ ↩︎
- https://www.snaplabs.io/insights/immersive-labs-acquires-snap-labs ↩︎
- https://www.zeropointsecurity.co.uk/ ↩︎
- https://docs.aws.amazon.com/SetUp/latest/UserGuide/setup-AWSsignup.html ↩︎
Ready to learn more?
Level up your skills with affordable classes from Antisyphon!
Available live/virtual and on-demand
