
Fixing EyeWitness Install Errors on Kali Linux
I recently had to install a new gold image as my Kali Linux testing virtual machine. Almost on every test I do, I clone the gold image and use the fresh install to start from. On this image I install as many of the scripts and tools as I can so when I clone it, I don’t have to do it again. One of these tools is EyeWitness. It was written by Chris Truncer and can be found at https://github.com/FortyNorthSecurity/EyeWitness.
EyeWitness is a great tool that visits web servers from either a list or a .nessus file output. EyeWitness takes a screenshot of the connection and compiles the screenshots in an easy to view report. In addition to the screenshots, the report is sorted by the type of connections and groups similar connections together.
This last time I went to install this on my image, I had some problems getting it to run and install. I was finally able to get it to work, but thought I would explain how I went about “fixing” it.
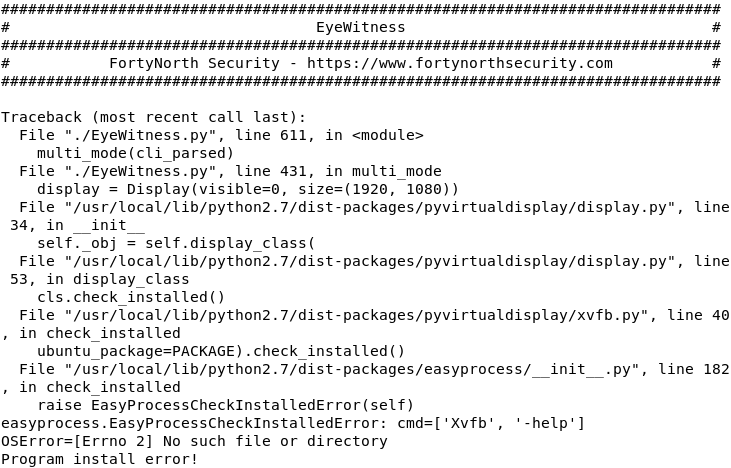
First, clone EyeWitness from GitHub and install. If you are like me, then you might get some errors when you run it. The first error I got was the following.
To get around this I ran the following command.
sudo apt install xvfb
Unfortunately, this gave me the following error.

Well, isn’t that a pain? What does “Package ‘xvfb’ has no installation candidate” even mean? After looking into this a little more, it means that the package can’t be downloaded from any of the sources identified on the /etc/apt/sources.list file.
Let’s add the location for this package to the file. Edit this file in your favorite text editor.
Add the following to the bottom of the file.
deb http://http.kali.org/kali kali-rolling main non-free contrib
After you save the sources, run the following.
apt update
Then the following.
apt install xvfb –fix-missing
After I did the above, I reran the EyeWitness command and it worked! Problem solved.
After further investigation, I found out that while installing the OS, I clicked “No” on the network mirror.
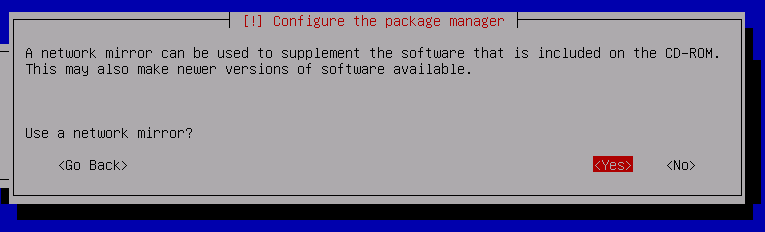
I went back and re-installed the OS, this time clicking “Yes” on using a network mirror. I went through installing and running EyeWitness and this time it worked without any problems.
Just to satisfy my curiosity, I compared the two sources.list files. This is the file that came without using the network mirror.
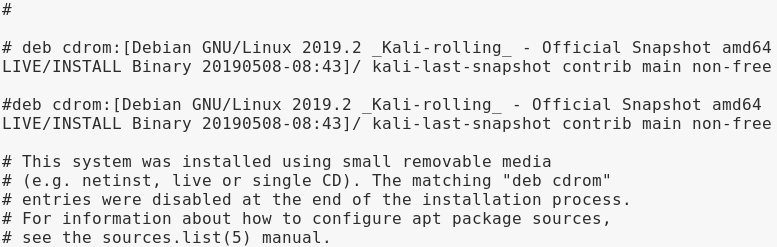
This is the file that came from using the network mirror. The difference is highlighted.
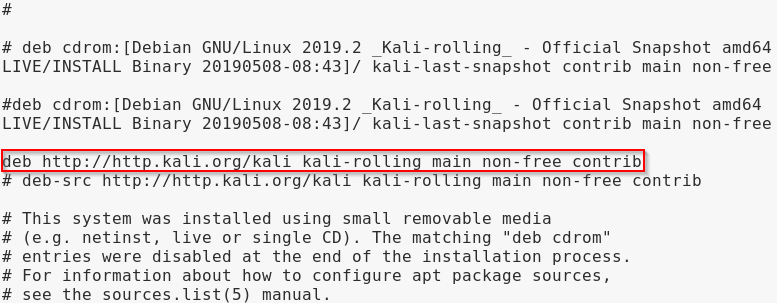
Since that highlighted line is the line that we added to fix our problems, it seems that all we really needed to do is to use a network mirror on the installation of Kali.
This fix probably does fix more things other than EyeWitness, I just ran into it when installing it last time, and I have had the same issue on a previous install. EyeWitness is a great tool for me in my job and helps screenshot web pages quickly and easily. It reduces a lot of time visiting pages to determine what is being hosted on the site. The method explained here helped me install it on a system that was originally misconfigured.
Ready to learn more?
Level up your skills with affordable classes from Antisyphon!
Available live/virtual and on-demand
