
Gowitness, a Tester’s Time Saver
Alyssa Snow //
During an external or internal network penetration test, it can be challenging to comb through each web server in scope to find the juicy stuff. During a timeboxed assessment, a tool like Gowitness (https://github.com/sensepost/gowitness/wiki) can help prioritize the web applications available on your target network.
Gowitness is an automated website screenshot tool, inspired by Eyewitness (https://github.com/FortyNorthSecurity/EyeWitness), written in Golang. Gowitness navigates to each web application and uses a headless browser to generate screenshots of the web application. It fingerprints these applications by capturing the HTML response and HTTP headers. Additionally, Gowitness attempts to identify technologies used by the application. Next, it generates a report that allows the tester to browse through the available web services easily.
Installation
Gowitness installation can be as simple as downloading one of the prebuilt binaries found here: https://github.com/sensepost/gowitness/releases.
You can install the tool with go as follows:
go install github.com/sensepost/gowitness@latest You can run the tool using a docker container:
docker pull leonjza/gowitness You can also clone the repository and compile the tool from the source code:
git clone https://github.com/sensepost/gowitness.git
cd gowitness
make linux
Make sure you have Chrome and Golang installed on your machine before attempting to use the tool.
Gowitness Scanning
There are many other automated screenshot tools, and I encourage you to investigate whichever interests you most. We also have another blog post about Eyewitness (https://www.blackhillsinfosec.com/eyewitness-and-why-it-rocks/). One cool feature Eyewitness has that I hope to see Gowitness implement at some point is default credential identification. Eyewitness will supply the user with default credentials (if it knows them) alongside the application HTTP header information. I use Gowitness because I am a fan of Golang, and I like the tool’s UI.
I typically use Gowitness to process Nessus and Nmap scan results. Gowitness accepts targets in several formats. You can provide the tool with a single target URL, a list of URLs, IPs, or CIDRs.
Process Nessus scan command:
gowitness nessus -f basic-scan.nessus GoWitness can process Nmap results in XML format. To output Nmap results in XML format you can run Nmap using the -o flag with argument X. An example of this is shown below.
nmap <TARGET> -oX nmap-results.xml 
Process Nmap scan command:
gowitness nmap -f nmap-results.xml Gowitness has various flag options that can be used to fine-tune your scan. For example, the --user-agent flag. The default user agent string is “Mozilla/5.0 (Macintosh; Intel Mac OS X 10_15_7) AppleWebKit/537.36 (KHTML, like Gecko) Chrome/102.0.0.0 Safari/537.36“. Let’s say you wanted to experiment with different results using a mobile user-agent string; you may set this flag value to something like --user-agent “Mozilla/5.0 (iPhone; CPU iPhone OS 10_3 like Mac OS X) AppleWebKit/603.1.23 (KHTML, like Gecko) Version/10.0 Mobile/14E5239e Safari/602.1”.
I have listed a couple of other useful flags below:
--timeout– timeout string. The default is 10 seconds.-t/--threads– threads used to run Gowitness. The default is 4 threads.
If you are on a reliable network but you have many invalid domains, you might consider reducing the timeout to 4 to reduce the scanning time.
I recommend setting the thread count to somewhere between 1 and 2 times the number of cores on your system. So, if your system has 4 cores, you could set the threads to 8. You can keep an eye on your CPU usage and tune up or down if you hit bottlenecks or still have unused cycles.
Gowitness Results
Gowitness stores a screenshot of each of the target URLs in a folder called screenshots. Additionally, Gowitness creates an SQLite database stored in the file gowitness.sqlite. To view the Gowitness results first, start up the web server, run the following command, then navigate to http://localhost:7171 in your browser.
gowitness server -A 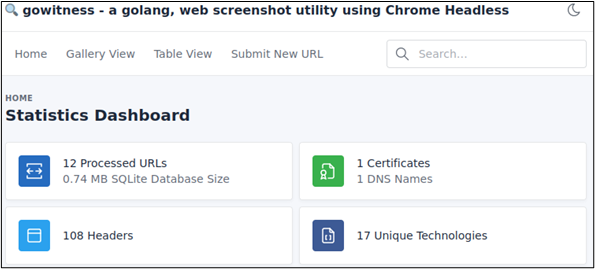
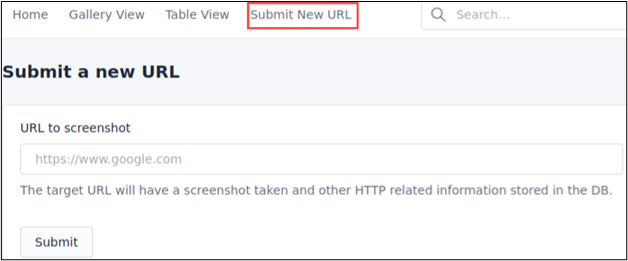
The landing page of our Gowitness server displays the statistics detailing the number of processed URLs, DNS names, and certificates, as well as unique technologies observed on the target web servers. If a new target pops up, you can easily submit a new URL via the UI by clicking “Submit New URL.”
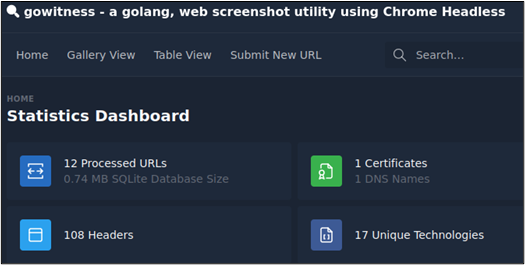
Gowitness also supports dark mode, which does not necessarily make a difference functionally, but it is a feature I love.
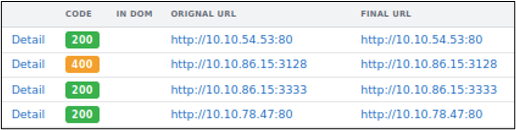
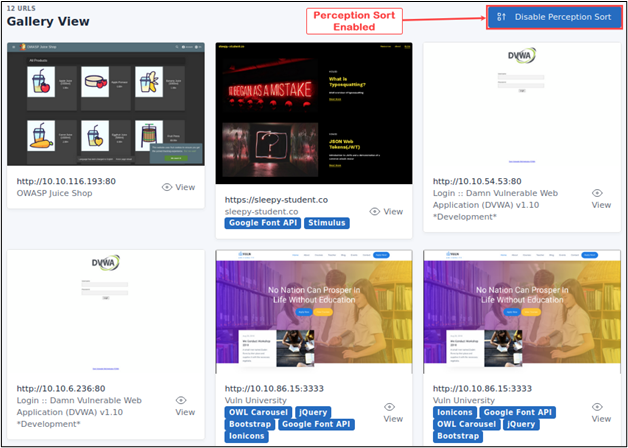
You can review the results in a table format by clicking “Table View” or view the various web applications in “Gallery View.”
While viewing the results in Gallery mode, you can enable perception sort, which will sort the results based on images that look alike. Perception sort allows you to group targets running the same web services and makes testing for issues like default credentials a breeze.
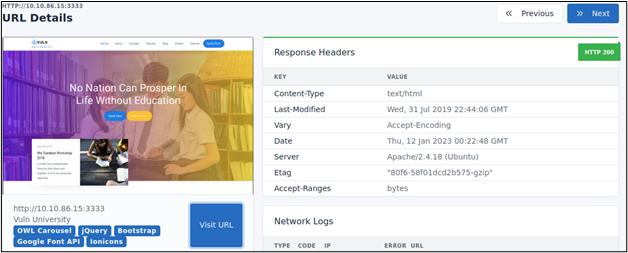
Each entry displays the screenshot captured, technologies, the HTTP Response Headers, and other details such as the console log, network log, DOM, and TLS information.
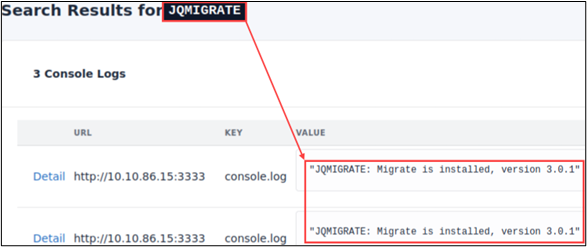
Gowitness results are easily searchable. You can retrieve results for URLs, HTTP Headers, Console logs, and network logs by typing a query in the search bar. For example, the following figure shows the search results for all web servers running JQMIGRATE.
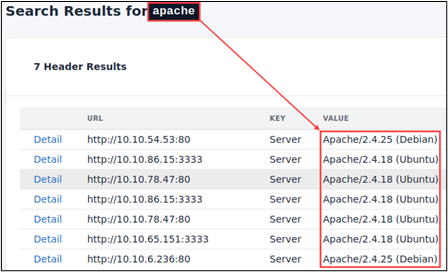
We can identify Apache web servers by searching for Apache in the HTTP headers.
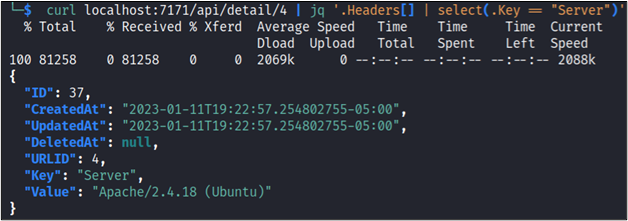
We could also query Gowitness API to gather similar details.
Once you have investigated the processed Gowitness results, you can generate a consolidated report. Gowitness will create a zip archive of the necessary files and an HTML document of the results.
gowitness report -f example.zip 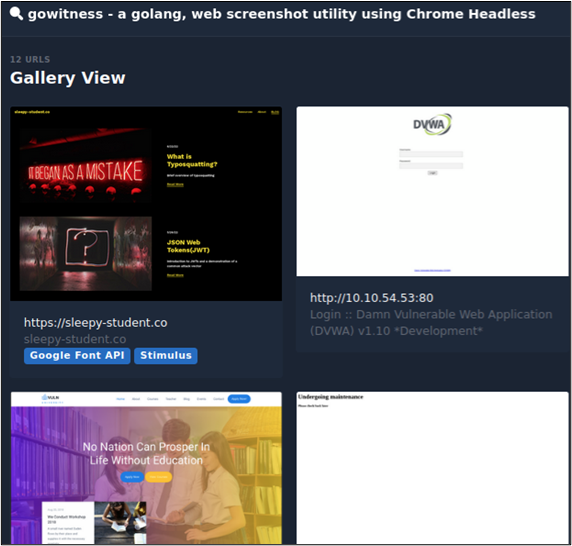
Gowitness is an excellent automated screenshot tool that can be extremely useful to help a tester get a quick overview of an extensive list of URLs or scan data post-processing.
Ready to learn more?
Level up your skills with affordable classes from Antisyphon!
Available live/virtual and on-demand
