
Start to Finish: Configuring an Android Phone for Pentesting
Jeff Barbi // *Guest Post
Background
Unless you’re pentesting mobile apps consistently, it’s easy for your methodologies to fall out of date. Each new version of Android brings with it additional security features to bypass, making the process you used three years ago to set up your testing device obsolete.
If you’re like me, instead of documenting how you set up your last phone, you re-discover a new process each time you configure one. This is redundant and silly. Worse, the information is scattered across the internet in code repos, blogs, and forum threads. Worse still, much of this info is outdated and no longer works.
What follows is an attempt to save others time in the future by documenting a known-good process for Android 12 at the time of writing (October 2022).
I took a factory non-rooted Pixel 4A running a recent stable version of Android 12 “snow cone” and documented the steps required to configure it for pentesting, start to finish. This includes defeating certificate pinning, which is becoming more and more common. At the start of each section, I include the tools required and where to get them.
The order of operations we’ll take is as follows:
- Enable developer mode, boot loader unlocking, and USB debugging
- Unlock the boot loader
- Use Magisk to modify a factory boot image
- Flash this new image to the bootloader, rooting the phone
- Convert the Burp certificate to a format Android expects
- Install the Burp cert as a trusted CA, using a custom Magisk Module Template installer
- Install & run Frida server on the phone
- Connect Frida server agent with Runtime Mobile Security frontend
- Run our target app in a hooked process via RMS
- Use a custom RMS plugin to bypass cert pinning
I’m starting with a factory-original, out-of-the-box phone:
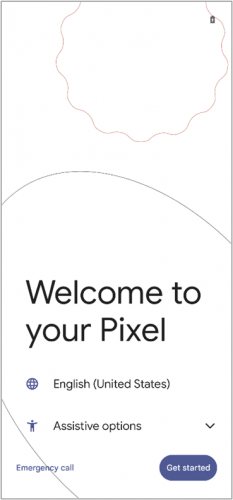
I followed the prompts to join Wi-Fi, log into a Google account, accept the ToS, etc.
NOTE: My host machine for this walkthrough was running a Debian-based Linux distro. The steps should work on other distros and/or OSX, but some of the syntax may be different.
Rooting the phone
Tools required
Android Debug Bridge (adb)
- # apt install adb
- https://developer.android.com/studio/releases/platform-tools#downloads
fastboot
- # apt install fastboot
- https://developer.android.com/studio/releases/platform-tools.html#downloads
Note: Package repos like apt will have older versions of these tools. They may work, but I used the ones from the developer site.
Unlocking the boot loader
If we want to install the Burp cert, Frida, defeat certificate pinning etc. then we need to root our phone. This involves writing a modified boot image to the phone’s boot loader. To do that, we need to unlock it.
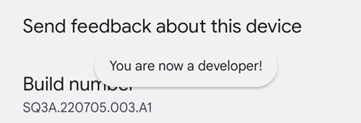
Enable developer mode
Go to Settings -> About phone. Tap on “Build number” 7 times. After entering your PIN, you will see this “You are now a developer!” message:
Enable USB debugging & OEM unlocking
Go to Settings -> System -> Advanced, and you will see a new item, “Developer options.”
In the dev options menu, toggle on “OEM unlocking” and you will see a warning:
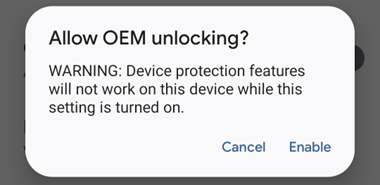
Confirm OK and your boot loader is unlocked.
Toggle on USB debugging, you will see another warning:
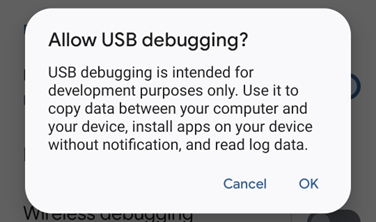
Choose OK.
Test adb
Now that USB debugging is enabled, we can use adb and fastboot.
Plug the phone into the computer and confirm adb can connect to the phone:
$ adb devices -l
List of devices attached
13011JEC204262         device usb:5-1.4 product:sunfish model:Pixel_4a device:sunfish transport_id:2

Then use adb to reboot into fastboot mode:
$ adb reboot bootloaderThe phone will reboot, and we can now run fastboot commands on the phone.
Check that fastboot can connect to the phone:
$ fastboot devices
13011JEC204262  fastboot

Now we can unlock the bootloader:
$ fastboot flashing unlock
OKAY [  0.104s]
Finished. Total time: 0.104s

The warning screen will change and “Do not lock the bootloader” is selected by default. Hit the volume up key to select “Unlock the bootloader,” then hit the lock button.
The phone will reboot back into fastboot mode. Hit the lock button, and the phone will reboot again. The boot loader is now unlocked.
When the phone boots, follow the prompts again to join Wi-Fi, log into a Google account, etc.
Enabling USB debugging (again)
Unlocking the boot loader resets the phone, disabling developer mode and USB debugging along with it. Re-enable these the same way as before:
- – Settings -> About phone. Tap on “Build number” 7 times, then enter the PIN.
- – Settings -> System -> Advanced and enter the “Developer options” menu. Toggle on “USB debugging.”
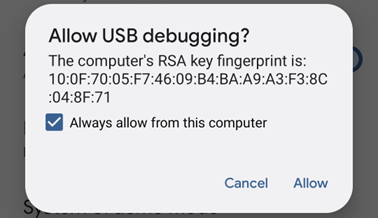
Reboot the phone. Hit allow on the warning prompt:
Installing the Magisk app
Download the Magisk app as an APK file here: https://github.com/topjohnwu/Magisk/releases/latest
Then use adb to install the app:
$ adb devices -l
List of devices attached
13011JEC204262         device usb:5-1.4 product:sunfish model:Pixel_4a device:sunfish transport_id:4

$ adb install Magisk-v25.2.apk
Performing Streamed Install
Success

Modifying a boot image with Magisk
Magisk can modify a factory boot image for us, which we’ll write to the boot loader and root the phone.
IMPORTANT: modifying boot images is done differently on different phones. What follows is for a Pixel 4A and other Google phones using the same partition scheme. Specific steps for phones from other vendors are described in detail here: https://www.xda-developers.com/how-to-install-magisk/
Boot images for Nexus and Pixel devices are available here: https://developers.google.com/android/images
Since I’m using a Pixel 4A and Android 12, I downloaded the android 12.1.0 “sunfish” image:
https://developers.google.com/android/images#sunfish
Here is a direct link to the image: https://dl.google.com/dl/android/aosp/sunfish-sq3a.220705.003.a1-factory-c1963f71.zip
IMPORTANT: for the rest of this step, it’s critical that the image you downloaded matches the version of Android on the phone.
Patch the image
Extract the zip file, and then the boot image:
$ unzip -p sunfish*.zip */*.zip >image.zip
$ unzip -p image.zip boot.img >boot.img
$ file boot.img
boot.img: Android bootimg, kernel (0x8000), ramdisk (0x1000000), page size: 4096, cmdline (console=ttyMSM0,115200n8 androidboot.console=ttyMSM0 printk.devkmsg=on msm_rtb.filter=0x237 ehci-hcd.park=3 service_locator.ena)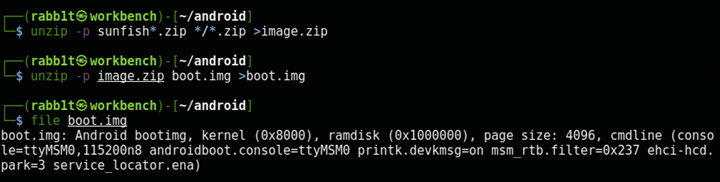
Use adb to push this file to the phone. I chose the Download directory because it’s easy to find in Magisk:
$ adb push boot.img /storage/self/primary/Download
boot.img: 1 file pushed, 0 skipped. 24.2 MB/s (67108864 bytes in 2.644s)
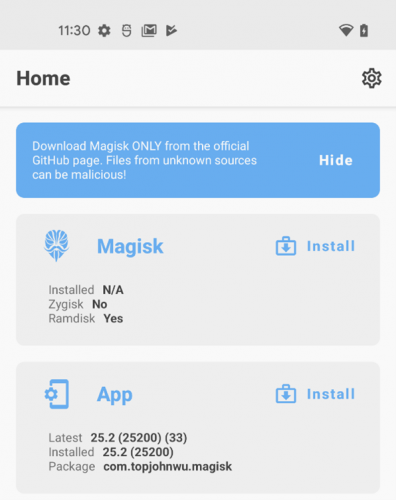
Now open the Magisk app and choose Install:
Then “Select and patch a file:”
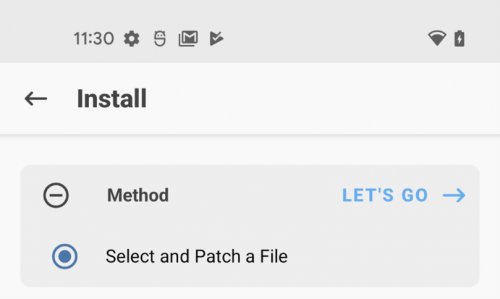
Then “Let’s Go.” You will see install log output and the file will be written to the same directory as the original file:
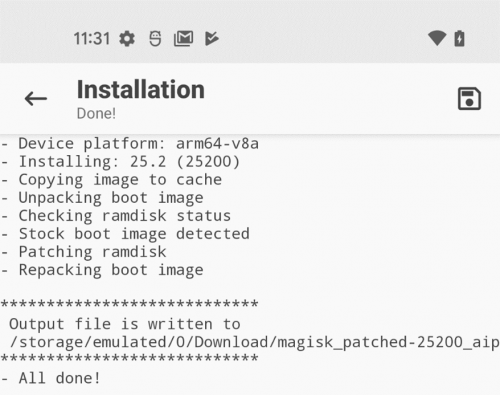
Use adb to pull the new file off the phone (you can use tab completion, the filename will start with “magisk_patched”):
$ adb pull /storage/self/primary/Download/magisk_patched-25200_VEmzX.img
/storage/self/primary/Download/magisk_patched-2...0 skipped. 36.6 MB/s (67108864 bytes in 1.748s)

Now we have a rooted boot.img file, ready to write to the bootloader.
Write the patched image
All that’s left is to write our patched image to the boot loader.
Write the image with fastboot
Reboot the phone into fastboot mode:
$ adb reboot bootloader
$ fastboot flash boot magisk_patched-25200_VEmzX.img
Sending 'boot_b' (65536 KB)                        OKAY [  1.930s]
Writing 'boot_b'                                   OKAY [  0.306s]
Finished. Total time: 2.459s

Verify root
When the phone reboots, it should now be rooted. We can verify this with adb:
$ adb shell
sunfish:/ su root
A warning prompt should appear on the phone:
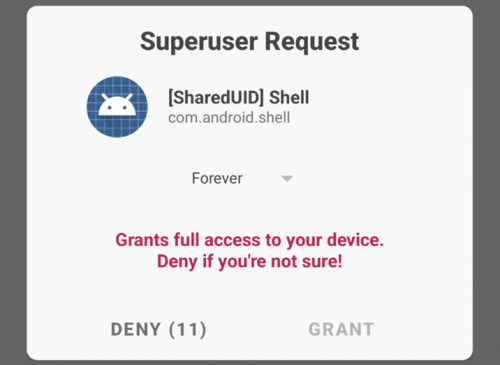
Accept this prompt and the process should allow root:
sunfish:/ # id
uid=0(root) gid=0(root) groups=0(root) context=u:r:magisk:s0
Installing the Burp cert
Intercepting requests with Burp breaks the TLS certificate chain. Without a root of trust, TLS will not work and we cannot dynamically test the app with Burp.
Export & convert the cert
Note: steps below partially taken from here: https://blog.ropnop.com/configuring-burp-suite-with-android-nougat/
First, launch Burp. Then export the certificate:
$ curl http://burp/cert -x localhost:8080 > /tmp/cacert.derThen convert it from DER to PEM format:
$ openssl x509 -inform DER -in /tmp/cacert.der -out /tmp/cacert.pemAndroid certs are named using the hash value of the file. Rename cacert.pem to this format:
$ HASH=$(openssl x509 -inform PEM -subject_hash_old -in /tmp/cacert.pem | head -1)
$ mv /tmp/cacert.pem /tmp/$HASH.0
Now we are ready to copy the cert to the phone.
Create a module with MMT
On earlier versions of Android, we could simply write the cert to the phone at this point and be finished. More recent versions of Android use a different partitioning scheme, making it more difficult to mount the /system partition as writable on a rooted phone. Commands like mount -o remount,rw /system no longer work, even as the root user.
For this reason, we will use Magisk Module Template Extended (MMT-Ex) to write the Burp cert to the phone. MMT automates the installation of Magisk modules, and we can use it to help install our cert.
Note: The below steps are taken loosely from here: https://github.com/Zackptg5/MMT-Extended/wiki
Clone the repo:
$ git clone https://github.com/Zackptg5/MMT-ExtendedNow, we will create the directory structure that MMT will recreate on the phone when our module is run:
$ cd MMT-Extended
$ mkdir -p ./system/etc/security
$ rm -rf ./zygisk
$ rm ./system/placeholder
$ cd ./system/etc/security
Then copy the existing certs from the phone into this directory, so they are not removed when the module is run:
$ adb pull /system/etc/security/cacerts/ .…and add the Burp cert:
$ cp /tmp/$HASH.0 ./cacerts/The file customize.sh is essentially a setup script for our module. For example, any filesystem permissions configured here will be matched on the device when the module installs. This way we can make sure our new certificate has the same file permissions as the rest of the certs on the phone.
Modify customize.sh, replacing the REPLACE variable on line 36 according to the example in the file:
$ cd ../../../
$ vim customize.sh
Make the following replacements/additions in the file (follow the examples):
REPLACE="
/system/etc/security/cacerts
"

set_perm_recursive $MODPATH/system/etc/security/cacerts 0 0 0755 0644
Zip up the module and push it to the phone:
$ zip -9 -r MMT.zip .
$ adb push MMT.zip /storage/self/primary/Download/
Install the module in Magisk
Before installing the module, we need to enable Zygisk. Open the Magisk app, and hit the settings icon on the top right. Toggle on “Zygisk: run parts of Magisk in the zygote daemon:”

Reboot the phone.
Open the Magisk app and navigate to Modules -> Install from storage:

Choose the zip file and Magisk will install it as a module:
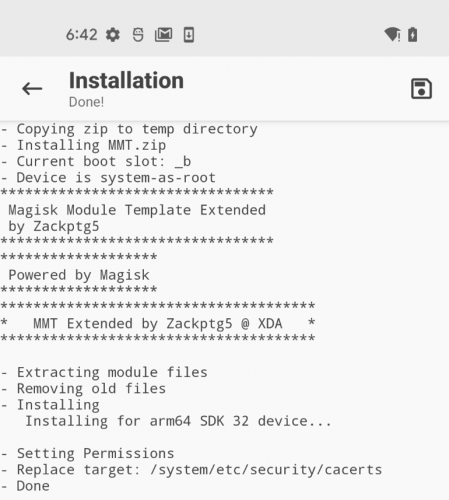
Reboot the phone again.
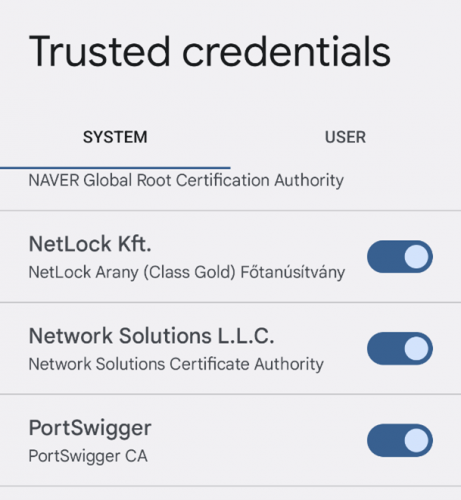
To verify the cert is now trusted, navigate to Settings -> Security -> Encryption & credentials. You should have a Portswigger entry:
Proxying traffic over USB
With the Burp cert installed and trusted, we can intercept traffic from running apps.
Make sure adb is running and connected to the phone. Then start a reverse proxy, which will route a given local port on the phone to a given local port on the host computer. Burp listens on 8080 by default, so we’ll use that:
$ adb devices -l
List of devices attached
13011JEC204262         device usb:5-1.4 product:sunfish model:Pixel_4a device:sunfish transport_id:1

$ adb reverse tcp:8080 tcp:8080
8080
Now set the phone’s network connection to use local port 8080:
Settings -> Network & internet -> Internet -> your SSID -> edit button in the top right
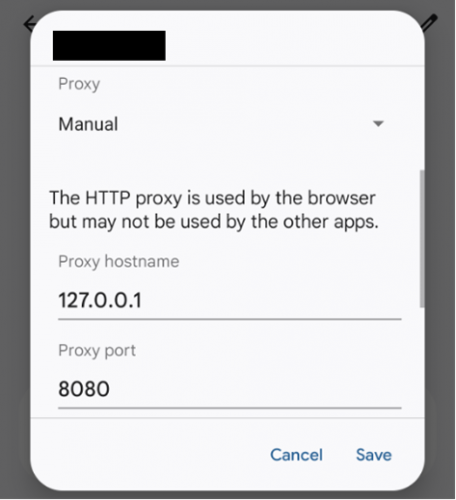
App traffic should now route through the Burp listener.
Bypassing cert pinning
Cert pinning is a way to ensure that not only is a host’s certificate valid, but it is the expected one for that host. No other certificate will work, even if it is a valid, signed, trusted cert.
This is becoming more and more common, and presents an extra hurdle for us to get around if we want to proxy and analyze app traffic.
Tools required
Frida tools
- $ pip install frida-tools
- https://frida.re/docs/installation/
nodeJS & npm
- # apt install nodejs
- # apt install npm
- https://nodejs.org/en/download/
- https://docs.npmjs.com/downloading-and-installing-node-js-and-npm
Runtime Mobile Security (RMS)
- # npm install -g rms-runtime-mobile-security
- https://github.com/m0bilesecurity/RMS-Runtime-Mobile-Security
Using RMS
RMS is a web interface which uses Frida to provide debugging features & manipulation tools at runtime: https://github.com/m0bilesecurity/RMS-Runtime-Mobile-Security
Frida uses Google’s V8 engine to run JavaScript in a hooked process. This enables us to interact with functions and modify their behavior; for example, changing the return value of TLS checks. We can use this to defeat roadblocks such as a broken certificate chain or to bypass cert pinning.
Install Frida server
At this point, I experienced the issue discussed here: https://github.com/frida/frida/issues/2176#issuecomment-1262135111
So I uninstalled com.google.android.art as shown in the comment:
sunfish:/ pm path com.google.android.art
package:/data/apex/active/[email protected]

sunfish:/ pm uninstall com.google.android.art
Success
I then rebooted the phone and I was able to install Frida server. This will probably be patched in future versions of Frida (I am using 15.2.2 at the time of writing).
It is important that both the Frida client and server versions match.
Check which version of Frida client was installed with Frida-tools. Download this version of Frida server from the Frida git repo. Then unxz the file, and push it to the phone:
$ frida-ps --version
15.2.2
$wget -q https://github.com/frida/frida/releases/download/15.2.2/frida-server-15.2.2-android-arm64.xz
$ unxz frida-server-15.2.2-android-arm64.xz
$ adb push frida-server-15.2.2-android-arm64 /data/local/tmp
frida-server-15.2.2-android-arm64: 1 file pushed, 0 skipped. 71.0 MB/s (47188552 bytes in 0.634s) 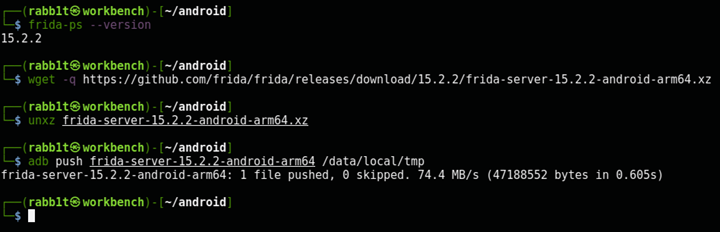
NOTE: Each Frida release includes many related tools with builds for various architectures. Make sure to get the Frida server for the architecture of the device you are using.
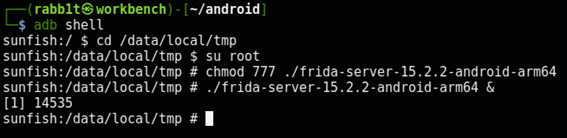
Now connect to the phone and start Frida server:
$ adb shell
sunfish:/ $ cd /data/local/tmp
sunfish:/data/local/tmp $ su root
sunfish:/data/local/tmp # chmod 777 ./frida-server-15.2.2-android-arm64
sunfish:/data/local/tmp # ./frida-server-15.2.2-android-arm64 &
[1] 14535
Now run frida-ps -U and you should see a list of packages:
$ frida-ps -U
  PID  Name
-----  -------------------------------------------------------
2598   .dataservices
2614   .qtidataservices
10851  Facebook
3687   Google
11718  Magisk
8655   Photos
12474  Settings
1482   adbd
1317   adsprpcd
 <snip>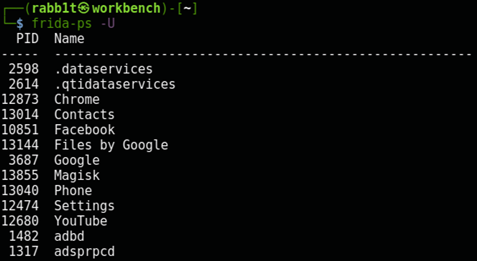
Frida works, so we’re ready to connect to the agent it with RMS.
Start RMS
The rms command will start the web interface locally on port 5000:
$ rms
_________________________________________________________
RMS - Runtime Mobile Security
Version: 1.5.11
by @mobilesecurity_
Twitter Profile: https://twitter.com/mobilesecurity_
_________________________________________________________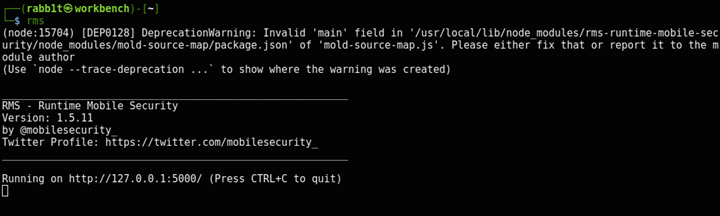
Navigate to http://localhost:5000 in a web browser.
RMS can be used for iOS phones as well, so choose the Android option under ‘Mobile OS’.
The Facebook Android app has cert pinning, so we will use it as an example. Set com.facebook.katana under ‘Package name.’
RMS can spawn an app with Frida already hooked, or it can attach to a running process. I have never had much luck with the Attach function, so choose Spawn.
We can give Frida our own JavaScript to run, but it comes with a set of default scripts to perform common bypasses. Multiple cert pinning bypasses are included in this set.
I’ve had good results with ssl_pinning_multi_bypass.js, so choose this under ‘Load Default Frida Scripts’:
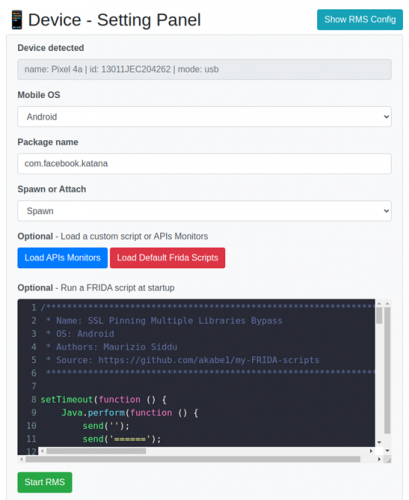
Choose ‘Start RMS’ and the app should open on the phone, and traffic should show in the Burp proxy.
Closing thoughts
Hopefully collecting all this information in one place saves someone time in the future. Inevitably these steps will become obsolete as Google continues to change the Android OS. As of October 2022, this process worked for me. Hopefully it works for you.
Thanks to Lance Pendergrass for some of the techniques, and Carrie Roberts for the inspiration & guidance.
—
*Jeff has been in various infosec roles for over a decade, including 7 years as a penetration tester and a recent transition to cloud security engineer. Thank you for sharing your knowledge with us, Jeff!
Ready to learn more?
Level up your skills with affordable classes from Antisyphon!
Available live/virtual and on-demand
