
Home Network Design – Part 1
Ethan Robish //
In this series of posts, I’ll discuss how I segmented my home network using VLANs and how I moved away from using a risky consumer-grade router at the edge of my network. My goal for this series is to take you from using a consumer-grade router running a flat network to a segmented network as cheaply as possible. I’ll also touch on easier, more advanced, and more expensive options so you know what’s available.
I began with a network like most people: completely flat behind a single consumer-grade wireless router that serves all my household’s devices. I have a few wired systems, but the majority of my connectivity is wireless due to convenience and lack of cabling in my house. My initial motivation was to separate out a guest network for friends and family who come to visit. But then I thought, “Why not take it a step or two further and segment some of my home devices as well?”
If you’re Cisco certified or architect networks for a living, this post isn’t for you (though you could probably teach me quite a bit). Likewise, if you already have something other than an off-the-shelf router from a big box store, then I would point you to Troy Hunt’s article (https://www.troyhunt.com/ubiquiti-all-the-things-how-i-finally-fixed-my-dodgy-wifi/) on how he configured his home network. Although, you can certainly skim through this post to see some of the other options available to you that you might not be aware of.
In this post, I will start by going over general terminology and some of the different options available to you.
Network Topologies
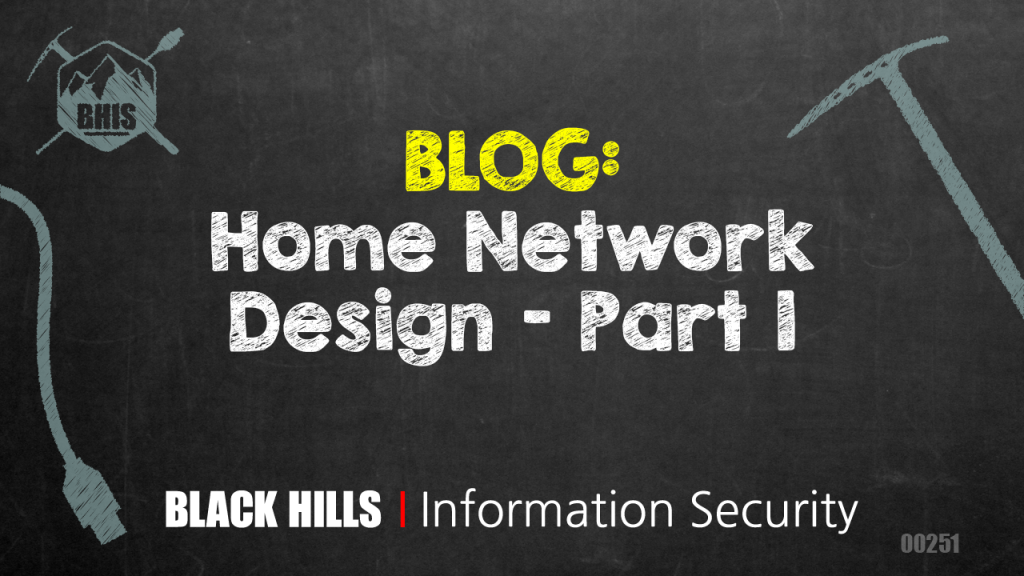
In the diagrams below I’ll ignore any modem or other devices you have to interface with your ISP. The device you’ll see connected to the internet in my diagrams has a publicly routable IP address. This first diagram shows the starting point of my network (and probably yours too).
The easiest solution that would meet my initial goal would be to simply set up a guest wireless network. Here are a couple of options to satisfy that goal.
1. Single Wireless Router with a Guest SSID – If your wireless router supports this (mine didn’t), all this takes is a couple of minutes in your router’s configuration to set up the new guest network. Your consumer-grade router will hopefully take care of all the networking configuration behind the scenes to segregate the two networks. You can even turn on Wireless Isolation mode which will prevent your guests’ devices from being able to communicate with each other on their network; they will only be allowed to communicate with the internet. This is definitely the “easy” button and won’t let us understand the inner workings very well.

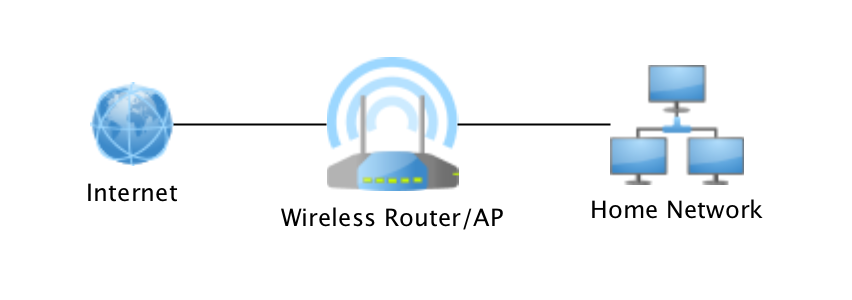
2. Wireless Routers in Parallel – This setup gets a little more complicated, but it is basically two copies of the flat network setup. It involves a separate wireless router for both the home network and guest network. Each router has the default NAT, DHCP, and firewall configuration that would come with your typical consumer wireless router. The two networks are then allowed out to the internet through a third router device. It doesn’t matter if this is wireless or not since you wouldn’t be using the wireless capability in this scenario. The networks are segmented because, from the point of view of each of the wireless routers, anything on the other side (your third router) is treated just like internet traffic. There are a whole bunch of ways you can tweak this setup and it can start to get more complicated. I won’t go into any more details, but my point is you could take some basic gear you find at rummage sales or have laying around, plug it in, and with very little configuration it will just work.
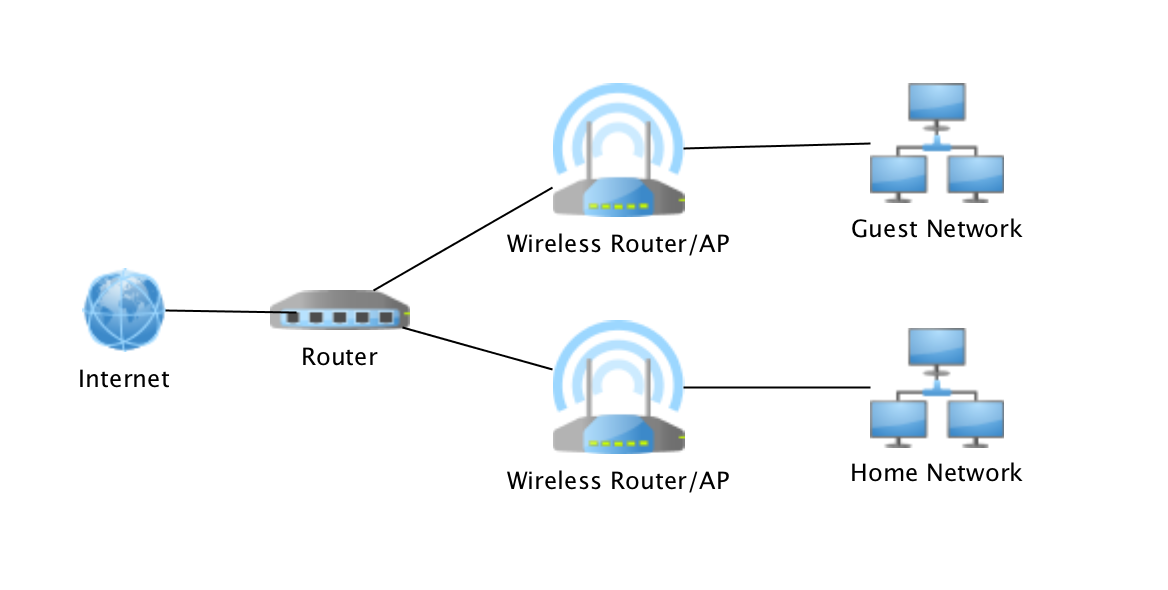
3. Wireless Routers in Series – What if you only have two wireless routers? The diagram below shows a valid configuration as well, but I prefer #2 above for a couple of reasons: 1) The networks will not be properly segmented in this scenario, and 2) the gateway for the home network is in the guest network. This means that in the following diagram, devices in the home network will be able to initiate communication with devices in the guest network (but not vice versa). You may be able to disable this if your router lets you add static routes, but by default, the routes will be there. It also means that if a particularly nasty device got on your guest network it would have the possibility to Man-in-the-Middle your home network’s gateway through an attack like ARP spoofing and inspect all your unencrypted traffic going to/from the internet.
Affordable Options
The consensus from what I’ve read is that you’ll have much better results (i.e. network performance) by using purpose-built devices over all-in-one devices. What I mean by that is instead of the all-in-one consumer-grade wireless routers that we currently have, you’d have one device for a firewall, one for a router, potentially multiple switches, and multiple wireless access points (more on that below). Each new device will also increase the cost and complexity, so we need to make sure we weigh the benefits against the costs before diving in.
Here are several options that I considered for my edge router.
- Consumer Device Running DD-WRT or Open-WRT – If you have a device that supports flashing open-source firmware such as DD-WRT or Open-WRT you could turn your consumer-grade device into something exponentially more configurable. Personally, I haven’t had the greatest luck with either of these though some people swear by them.
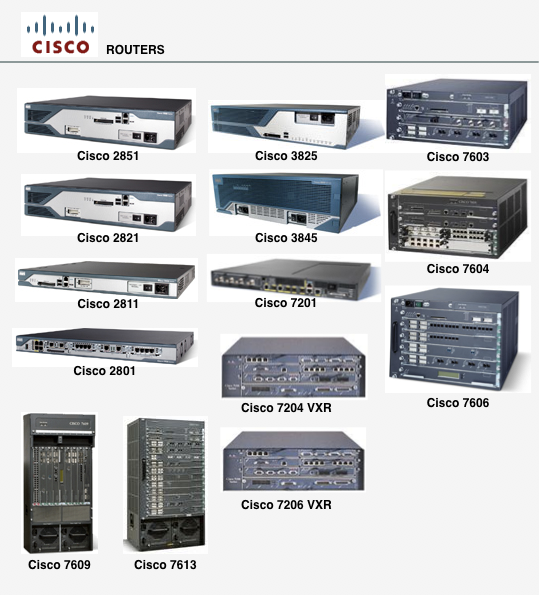
- True Enterprise Level Devices such as Cisco – These are typically rack mount (read: big) and not affordable new for a home network. This is definitely a valid route to go if you have space and want to learn a marketable skill. I hear that used Cisco devices can be quite affordable on eBay.
Enterprise Cisco gear will look like this:
Not this:

- Enterprise Quality Devices at Consumer Prices – You can buy something that has most of the configurability of the Cisco devices above but for the price of a consumer-grade router. The two big contenders I’ve run across are Mikrotik and Ubiquiti. My impressions are that Mikrotik devices are cheaper and don’t hold your hand as much as Ubiquiti. Ubiquiti devices are much sleeker looking, both in their physical appearance and in the graphical interface
- Side note:
- If Ubiquiti sounds more interesting to you, I definitely recommend reading Troy Hunt’s article. I drool over the type of setup he ended up with, but I didn’t want to spend that kind of money and I didn’t want to try and run ethernet cables through my walls.
- Build Your Own Router/Firewall – You can take almost any old computer you have lying around, slap one of these free or open-source OS’s on it, and have something that performs better as a router/firewall than most off the shelf products you can buy. With this option, you’ll need to purchase a managed switch and a wireless card or access point separately. I don’t have any personal experience yet here, so the suggestions below are purely based on my research.
- https://pfsense.org/ – The de facto standard OS for a DIY firewall. I would personally try OPNsense first before pfSense to see if it does what I need, but that might just be my penchant to cheer for the underdog. Again, I don’t have the first-hand experience with either software so feel free to choose the one that suits you best.
- https://opnsense.org/ – OPNsense is fully open source, has a nice list of features, and a spiffy looking web UI. Originally this was a fork of pfSense, but now they claim they have rewritten nearly all the original code. I like that they seem to patch security issues and implement new features earlier than pfSense. Like Pfsense, it is also built on top of FreeBSD.
- http://blog.packetheader.net/2016/03/how-to-create-soho-router-using-ubuntu.html – Joff Thyer has a writeup on how to get started by utilizing open source services on a Linux system to configure your own router. This will definitely give you the most control out of any option, but it’s also likely going to take the most time unless you are a packet wizard-like Joff. If you fall into that category, why are you still reading this? 🙂
- https://vyos.io/ – This is a Linux distribution that supplies a management interface for many great open-source tools. Their website states “Unlike OpenWRT or pfSense, VyOS is more similar to traditional hardware routers.” This is going to be similar to the DIY Linux solution suggested by Joff, but probably easier to use due to the central interface. However, everything is still done from the command line as VyOS lacks a GUI.
- https://www.sophos.com/en-us/products/free-tools/sophos-utm-home-edition.aspx – On the other end of the DIY spectrum is Sophos UTM (Unified Threat Management) Home Edition. While not open-source, it is free. It has a slick web UI, but definitely looks more geared towards firewall and filtering services than low level routing.
Honorable Mention:
The latest craze these days has been “whole home Wi-Fi” and “mesh networking” systems. These have always existed for the dedicated DIYer such as yourself, but lately, companies such as Google and Eero have created consumer kits that make the installation and setup dead simple. This is certainly a great option for excellent Wi-Fi coverage without extra cabling, but as these devices are meant to be used by a non-technical audience, they don’t meet my requirement that will allow segmenting wireless networks on different VLANs.
Terminology
Up until this point, I’ve been pretty liberal using terms like “access point” and “router”. To discuss things further I’ll have to be a little more careful with my terminology. I’ve explained several terms below in my own words and purposely simplified some of the concepts because they aren’t needed in what follows. I’m sure my understanding is not perfect, but it has worked well enough so far. If I’m wrong on some major point please reach out and let me know.

Wireless Access Point (AP) – This is simply the wireless base station that will send and receive signals with your wireless client device (e.g. phone, tablet, laptop). The AP will then send the packets on to the wireless controller, switch, or router it’s connected to. Wireless APs will have a transmit power measured in milliWatts and antennas measured in dBi that determine their range. Multiple APs can work together to host the same wireless signal and cover a larger area, but these APs must be wired together using ethernet cables.

Hubs – OSI layer 1 device (think electrical wires). Any packet received on any physical interface is sent to every other physical interface. This means that if you have a system plugged into one interface, you’ll be receiving traffic from all other systems on the same hub regardless if the traffic is directed at you. I won’t be using a hub, but I mention them to highlight the difference between a hub and a switch.

Switches – OSI layer 2 device (think MAC addresses) that forwards packets between its different physical interfaces (aka ports). Unlike a hub, a switch keeps an internal mapping between its ports and the MAC address associated. It uses this knowledge to only forward packets to the correct ports rather than all ports. Normally, this mapping is automatically populated by the switch listening to the first packets sent from each port.

Routers – OSI layer 3 device (think IP addresses) that keeps an internal routing table. The routing table is where the router stores which subnets are available (e.g. 192.18.1.1/24) and which physical interface is the best to reach that subnet. The routing table can be populated manually using static routes, or automatically by communicating with other routers using routing protocols such as OSPF, EIGRP, RIP, BGP, and EGP. When a packet comes into the router, it consults the routing table to determine where to send the packet out again.

Firewalls – OSI layer 3+ device that inspects every incoming or outgoing packet and applies a set of rules that determine what action to take. That’s a pretty vague statement, but it’s because firewalls can be configured to do so many different things and operate on many different OSI layers. Basically, a firewall is configured with a series of rules that allow or deny traffic with certain characteristics. The firewall uses the information contained within each packet along with information it has stored about recently seen packets in order to apply these rules.
Here are some examples:
- Allow inbound traffic from certain IP addresses to pass (Layer 3).
- Block traffic destined to specific TCP ports (Layer 4).
- Allow inbound packets that correspond to an already established session (Layer 3).
- Inspect HTTP traffic and block access to certain URLs (Layer 7).
Additional Information:
Reddit user monoman67 gives a succinct comparison between a router and a firewall. “A router is a layer 3 device used to allow LANs to communicate with each other. A firewall is a layer 3-7 device used to limit traffic between LANs.”
This article is a slightly longer, but still accessible description of the differences between switches, routers, and firewalls.
Here’s another article that does a little wider survey with an infosec flair if you’re interested. Oh, and it’s full of memes.
Those are the theoretical definitions (or at least my take on them). However, things get confusing because the devices sold in stores often take on more than one of the roles described above. For instance,
- Layer 3 Switches – These are switches (remember, think MAC addresses) with layer 3 capabilities (think IP addresses). Essentially, these are just routers. They may not have all the capabilities normally associated with a router, but for our purposes, they function the same.
- Routers with Hardware Switching – I mention this because the Mikrotik device I’ll be using has this feature. Basically, it boils down to speed. In order to make routing decisions packets have to be sent to the CPU, which takes time. But by configuring a group of ports to function as a switch, packets can be sent at “wire speed” (fast). You lose the benefits of routing by IP address, but you have the ability to trade that for speed when your specific situation allows.
- Enterprise Firewall Appliances– These are most likely going to have routing capabilities. It’s possible to have a pure firewall that sits inline without routing, but in order to be competitive in the market, basic routing functionality is included. This allows customers to buy one hardware device instead of two.
- Consumer-Grade Wireless Routers – These are the devices you find in most people’s homes. Each acts as a firewall, router, and switch. The firewall functionality is there to protect you against attacks from the internet and is what keeps your devices from being compromised the moment you go online. I’m not sure if these devices have true layer 2 switch functionality, but for our purposes, it doesn’t matter.
In the next post, I’ll work through a way to determine how to group and segment your devices.
Read Part 2 here: https://www.blackhillsinfosec.com/home-network-design-part-2/
Credits:
Icons and diagrams are from yEd and Cisco
https://www.yworks.com/products/yed
https://www.cisco.com/c/en/us/about/brand-center/network-topology-icons.html
Ready to learn more?
Level up your skills with affordable classes from Antisyphon!
Available live/virtual and on-demand
